Simply Citrus

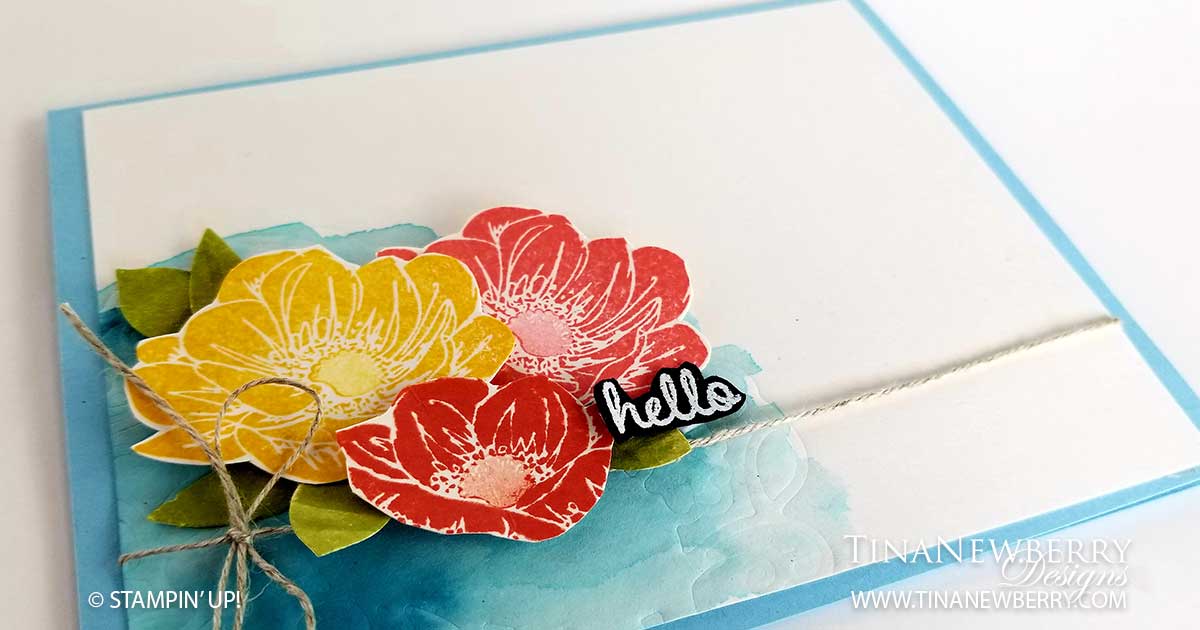
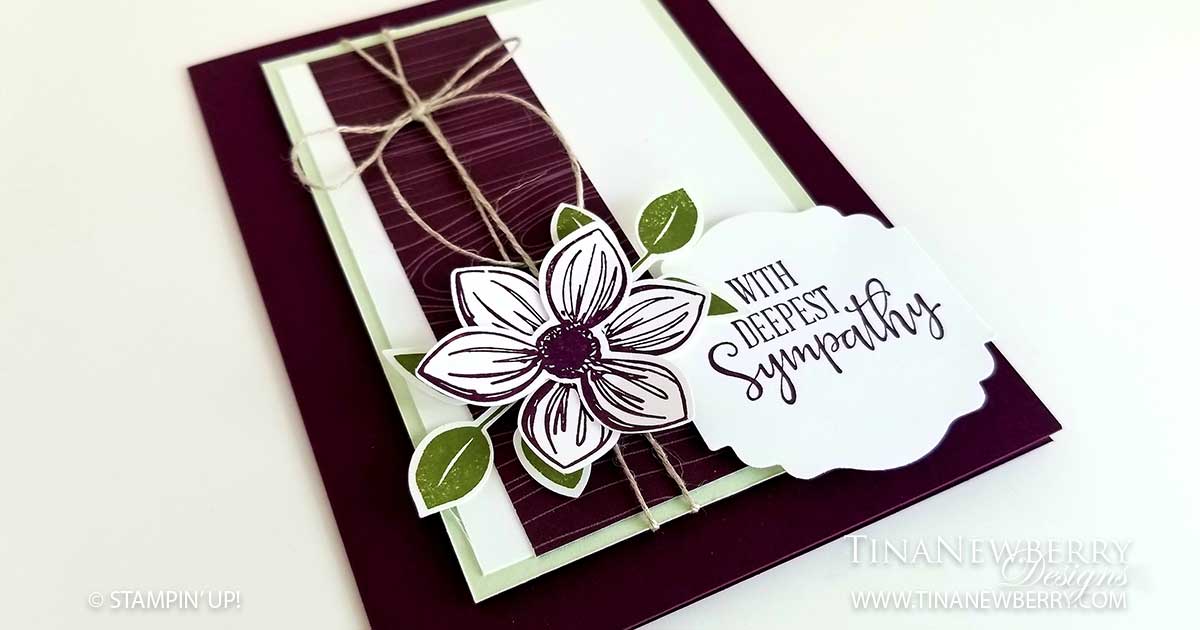
You’ll have all the bases covered with this all-inclusive all-occasion card kit!

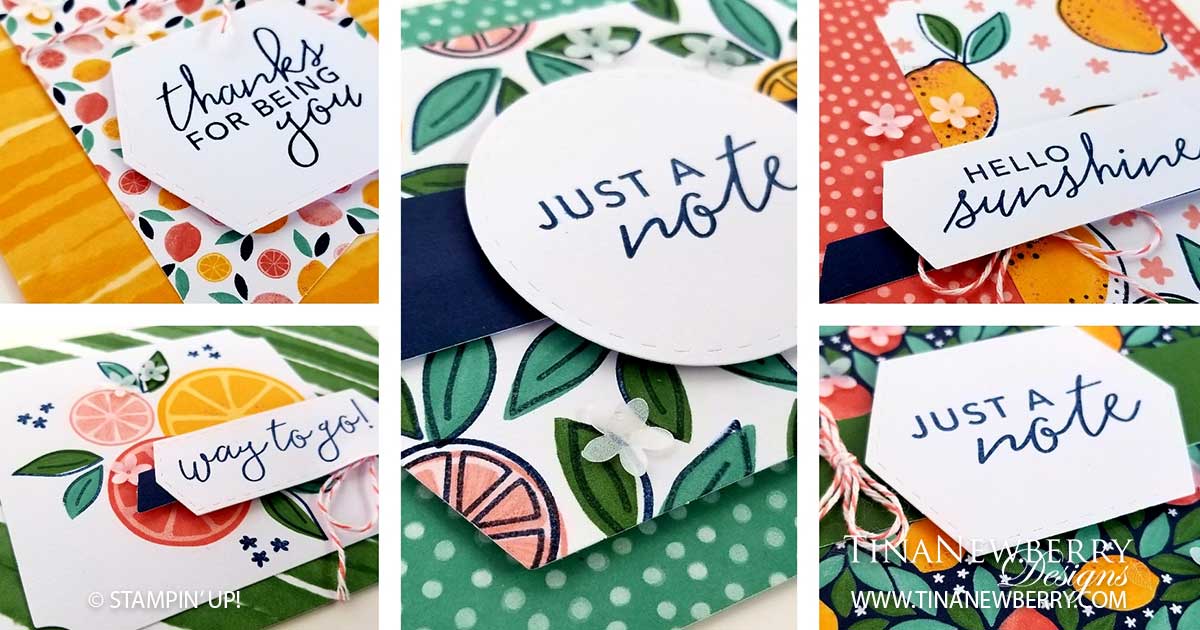
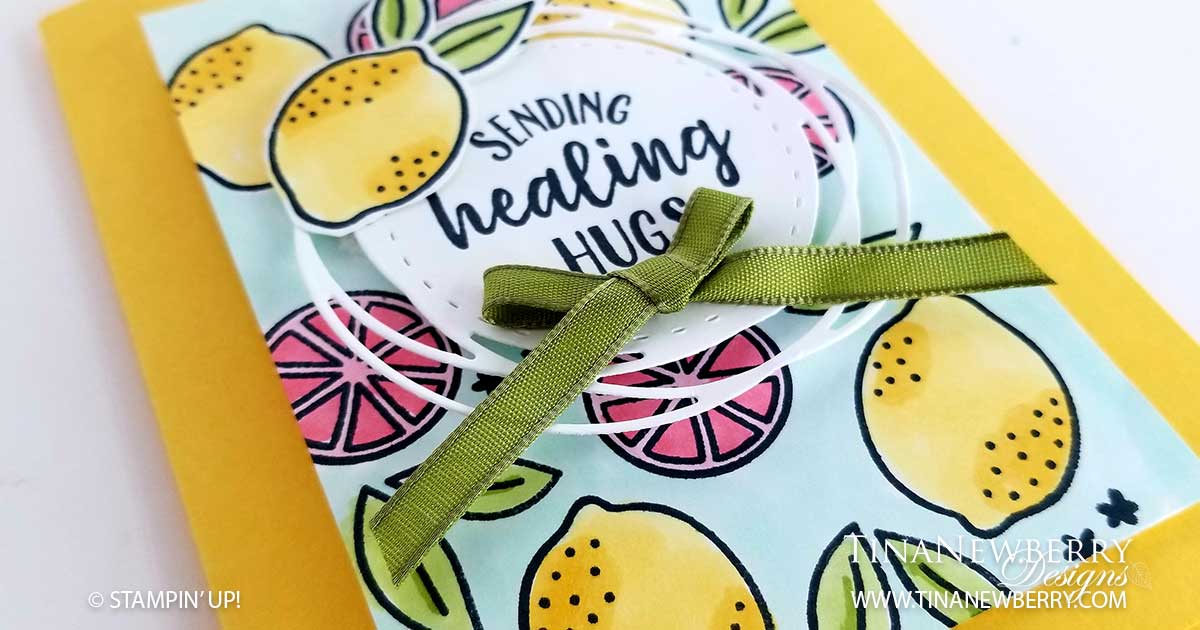
Create beautiful uplifting cards in minutes using the Simply Citrus Card Kit. This kit is perfect for new crafters, busy crafters, or crafters on the go. It’s one of our all-inclusive project kits, so everything you need is inside the box! The kit includes five vibrant contains Calypso Coral, Garden Green, Just Jade, Mango Melody, Night of Navy, and white.

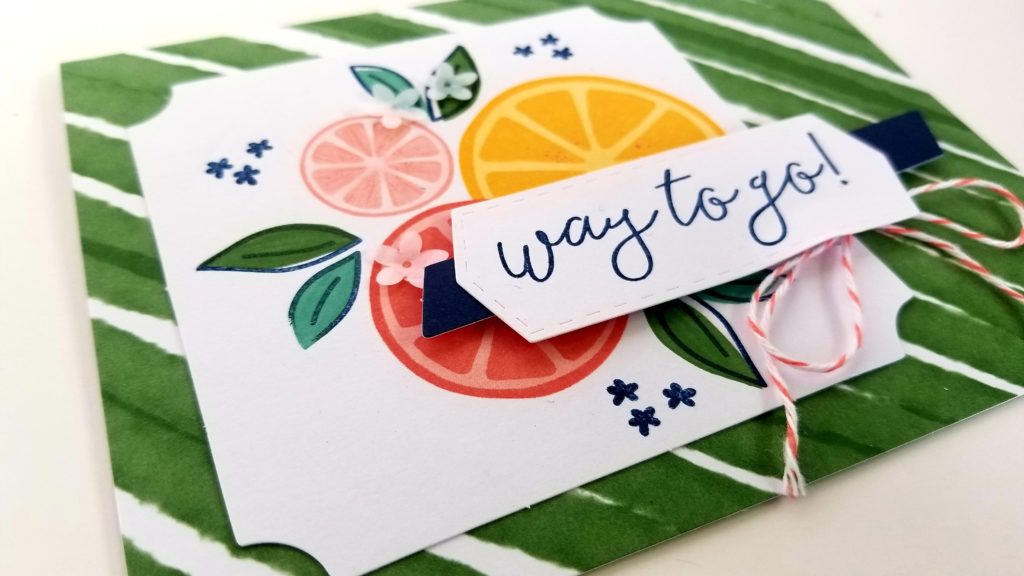
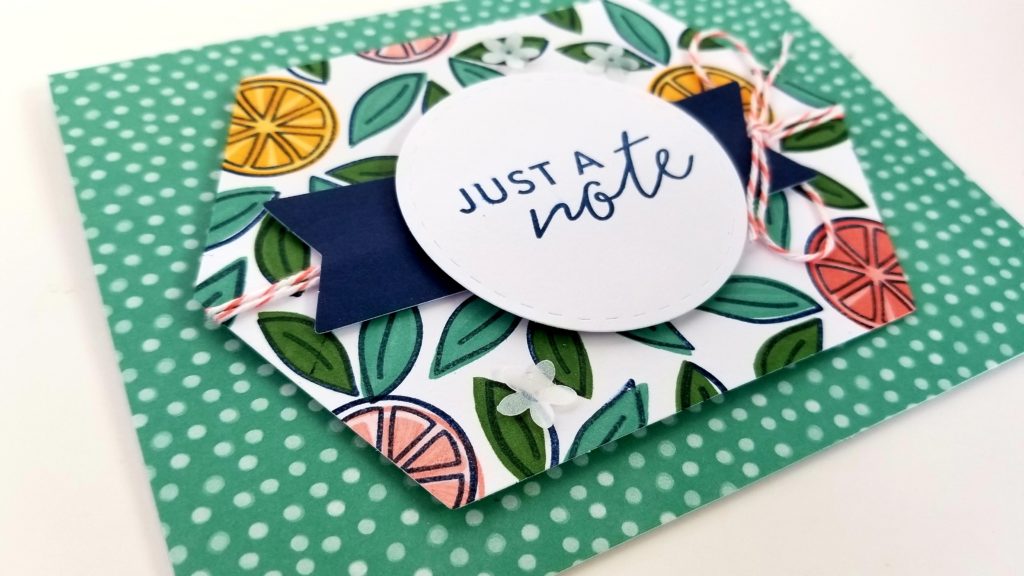
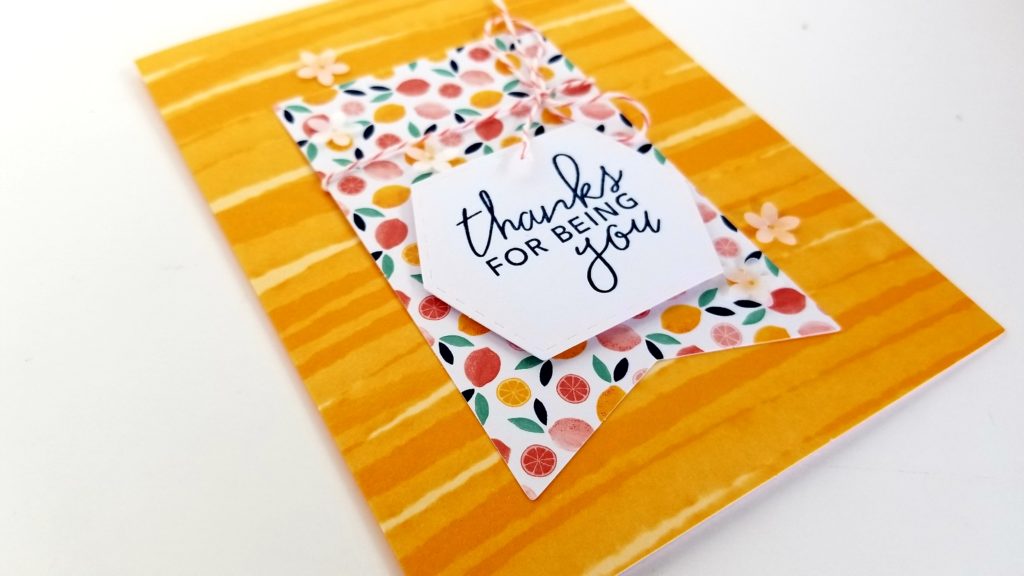
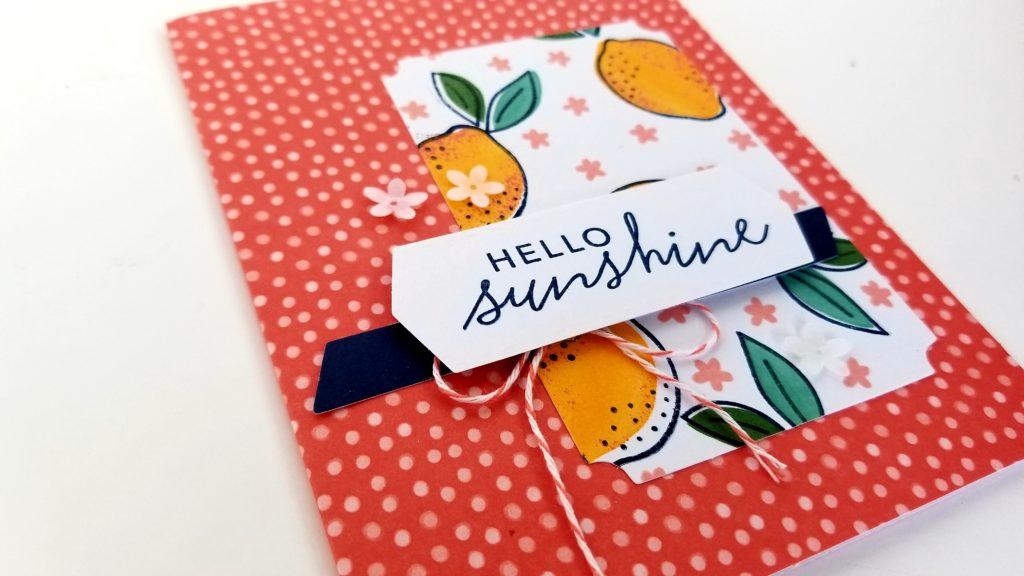
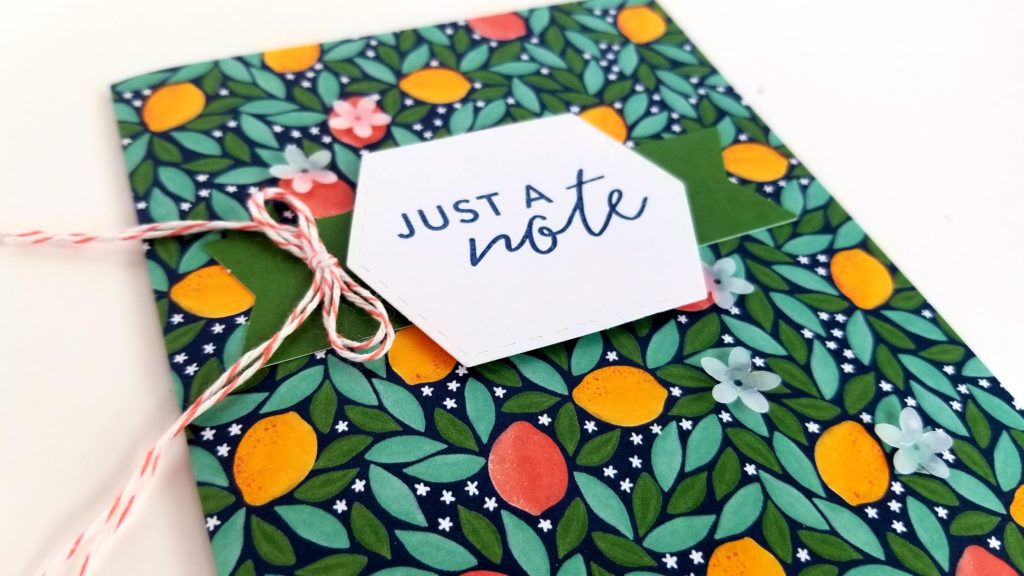
I love how with these kits, there is NO cutting needed. All the die cuts and cards are pre-cut. You just stamp and stick and you’re done. This makes it a great kit for crafters or aspiring crafters.

Kit Contents
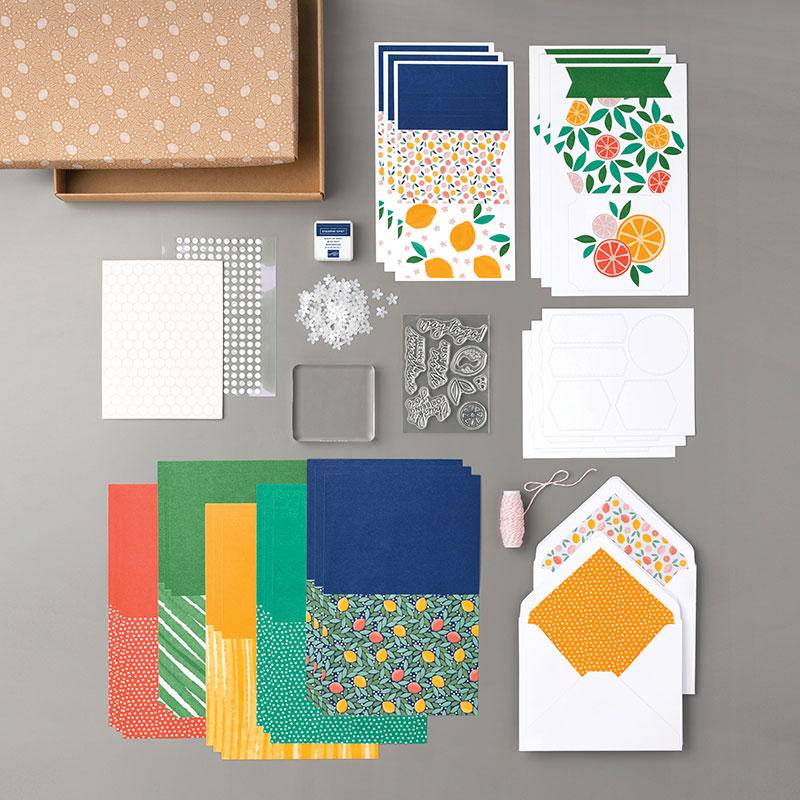
  • Kit includes the Simply Citrus Stamp Set
  • Makes 15 cards: 3 each of 5 designs
  • Folded card size: 5-1/2″ x 4-1/4″ (14 x 10.8 cm)
  • Includes 9-1/4″ x 9-1/4″ x 1-7/8″ (23.5 x 23.5 x 4.8 cm) printed cardboard box. 

Shopping List

Place your order through my online store directly or send me your order and I’ll take care of it for you!

Sending Healing Hugs

I recently saw a Demonstration with the Simply Citrus stamp set and knew I had to create with it. The sentiments are really uplifting – Way to Go! and Hello Sunshine are my two favorites. And the fruit stamps are also very cute! For this card, I tried those with a few other great products I had in my stash – Painted Label Dies and the So Sentimental Stamp Set. The bright sunny colors are so cute!

Full list of supplies needed, listed below. A die cutting machine is needed for this card.
Card Base: Daffodil Delight Cardstock 8 1/2 h” x 5 1/2″ w folded to 4 1/4″ w x 5 1/2″ h
Background: Whisper White Cardstock 4 1/2″ h x 3 1/4″ w
Sentiment Layer: 
Whisper White Cardstock with the Painted Labels Die
Ribbon: 6″ of Old Olive Ribbon from the Ornate Garden Ribbon Pack

  1. Affix all stamps to Acrylic Blocks.
  2. Fold the Card Base in half using a Bone Folder to sharpen the crease.
  3. Stamp the Fruit and Leaves on the Background Layer with Tuxedo Black Memento Ink then use Stampin’ Blends to color in the Fruit and the Background.
  4. Stamp an extra Lemon and Leaves on a scrap of Whisper White Cardstock, color in and use Paper Snips to cut out.
  5. Adhere the Background Layer and Sentiment with Stampin’ Dimensionals.
  6. Tie a bow with the Ribbon and adhere with a Mini Glue Dot.
  7. Adhere the Lemon and Leaves with Stampin’ Seal.
  8. Adorable! Go ahead and make someone’s day.
Shopping List

Recommended Stamper’s Toolkit

Product List
Order online from the convenience of your own home or send me your order and I’ll take care of you. ❤ Either way, please use the host code ANTD9UHS. Order online AND, if your order is $50 or more using host code ANTD9UHS between now and the end of the month you’ll receive a free pack of embellishment as a THANK YOU gift from me. ❤ If your order is over $150, skip the host code, earn Stampin’ Rewards for free stuff yourself and I’ll still send you a free pack of embellishment as a THANK YOU gift from me. ❤

Floral Essence Sympathy

Green and purple are made for each other. Pass on your condolences with this peaceful card made using the Floral Essences stamp set and the Perennial Flower Punch. The sentiment comes from the Peaceful Moments stamp set.

Full list of supplies needed, listed below.
Card Base: Blackberry Bliss Cardstock 8 1/2 h” x 5 1/2″ w folded to 5 1/2″ h x 4 1/4″ w.
Background Matte: Soft Sea Foam Cardstock 4 3/4″ h x 3 1/4″ w
Background: Whisper White Cardstock 4 1/2″ h x 3″ w
Decorative Strip: Blackberry Bliss Regals DSP 4 1/2″ h x 1 1/2″ w
Sentiment Layer: 
Whisper White Cardstock Label Me Lovely Punch
Thread: 20″ Linen Thread

  1. Affix all stamps to Acrylic Blocks.
  2. Fold the Card Base in half using a Bone Folder to sharpen the crease.
  3. Attach the Decorative Strip to the Background and the Background to the Background Matte using Stampin’ Seal.
  4. Wrap the Linen Thread around the Background and tie a bow.
  5. Affix the Background layers with Dimensionals.
  6. Stamp the flower in Blackberry Bliss ink on a scrap of Whisper White Cardstock and punch with the Perennial Flower Punch. Repeat so you have two stamped Perennial Flowers.
  7. Stamp the leaves in Old Olive ink and use Scissors or the Leaf punch to cut them out.
  8. Use Mini Glue Dots to attach the offset flowers together and attach the leaves, then use Mini Glue Dots to attach it all to the card.
  9. Stamp the Sentiment on the Sentiment Layer with Blackberry Bliss ink and attach with Dimensionals to the card.
  10. That’s it! Now save it to honor someone special.

Product List

Recommended Stamper’s Toolkit

Product List
Order online from the convenience of your own home or send me your order and I’ll take care of you. ❤ Either way, please use the host code ANTD9UHS. Order online AND, if your order is $50 or more using host code ANTD9UHS between now and the end of the month you’ll receive a free pack of embellishment as a THANK YOU gift from me. ❤ If your order is over $150, skip the host code, earn Stampin’ Rewards for free stuff yourself and I’ll still send you a free pack of embellishment as a THANK YOU gift from me. ❤

Design inspired by Corine van Wijk.

All Days Are Beautiful

A combination of resources were used on this #simplestamping card that uses only a SIP – stamps, ink and paper. First I saw the design of a similar card using Floral Essence stamp set. Then I chose this color palette from the new Annual Catalog. I’m really happy with the way it came out!

Full list of supplies needed, listed below.
Card Base: Petal Pink Cardstock 8 1/2 h” x 5 1/2″ w folded to 5 1/2″ h x 4 1/4″ w.
Background Matte: Basic Gray Cardstock 5 1/4″ h x 4″ w
Background: Whisper White 5″ h x 3 3/4″ w
Sentiment Background Matte: 2 1/4″ h x 2 1/4″ w
Sentiment Background: 2 1/8″ h x 2 1/8″ w
Sentiment Layer: Whisper White Cardstock 2″ h x 2″ w

  1. Affix all stamps to Acrylic Blocks.
  2. Fold the Card Base in half using a Bone Folder to sharpen the crease.
  3. Use Stampin’ Seal to adhere the Background Matte to the Card Base.
  4. Use Petal Pink Ink to randomly stamp flowers on the Background.
  5. Cut the Background into four pieces as shown.
  6. Use Stampin’ Seal to attach the Background pieces.
  7. Use Petal Pink Ink to stamp a flower on the Petal Pink and then Stamp the Sentiment with Basic Gray ink.
  8. Use Stampin’ Seal to attach the Sentiment, Sentiment Background and Sentiment Background Matte in a stack. Then use Dimensionals to attach to the card.
  9. Ta Da!! Very pretty. Who will you send it to?

Shopping List

Recommended Stamper’s Toolkit

Product List
Order online from the convenience of your own home or send me your order and I’ll take care of you. ❤ Either way, please use the host code ANTD9UHS. Order online AND, if your order is $50 or more using host code ANTD9UHS between now and the end of the month you’ll receive a free pack of embellishment as a THANK YOU gift from me. ❤ If your order is over $150, skip the host code, earn Stampin’ Rewards for free stuff yourself and I’ll still send you a free pack of embellishment as a THANK YOU gift from me. ❤

Design inspired by Lisa Curcio.