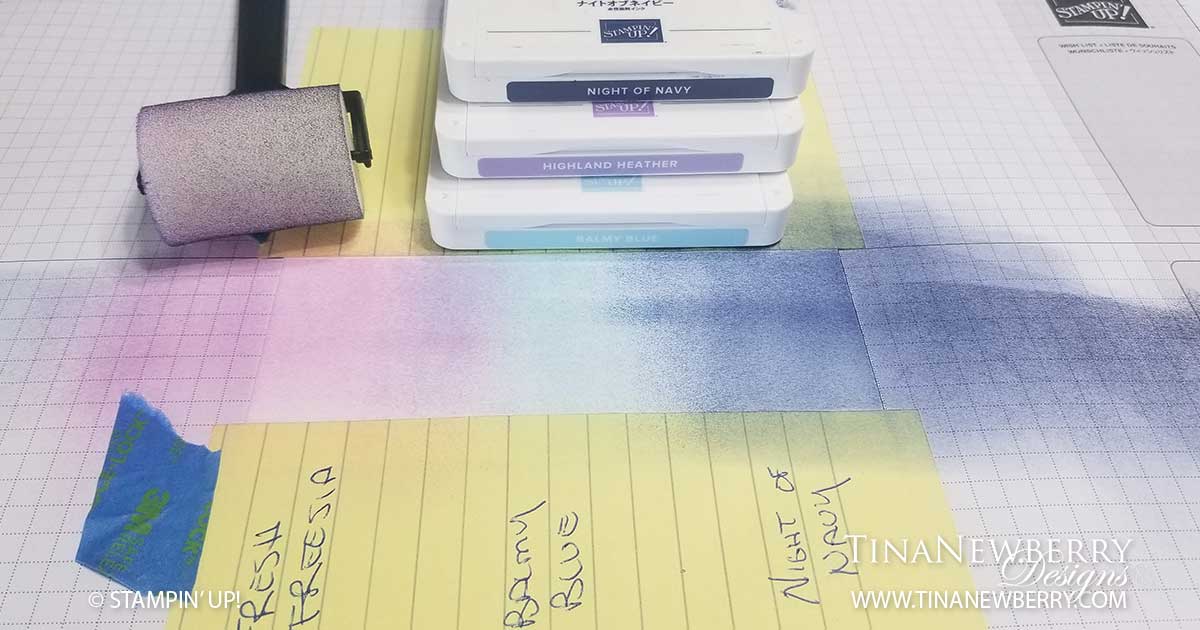
I had been seeing designs where the Queen Anne’s Lace stamp was shown as a silhouette and I just HAD to try it for myself, but first I needed to learn how to do the pretty sky in a strip! I knew how to blend the colors, but I did not know how to contain the colors to a strip. Anyone who knows me, knows I struggle with straight, so this technique had me a little anxious, but I was determined to do it and I’m so glad I did. It was WAY easier than I thought it would be! Luckily, my Stampin’ Up! upline, Lisa Curcio had a GREAT video for me to learn from. The secret is GRID PAPER. Take a look and learn yourself.
Full list of supplies needed, listed below. A die cutting machine is needed for this card. Card Base: Gorgeous Grape Cardstock 5 1/2″ h x 8 1/2″ w folded to 5 1/2″ h x 4 1/4″ w Background: Night of Navy Cardstock 5 1/4″ h x 4″ w Stamped Sky Strip Layer: Basic White Cardstock 5″h x 3 3/4″ w Pretty Border Accent: Basic Black Cardstock scrap die cut with the Painted Labels Dies Sentiment Layer: Basic White Cardstock scrap die cut with the Painted Labels Dies Inside Layer: Basic White Cardstock 5 1/4″ h x 4″ w
Let’s Create
Affix all stamps to Acrylic Blocks.
Fold the Card Base in half using a Bone Folder to sharpen the crease.
Create the Stamped Sky Strip Layer
First I recommend watching the video I linked above for the best description of how to set up your work area and complete the technique.
I will say grid paper and those big sticky notes are the KEY. I added a little painter’s tape too because my sticky notes were kind of old and I was concerned they would move.
Once you have your Basic White Cardstock 5″h x 3 3/4″ w secured in position and masked with your sticky notes, you’re ready to apply the layered sky.
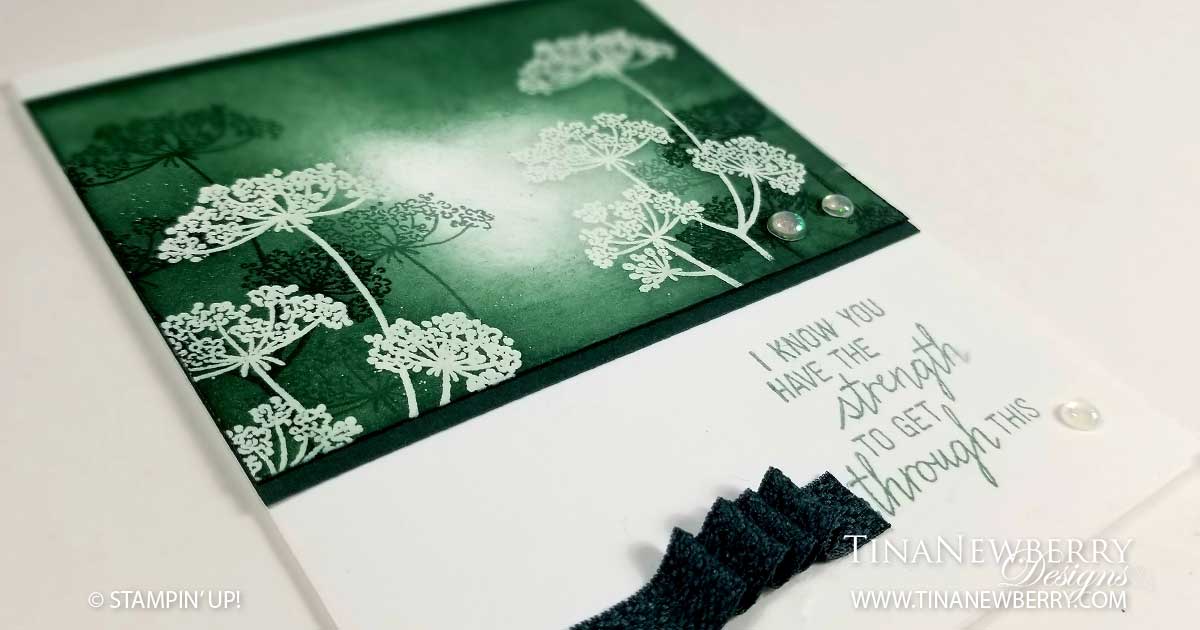
You’ll use a sponge brayer to pick up ink off your stamp pad and roll it onto your cardstock. I recommend starting with the lighter colors and working to the darker colors. And you’ll want to start rolling on your grid paper first and then onto your cardstock. I started with Fresh Freesia, then added some Highland Heather, Balmy Blue and ended with Night of Navy. You have to be very careful not to darken your light colors too much and use nice even strokes to blend through all the colors. Keep working at it. No two attempts will be the same. That’s the fun!
Remove the sticky notes and voila! You have your pretty sky strip.
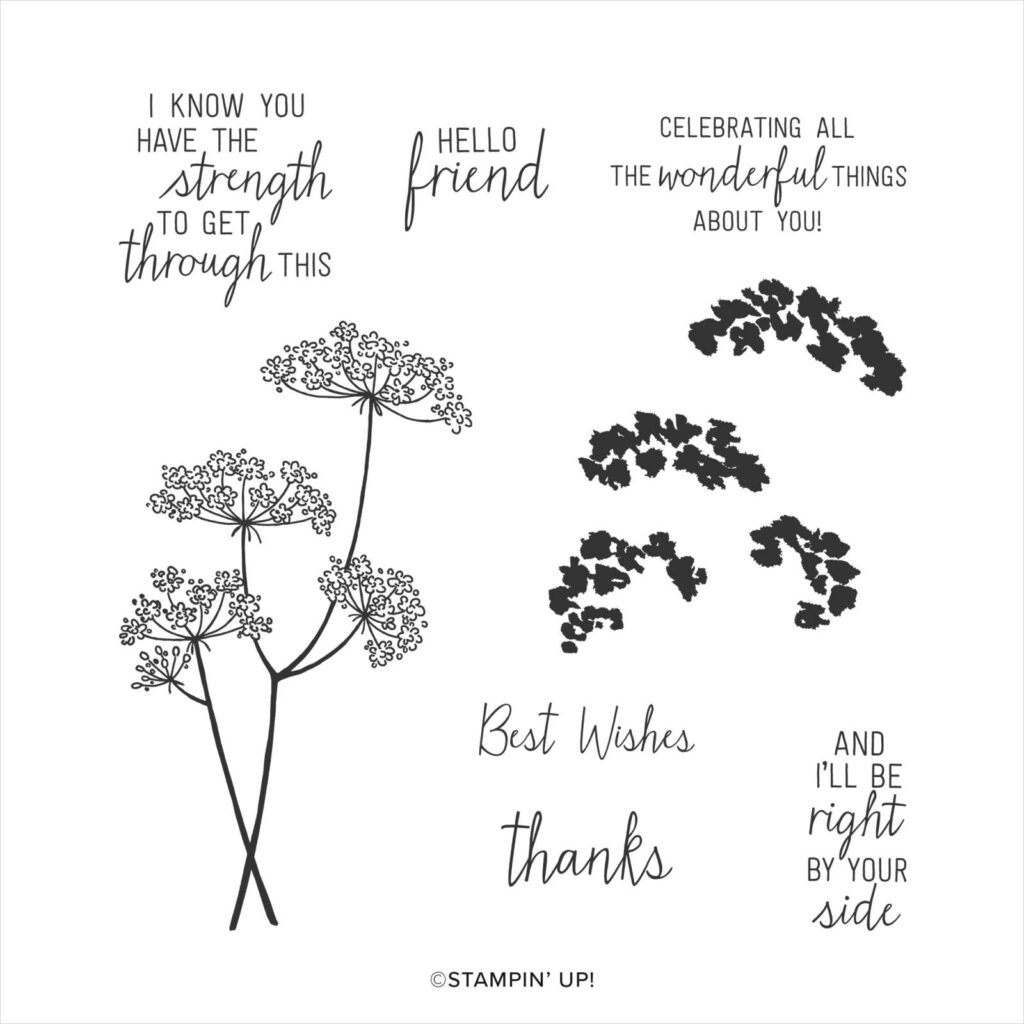
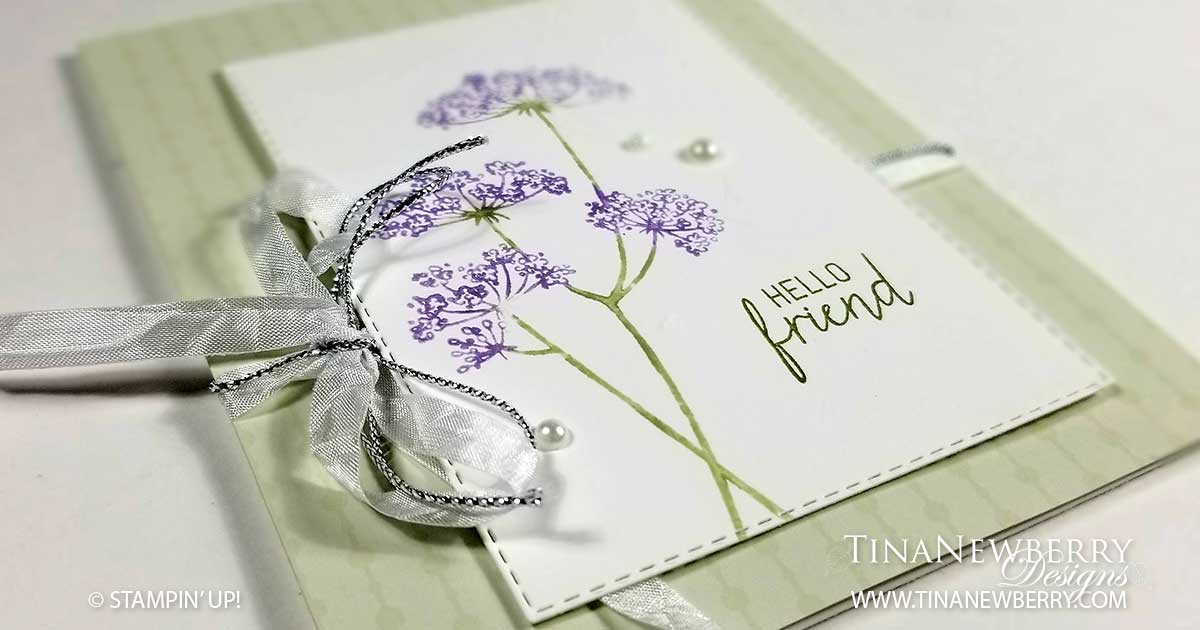
Next Stamp the Queen Anne’s Lace on the Basic White Cardstock 5″h x 3 3/4″ w in Memento Black Ink and then again in Gorgeous Grape Ink. Go back with the Blossoms Fill stamp in Memento Ink for the fuller look of the black Queen Anne’s Lace. You could do the Blossoms Fill stamp with gorgeous grape, if you want to, but I didn’t.
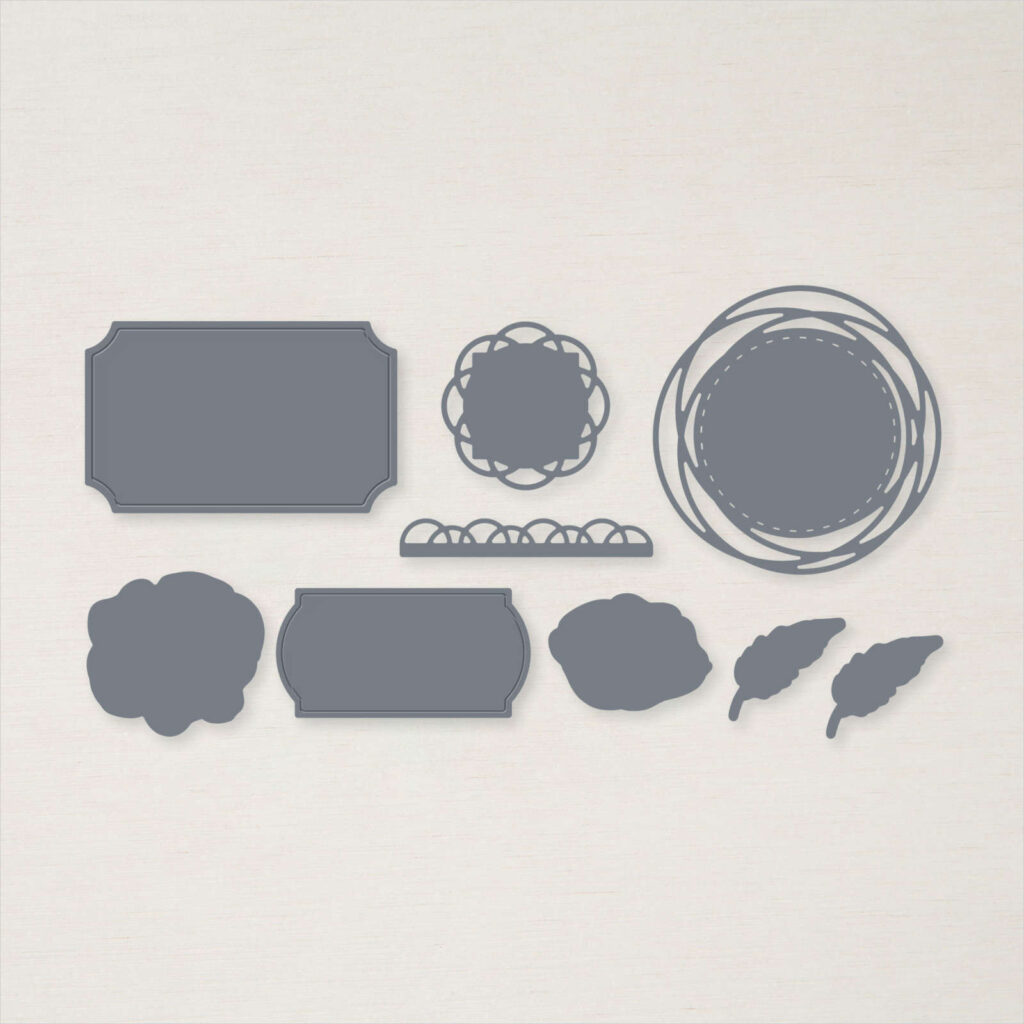
Stamp your sentiment on a scrap of Basic White Cardstock in Gorgeous Grape Ink and die cut with the Painted Labels Die.
Attach an adhesive sheet to the scrap of Basic Black Cardstock and die cut cut the Pretty Border die.
Now it’s time to Assemble!
Attach the Stamped Sky Strip Layer to the Night of Navy Cardstock with the adhesive of our choice.
Remove the backing from the Pretty Border Die Cut and attach to the Stamped Sky Strip Layer.
Use Tear & Tape to attach a 3 1/2″ w piece of shimmery Highland Heather 1/2″Grosgrain Ribbon. Use your Paper Snips to trim the ends to size.
Use Stampin’ Dimensionals to attach your Sentiment over the Ribbon and Pretty Border Die Cut.
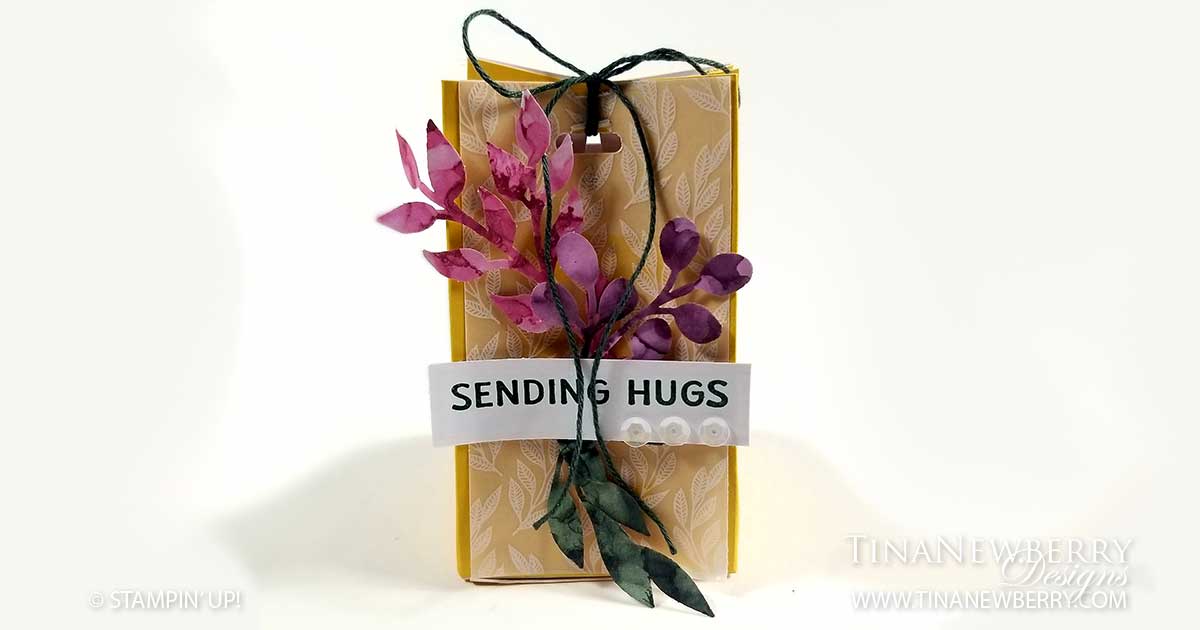
Sprinkle some Rhinestone Basic Jewelsto the sky for stars and also to the Sentiment for fun.
Tie a tiny tiny white Baker’s Twine bow and attach to the Sentiment with a squished up Mini Glue Dot.
Stamp an message on the Inside Layer and attach to the inside with adhesive of your choice.
Beautiful! Who will you send it to?
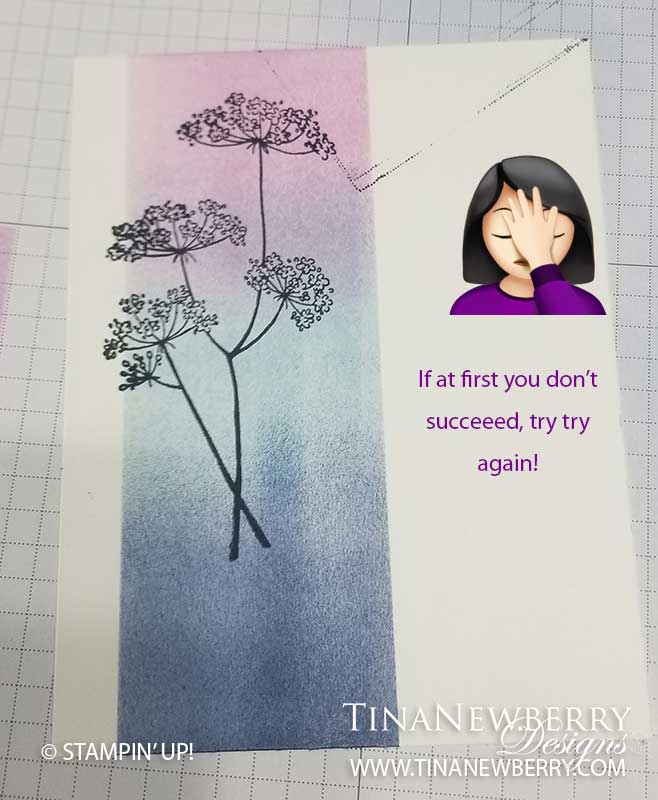
Whoopsie! What happened here? OH NO!!! After all that work, I butter fingered the stamp pad! I had to start all over again.
For #creativitymadeeasy the design for this card came straight from pg 134 of the 2020 Annual Catalog. Catalogs are full of ideas and with the 2020 Annual Catalog Sample Recipes,, it’s easier than ever to CASE – Copy and Share Everything. I’ve had the Queen Anne’s Lace stamp set on my wishlist for quite awhile. There’s something about the delicate, simple flowers of this set that I’m drawn to and the sentiments are thoughtful and endearing. I had so much fun CASEing this card! Ready to CASE the new 2021 Annual Catalog? Great! Here’s the 2021 Annual Catalog Sample Recipes.
Full list of supplies needed, listed below. A die cutting machine is needed for this card. Card Base: Basic White Cardstock 5 1/2″ h x 8 1/2″ w folded to 5 1/2″ h x 4 1/4″ w Background: Soft Subtles Designer Series Paper 5 1/2″ h x 4 1/4″ w Sentiment Layer: Basic White Cardstock 4 1/4″ h x 3″ w Stitched Rectangle Die Inside Layer (optional): Basic White Cardstock 5 1/2″ h x 4 1/4″ w
Let’s Create
Affix all stamps to Acrylic Blocks.
Fold the Card Base in half using a Bone Folder to sharpen the crease.
Wrap the Crinkle Seem Binding and Simply Elegant Silver Trim around the Soft Sea Foam Designer Series Paper and tie into a messy bow.
Attach the Soft Sea Foam DSP Background to the Card Base with Stampin’ Dimensionals.
Use Pear Pizzaz and Highland Heather Stampin’ Write Markers to color the Large Flower & Stem Stamp on the Sentiment Layer. If it takes you a bit to fully color it, remember to ‘huff’ on the stamp to re-wet the ink.
Stamp Hello Friend on the Sentiment Layer in Old Olive Ink and attach with Stampin Dimensionals.
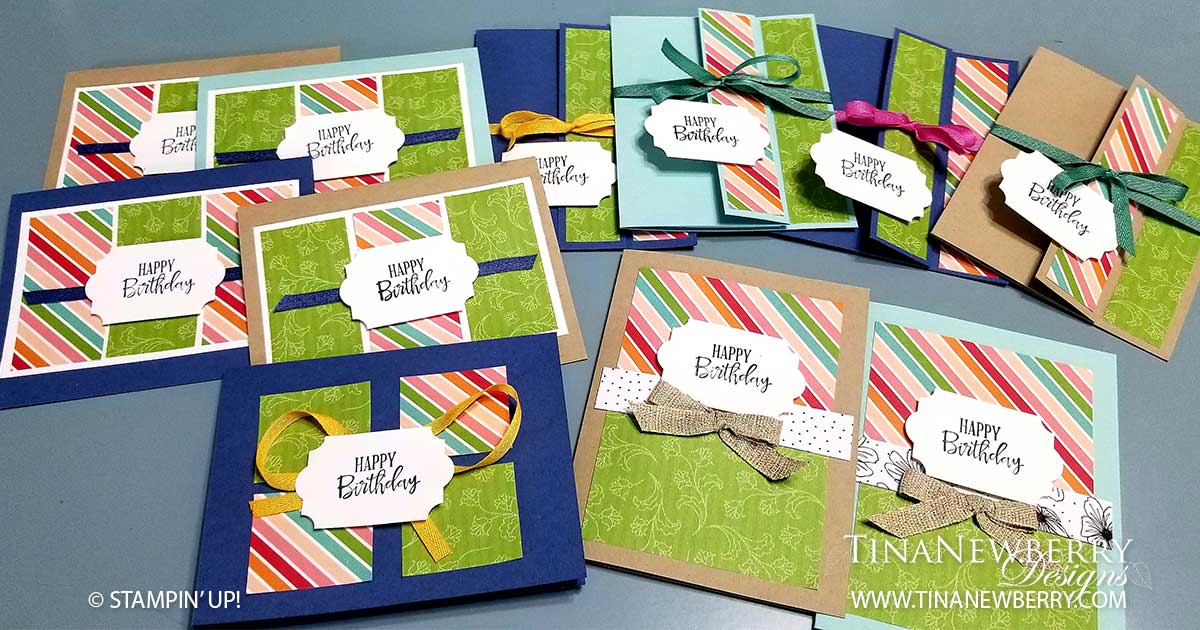
Whether you’re making a gift of cards or you have a bunch you need to send or maybe you’re making cards for a Cards for Troops Drive, with this Double Sheet Wonder Technique and about an hour and a half, you’ll have a stack of 11 beautiful cards ready to make someone’s day!
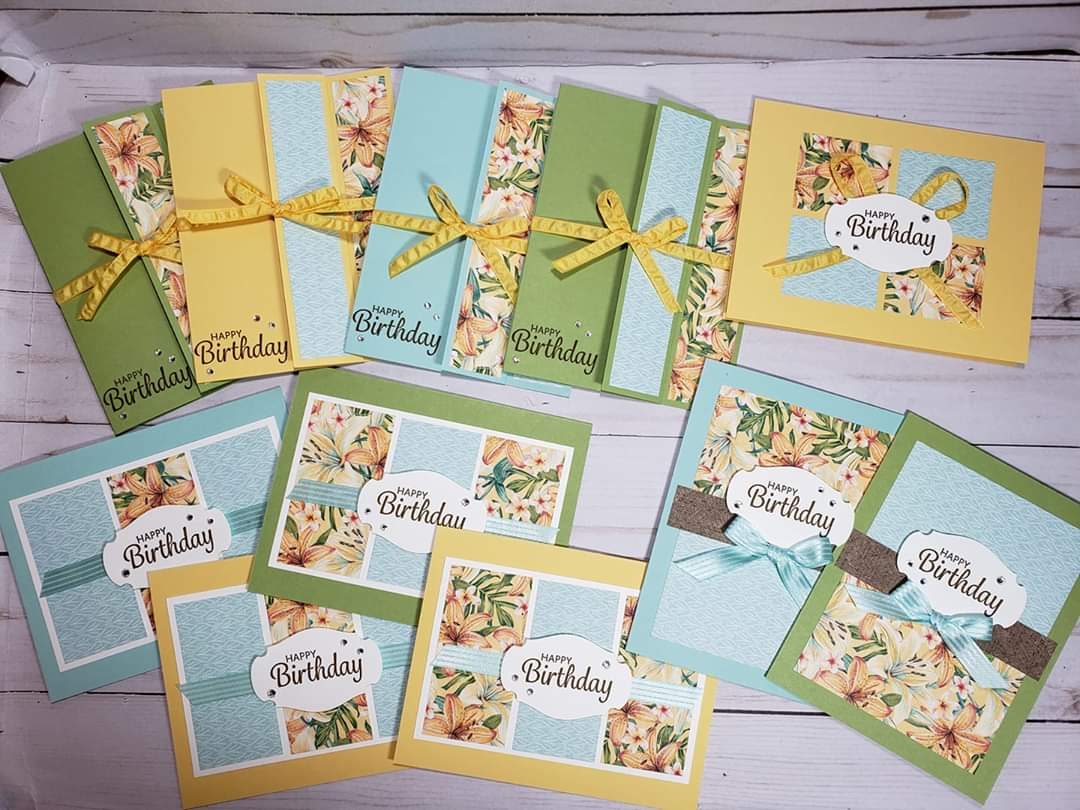
Over the weekend, I was putting together a basket to donate to the a fundraiser for the Melissa 4 Mayor Campaign and I was making a stack of Birthday Cards to include in the basket. I just LOVE the new hostess paper, Pattern Party and I knew I wanted to use it somehow to create a pretty coordinating set of cards. It had been a little over a year since I attempted my first Double Sheet Wonder and honestly, I hadn’t loved how busy my first set looked. Inspired by this gorgeous set using the In The Tropics Designer Series Paper (retired), I was determined to try again!
Inspired by the simple elegance of this stack using In The Tropics, I was inspired to try again!
If at First You Don’t Succeed, Try, Try Again!
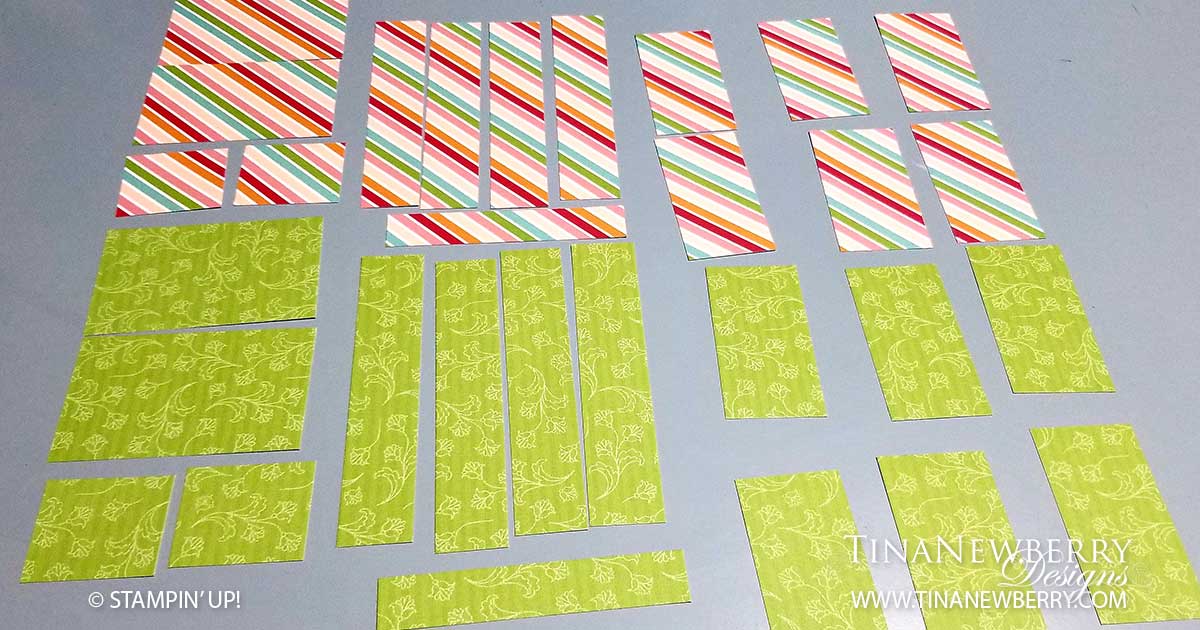
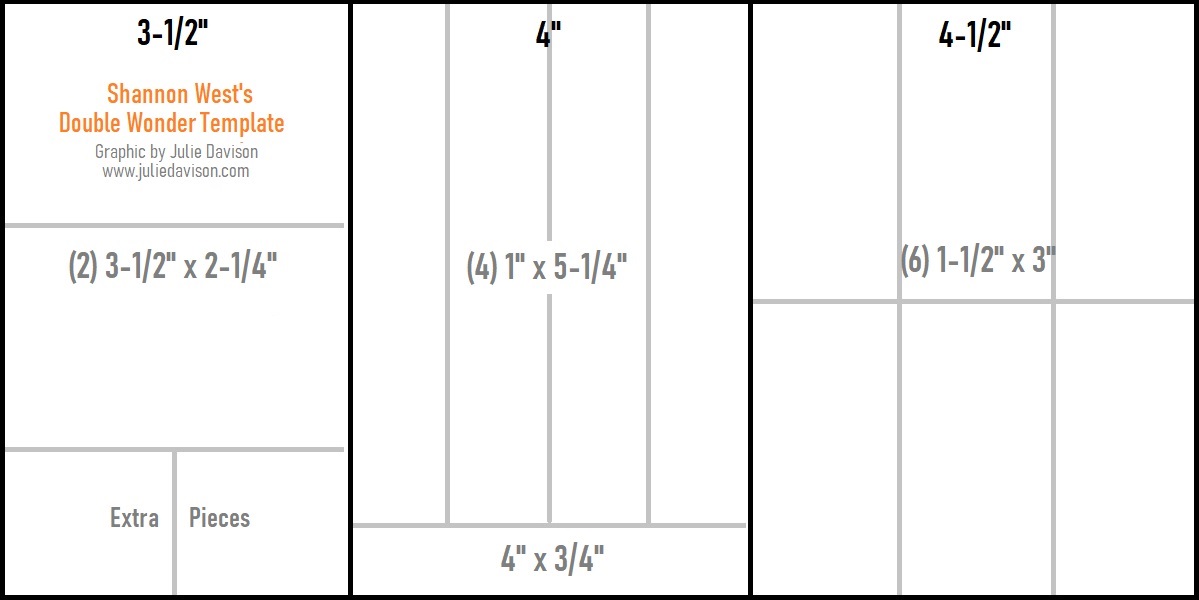
The two sheets I pulled from the pack of paper and cut according to Julie’s instructions below.
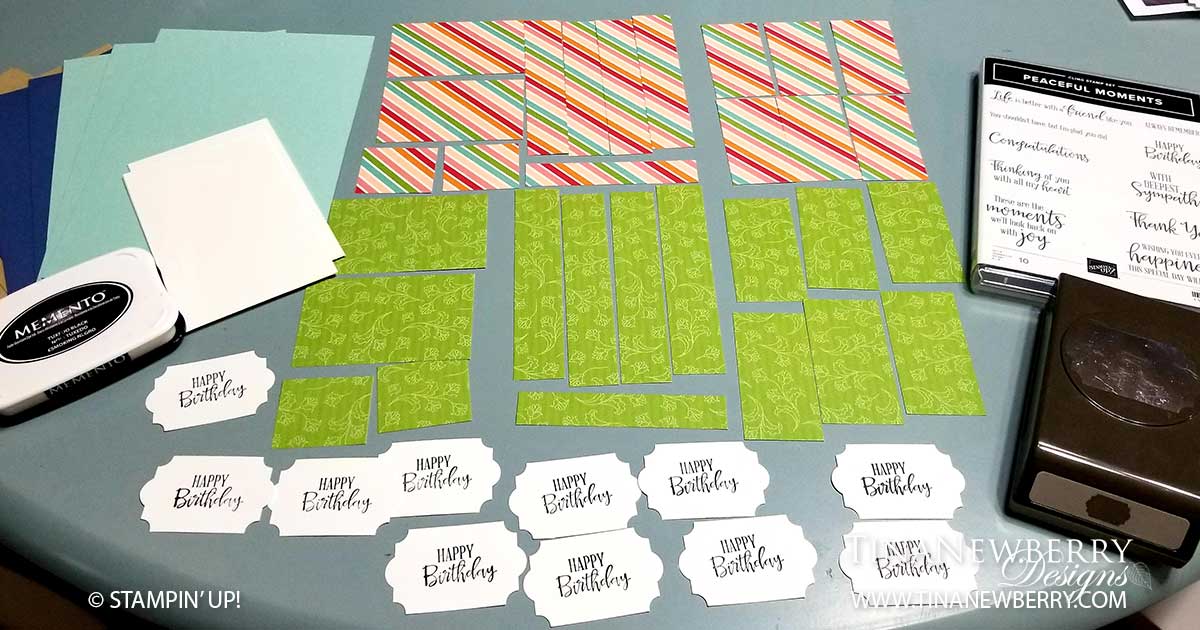
All of my supplies ready to go!
Ta Da! The finished stack
How To Make A Stack with the Double Sheet Wonder
The designs and ideas are all from Julie’s Stamping Spot, all you have to do is change up the Designer Series Paper, Cardstock and Sentiments to meet your needs for a fresh new stack every time.
Julie walks you through all of it in this handy video.
And she also provides excellent detailed Free Downloads:


")


 Grosgrain Ribbon")


")


")


 Designer Series Paper")
 Crinkled Seam Binding Ribbon")


