I have been helping small businesses, non-profits and institutions of higher education with a variety of print and digital solutions since 2000. From Save-the-Date postcards to eCommerce websites, I am prepared to help you grow your business without breaking the budget.
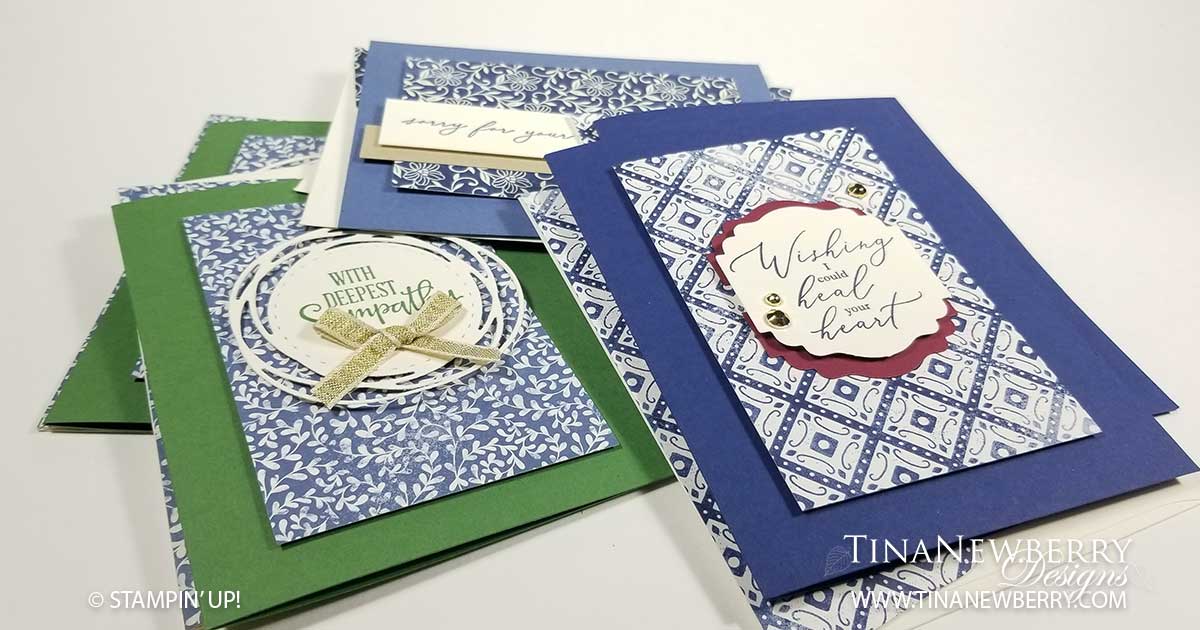
Using the same layout, with varying sentiments, my good friend, Annette & I were able to each create a quick six-pack of sympathy cards. Scroll down for measurements and supplies.
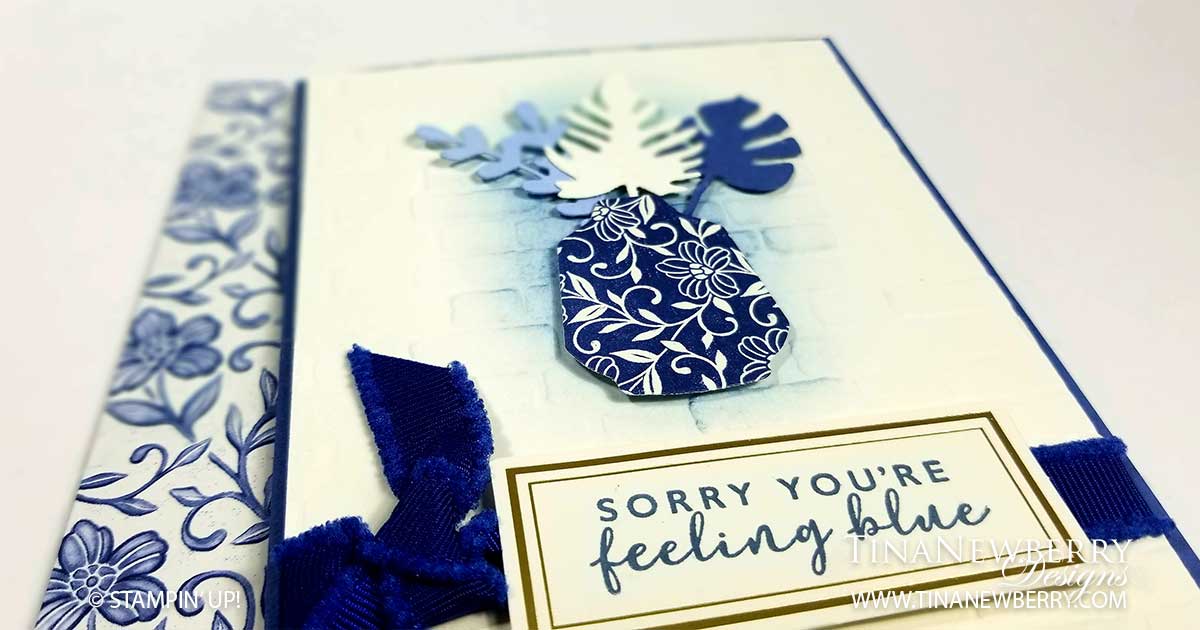
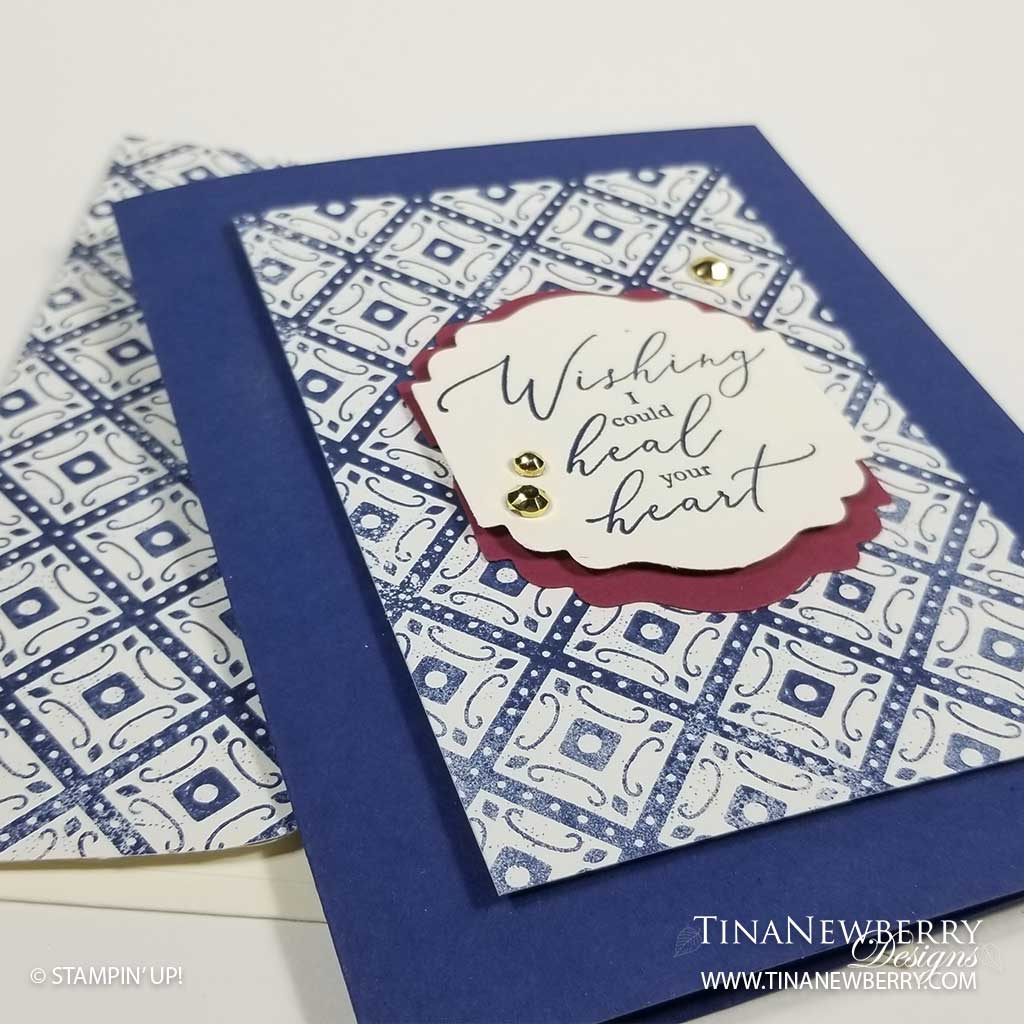
Heal Your Heart Sale-a-bration Stamp Set Misty Moonlight Card Base 4 1/4″ h x 5 1/5″ w Boho Indigo Product DSP 3″ h x 4″ w Very Vanilla Sentiment with Misty Moonlight Ink cut to size Crumb Cake Cardstock 3/4″ h x 4 1/4″ w
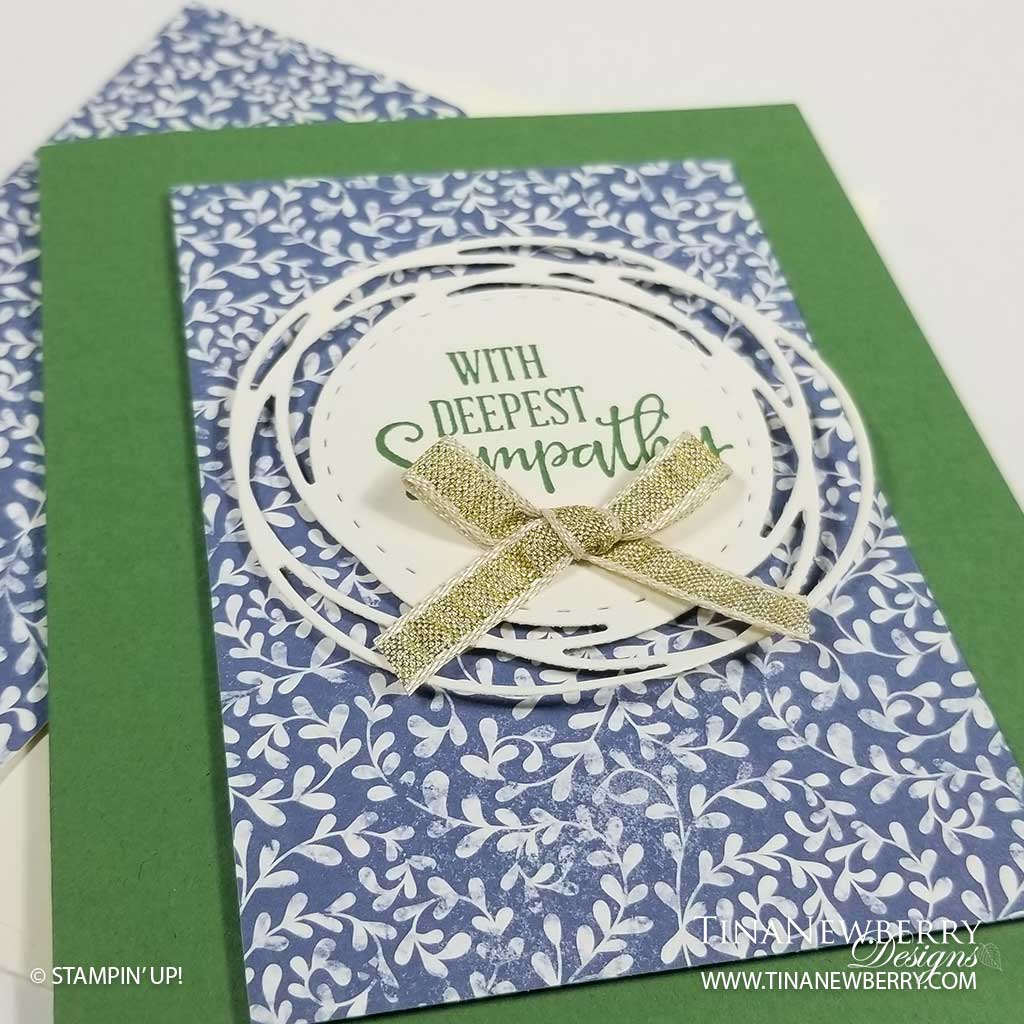
Peaceful Moments Stamp Set Garden Green Card Base 4 1/4″ h x 5 1/5″ w Boho Indigo Product DSP 3″ h x 4″ w Very Vanilla Sentiment with Garden Green Ink with the Painted Label Dies Boho Indigo Gold Ribbon
Heal Your Heart Sale-a-bration Stamp Set Night of Navy Card Base 4 1/4″ h x 5 1/5″ w Boho Indigo Product DSP 3″ h x 4″ w Very Vanilla Sentiment with Night of Navy Ink with the Label Me Lovely Punch Merry Merlot Cardstock with the Label Me Lovely Punch Gilded Gems
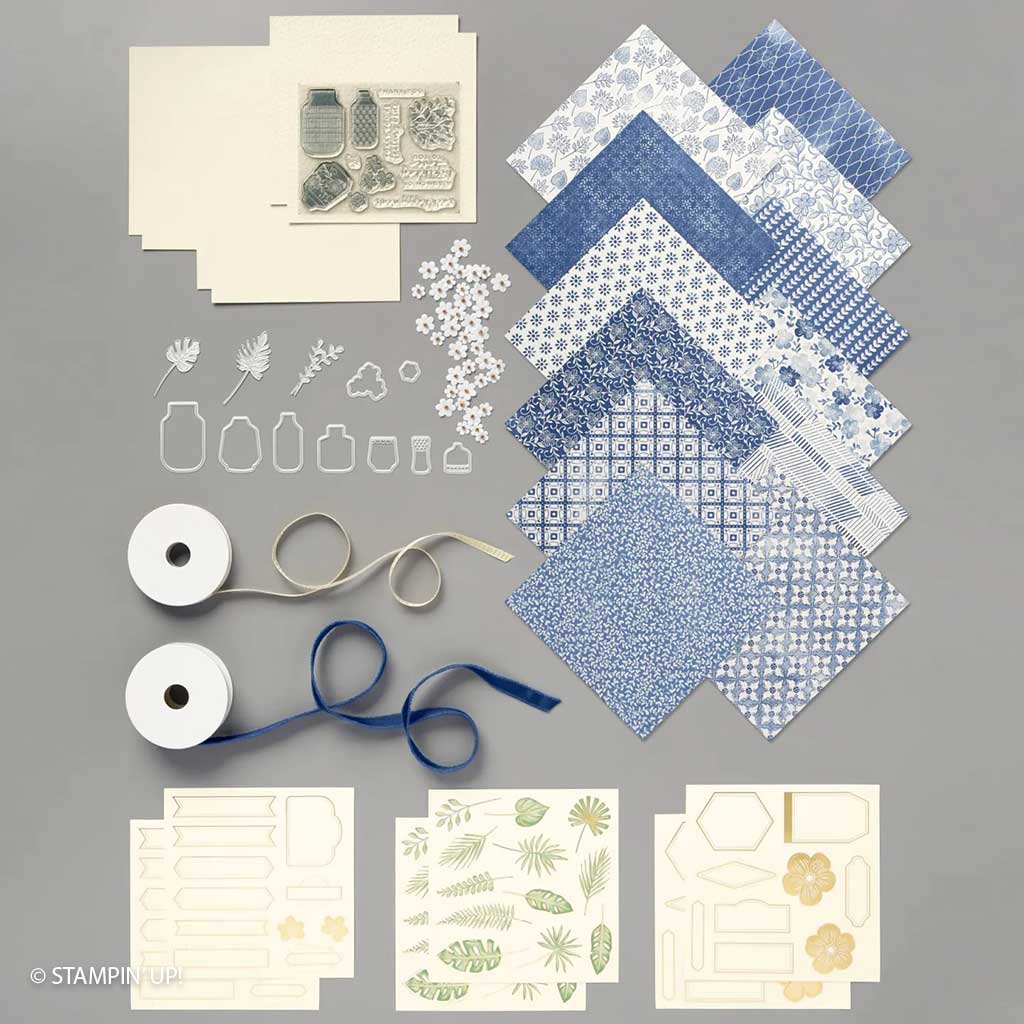
Pull together a simple, elegant card in minutes using the pre-embossed paper, die cut tags, beautiful patterned paper, cute paper flowers and a single stamped vase and branches. WOW! I’m not sure why I waited so long to buy the Boho Indigo Product Medley! This beautiful card came together so easily, I made two!
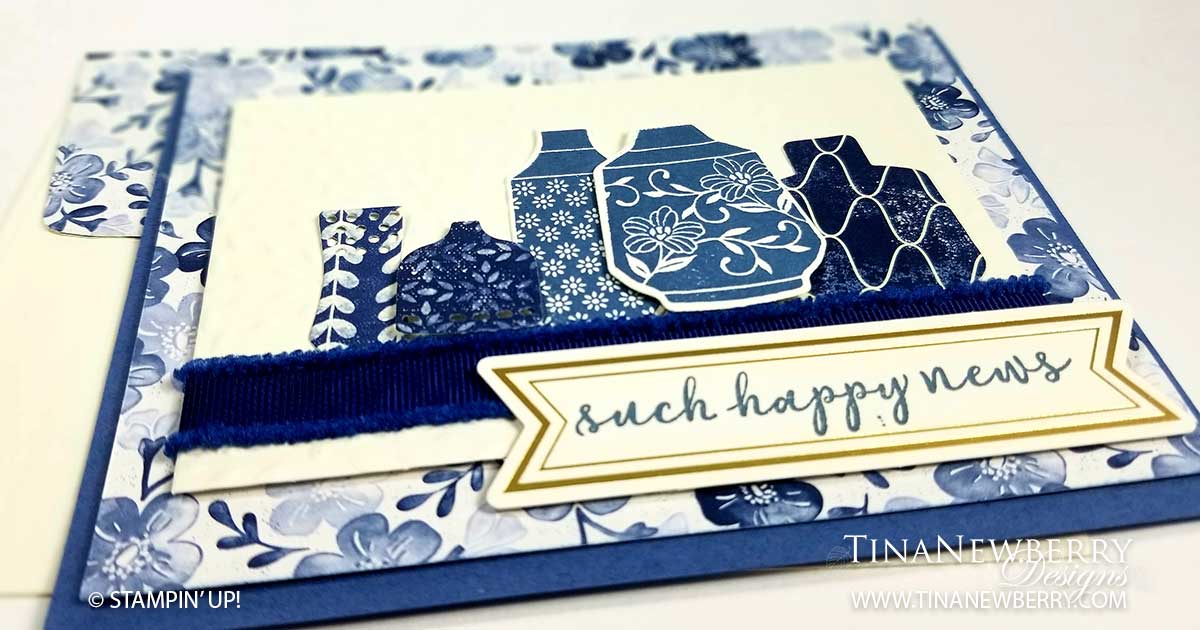
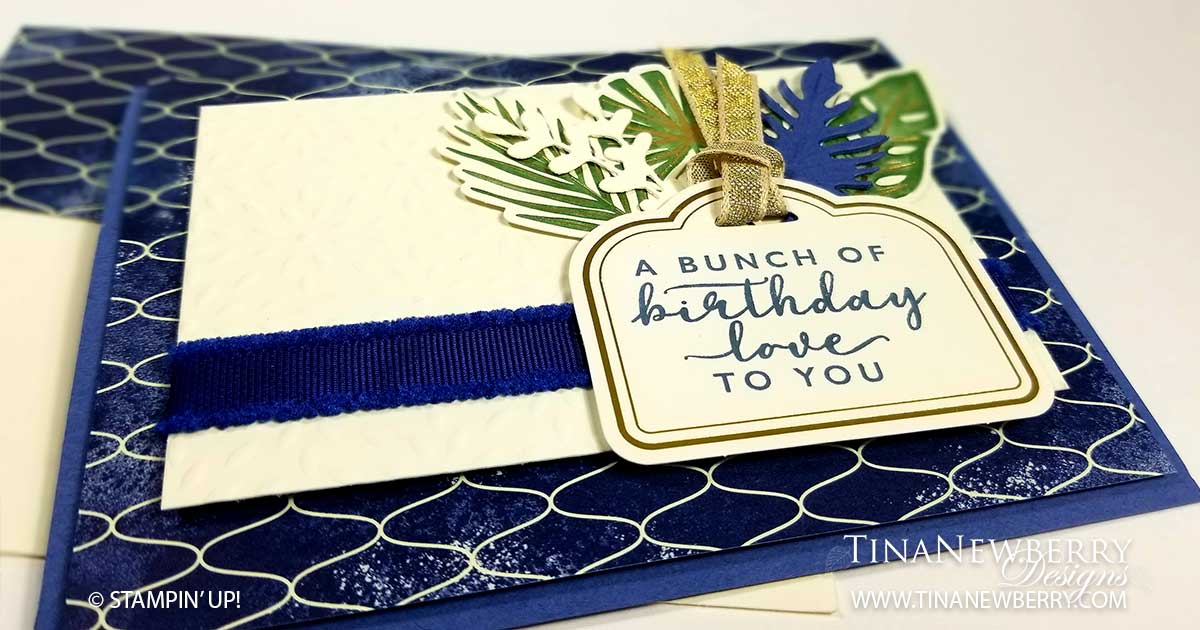
Full list of supplies needed, listed below. Card Base: Very Vanilla Cardstock 8 1/2 h” x 5 1/2″ w folded to 5 1/2″ h x 4 1/4″ w. Background:Boho Indigo Embossed Paper 5 1/2″ h x 2″ w Decorative Strip 1: Boho Indigo DSP 5″ h x 1/2 ” w Decorative Strip 2: Boho Indigo DSP 4 3/4″ h x 1″ w Sentiment Layer: Boho Indigo Die Cut Tag Inside Layer: Very Vanilla Cardstock 5 1/4″ h x 4″ w
Affix all stamps to Acrylic Blocks.
Fold the Card Base in half using a Bone Folder to sharpen the crease.
Attach the Background Layer and Background Strip 1 using Stampin’ Seal.
Attach Background Strip 2 using Stampin’ Dimensionals.
Cut a 3 3/4″ piece of the Gold Ribbon and attach using Tear & Tape.
Stamp a Vase in Misty Moonlight ink on scrap Very Vanilla and die cut.
Stamp the Leaves & Branches in Garden Green ink on the Card Base.
Attach the Vase with Stampin’ Dimensionals.
Stamp the Sentiment on the Tag in Misty Moonlight ink and attach Tag with Stampin’ Dimensionals.
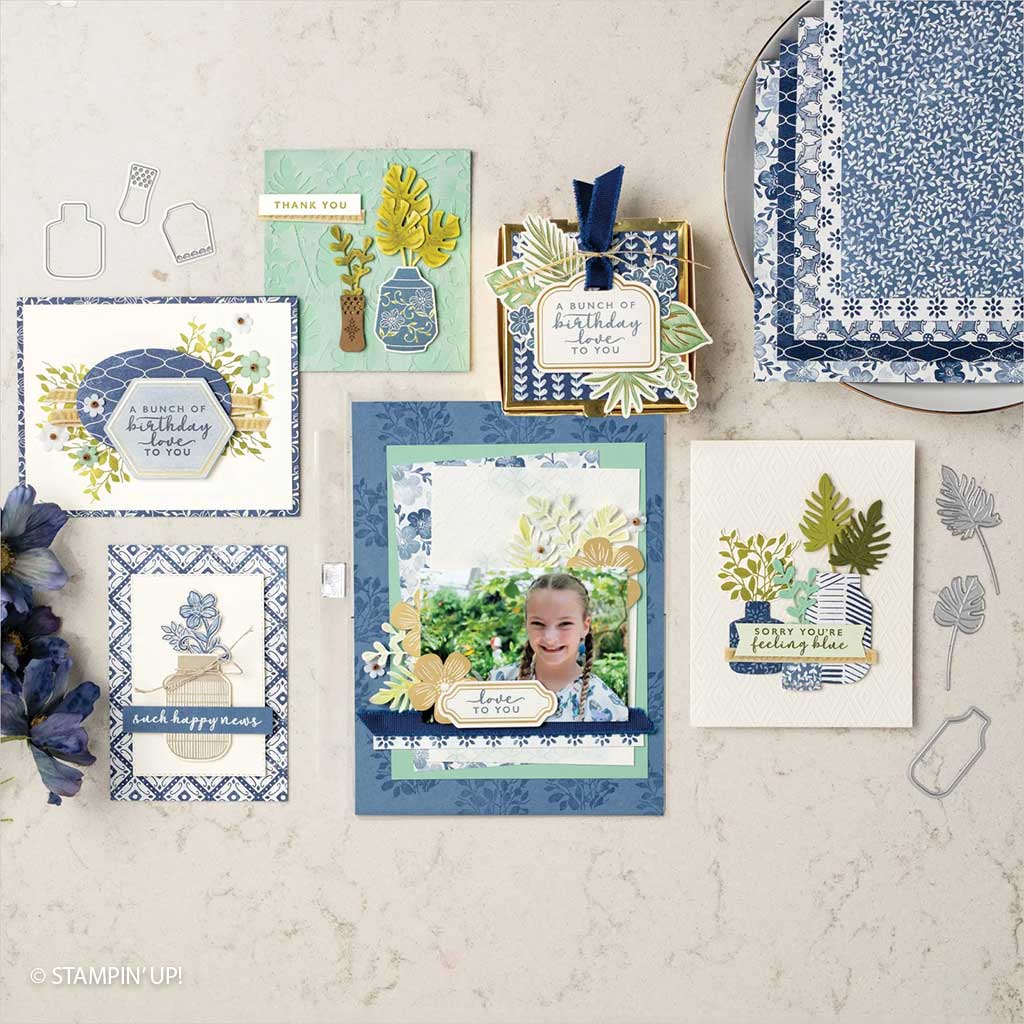
My eyes are naturally drawn to blues and greens, so when I first saw the Boho Indigo Medley, I was hooked. And a product medley takes all the guess work out out of it because everything coordinates just beautifully. The paper, die cuts, embossed paper, ribbon and adorable paper flowers are all ready to be used together. All I had to do was choose a layout, cut the paper, stamp the sentiments and voila! A beautiful card. It was so easy I made two using the same layout and different elements.
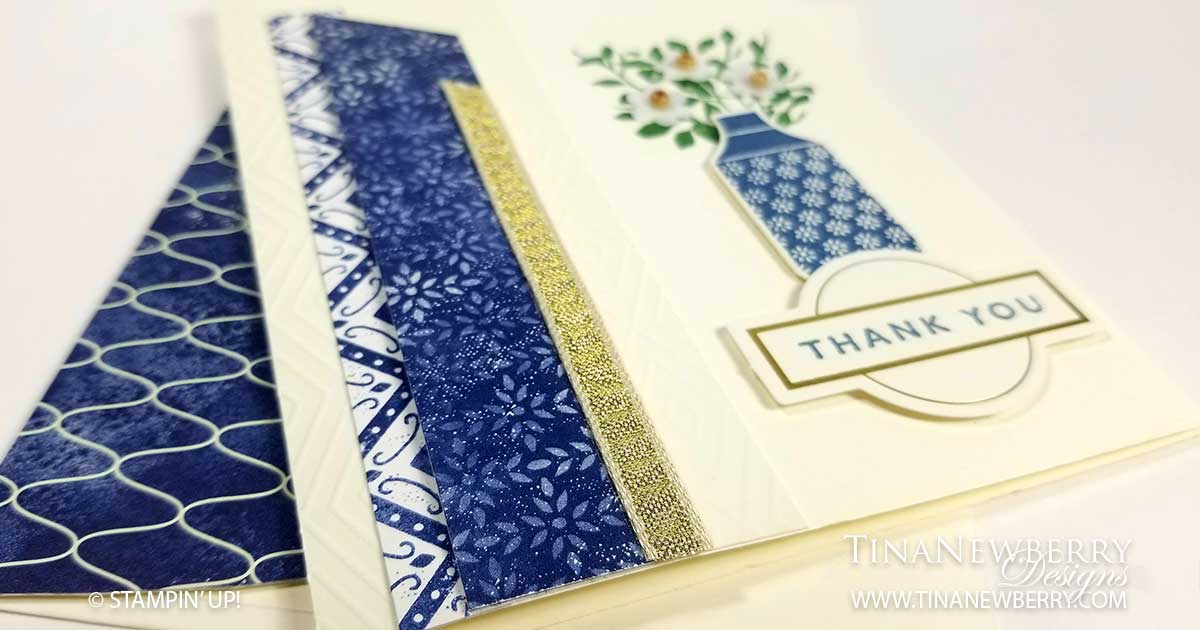
Full list of supplies needed, listed below. A die cutting machine is needed for this card. Card Base: Misty Moonlight Cardstock 5 1/2″ h x 8 1/2″ w folded to 4 1/4″ h x 5 1/2″ w. Background: Boho Indigo DSP 4″ h x 5 1/4″ w Embossed Layer: Boho Indigo Embossed Sheet 3″ h x 4″ w Sentiment Layer: Boho Indigo Die Cut Inside Layer: Very Vanilla Cardstock 5 1/4″ h x 4″ w
Let’s Create
Affix all stamps to Acrylic Blocks.
Fold the Card Base in half using a Bone Folder to sharpen the crease.
Attach the Background with Stampin’ Dimensionals.
Stamp two vases in Misty Moonlight Ink and Die Cut.
Die Cut three more vases from Boho Indigo Designer Series Paper.
Attach two to the Embossed Layer with Stampin’ Dimensionals and attach three with Stampin’ Seal.
Wrap ribbon around the Embossed Layer and attach on the back with Tear & Tape.
Stamp the Sentiment in Misty Moonlight ink on the Die Cut Banner Tag and attach with Stampin’ Dimensionals.
Attach the Embossed Layer with Stampin’ Dimensionals.

")


")