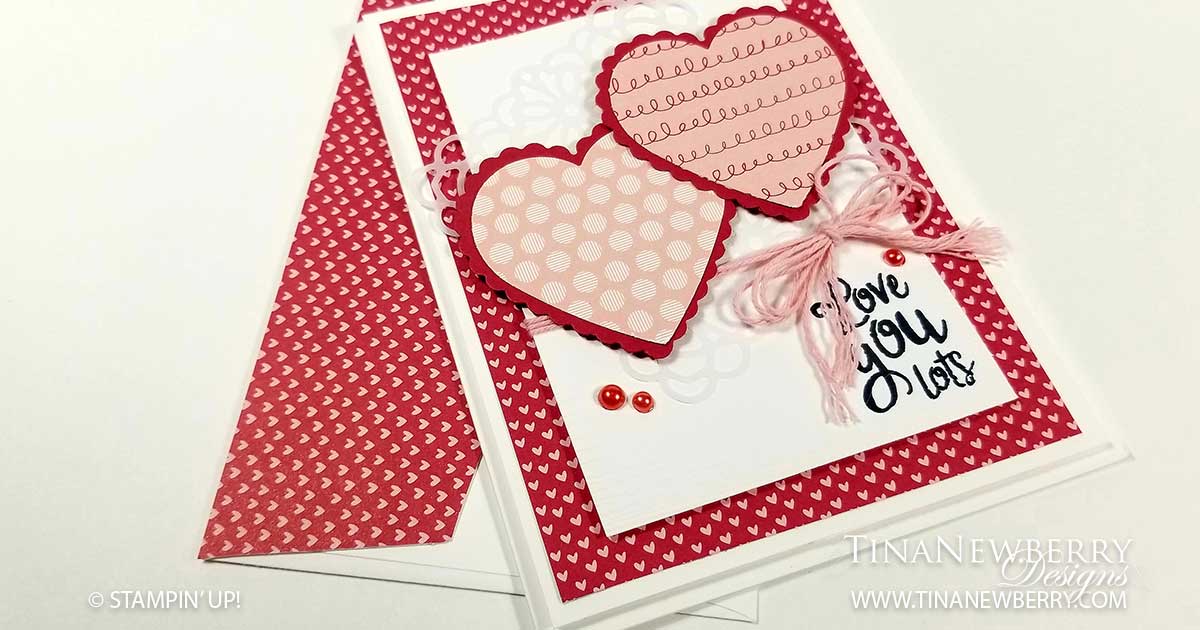
Love You Lots

The whimsical swirls and cute little hearts from the Snail Mail Designer Series Paper were made for a Valentine’s Card. Paired with a Blushing Bride polka dot piece of DSP from the Subtles DSP Pack and a Vellum Doily and this card came together pretty quickly. I do recommend stamping your sentiment BEFORE embossing the white background piece, but hey it came out all right. LOL.

Full list of supplies needed, listed below. A die cutting machine is needed for this card.
Card Base: Basic White Thick Cardstock 8 1/2 h” x 5 1/2″ w folded to 5 1/2″ h x 4 1/4″ w.
Solid Background: Basic White Cardstock 5 1/4″ h x 4″ w
Patterned Background: Snail Mail DSP 5″ h x 3 3/4″ w
Sentiment Layer: Basic White Cardstock 4″ h x 3″ w
Scalloped Hearts: Real Red Cardstock scraps
Patterned Hearts: Subtles DSP and Snail Mail DSP scraps

  1. Affix all stamps to Acrylic Blocks.
  2. Fold the Card Base in half using a Bone Folder to sharpen the crease.
  3. Attach the Patterned Background to the Solid Background with Stampin’ Seal and then attach to the Card Base with Stampin’ Dimensionals.
  4. Stamp the Sentiment on the Sentiment Layer using Tuxedo Black Memento Ink and then run through the Stampin’ Cut & Emboss Machine with the Subtle Embossing Folder.
  5. Attach a Square Vellum Doily to the Sentiment Layer and then wrap a double strand of Blushing Bride Twine around the Sentiment Layer and tie a bow.
  6. Attach the Sentiment using Stampin’ Dimensionals.
  7. Punch the two Patterned Hearts and the two Scalloped Hearts and layer using Stampin’ Seal. Attach both layered Hearts using Stampin’ Dimensionals.
  8. Use the Real Red Light Stampin Blend to color the Pearls and then add to the card.
  9. Decorate the Inside Layer and attach.
  10. Decorate the envelope.
  11. Adorbs!! Get this one in the mail. Valentine’s Day is coming soon!

Shopping List

Recommended Stamper’s Toolkit ❤


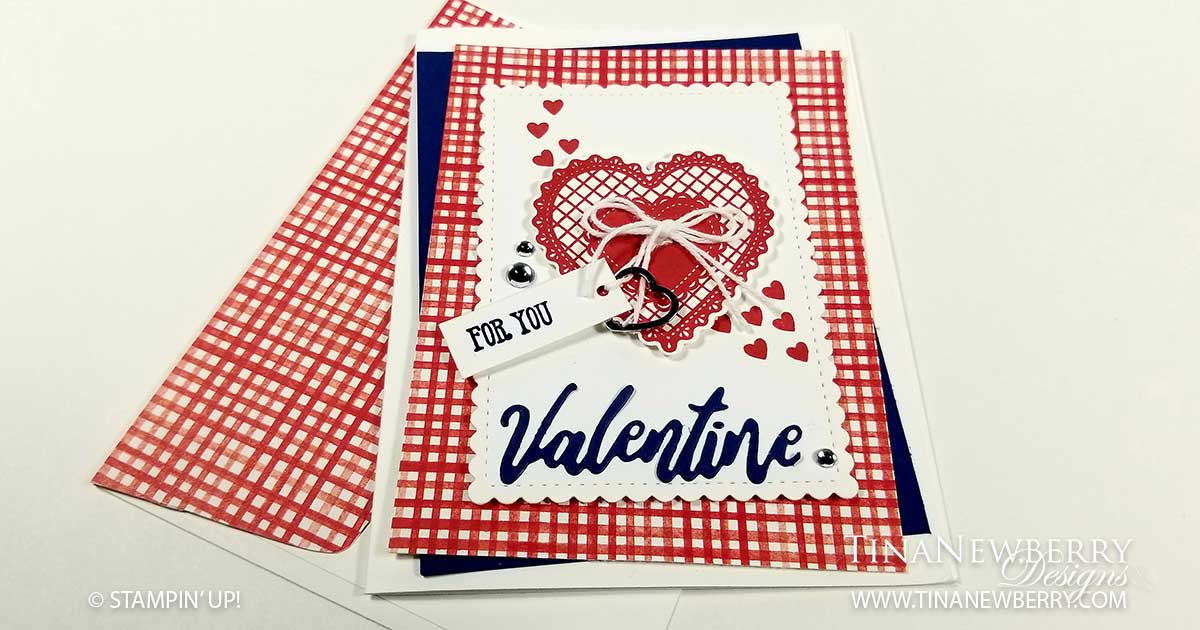
For You Valentine

More hearts and bling! It’s easy to get lost in pinks and reds for Valentine’s cards. I was going for not only a patriotic card, but also something a little less girly. Mission accomplished!

Full list of supplies needed, listed below. A die cutting machine is needed for this card.
Card Base: Basic White Thick Cardstock 8 1/2 h” x 5 1/2″ w folded to 5 1/2″ h x 4 1/4″ w.
Background (2): Night of Navy Cardstock and Berry Blessings DSP 5″ h x 3 3/4″ w
Scalloped Rectangle:
Basic White trimmed to 4″ h x 3″ with the Stitched So Sweetly Dies
Sentiment Layer: Basic White Cardstock 1/2″ h x 1 1/4″ w
Inside Layer: Basic White Cardstock 5 1/4″h x 4″w

  1. Affix all stamps to Acrylic Blocks.
  2. Fold the Card Base in half using a Bone Folder to sharpen the crease.
  3. Attach the two Background pieces using Stampin’ Seal.
  4. In Poppy Parade ink, stamp the small Hearts on the Scalloped Rectangle.
  5. Attach Adhesive Sheets to Night of Navy Cardstock and die cut Valentines from the Word Wishes Dies. Use Paper Snips to cut off the S.
  6. Attach Valentine to the Scalloped Rectangle and then attach Scalloped Rectangle to the card using Stampin’ Dimensionals.
  7. Stamp the Lacy Heart in Poppy Parade ink and Punch with the Scalloped Heart Punch. Attach with Stampin’ Dimensionals.
  8. Stamp For You on the Sentiment Layer with Night of Navy Ink. Use the Label Me Fancy Punch to add a hole.
  9. String a piece of Baker’s Twine through the Sentiment and add a Heart Charm. Attach the Sentiment to the Heart with a bit of Stampin’ Seal on the corner and attach the Baker’s Twine with a Mini Glue Dot.
  10. Tie a double string bow from Baker’s Twine and attach over the Glue Dot from the Sentiment twine.
  11. Sprinkle on some Clear Epoxy Droplets.
  12. Decorate the Inside Layer and attach.
  13. Decorate the envelope.
  14. That’s it! Now put it in the mail to someone special.

Shopping List

Recommended Stamper’s Toolkit ❤


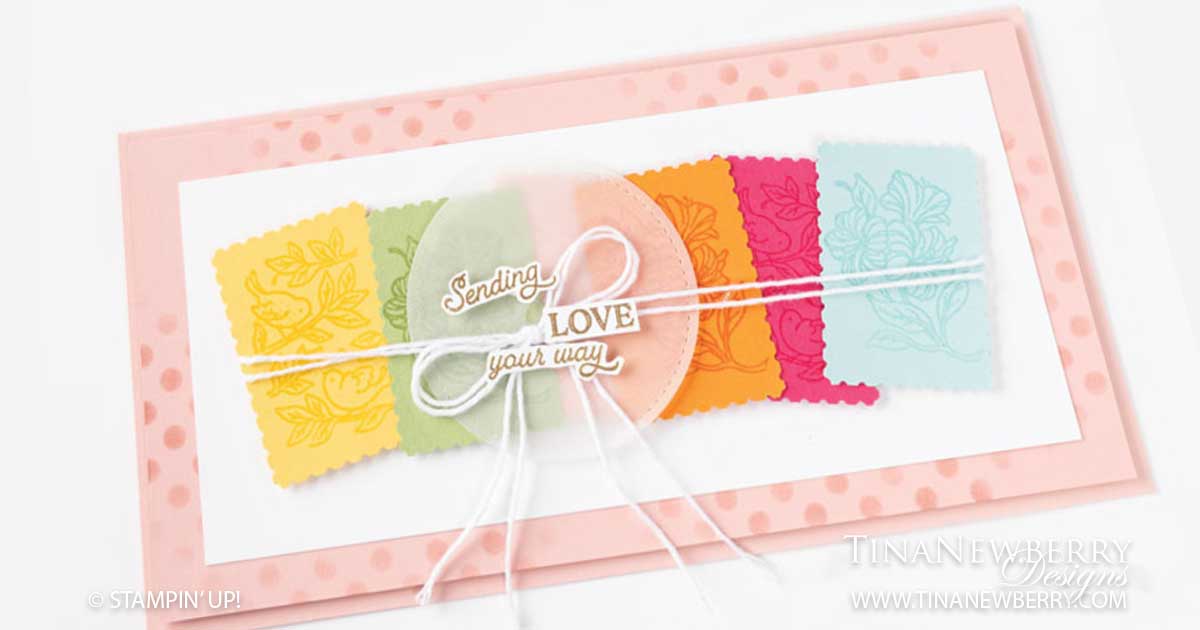
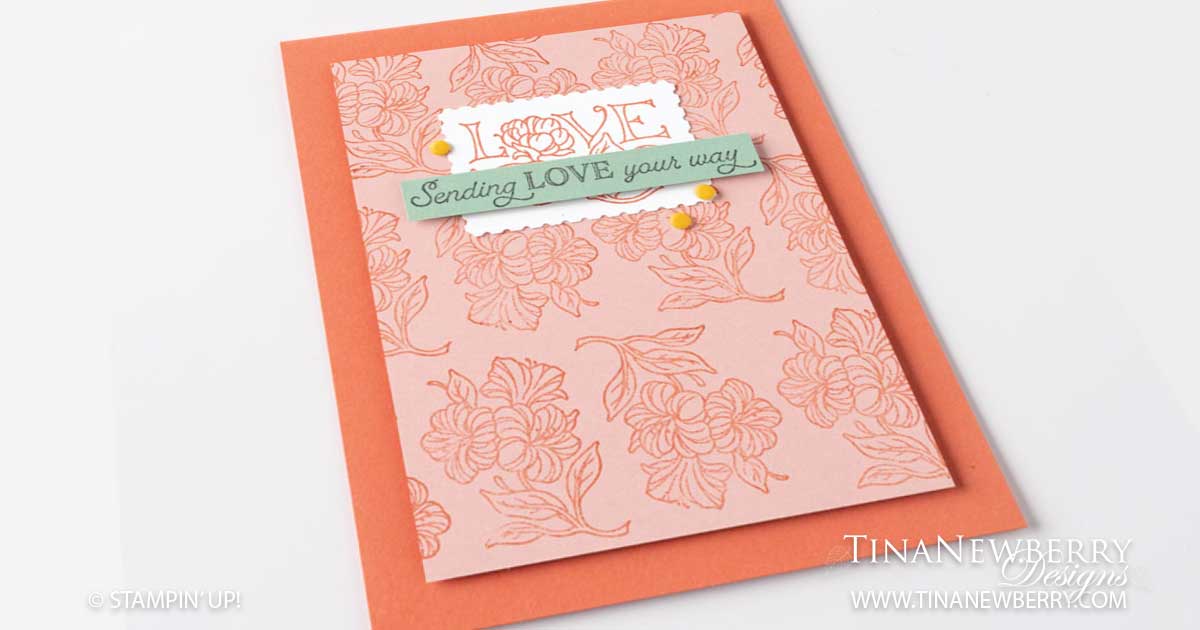
Sending Love Your Way

Except for a few Resin Dots, this adorable card is just stamps, ink and paper. I love the color combo and the random stamped background. Quick and easy.

Full list of supplies needed, listed below.
Card Base: Calypso Cardstock 4 1/4 h” x 11″ w folded to 5 1/2″ h x 4 1/4″w.
Background: Blushing Bride 5″ h x 3 3/4″ w.
Decorative Love Layer: 
Whisper White Cardstock scrap.
Sentiment: Mint Macaron Cardstock scrap.
Inside Layer: Basic White Cardstock 4″ h x 5 1/4″ w.

  1. Affix all stamps to Acrylic Blocks.
  2. Fold the Card Base in half using a Bone Folder to sharpen the crease.
  3. Stamp the floral image repeatedly in Calypso Coral ink on the Background Layer.
  4. Stamp the “Love” image in Calypso Coral ink on a scrap piece of Whisper White Cardstock and then punch it out using the Rectangular Postage Stamp Punch.
  5. Adhere the Decorative Love Layer to the Background using Stampin’ Seal.
  6. Stamp the sentiment in Basic Gray ink on a scrap of Mint Macaron Cardstock. Trim to desired size.
  7. Adhere the sentiment to the Background using Stampin’ Dimensionals.
  8. Add Resin Dots.
  9. Decorate the Inside Layer and attach.
  10. Decorate the envelope.
  11. Quick, easy and SO CUTE! Now send it to someone special.

Shopping List

Recommended Stamper’s Toolkit ❤