HBD for the Boys

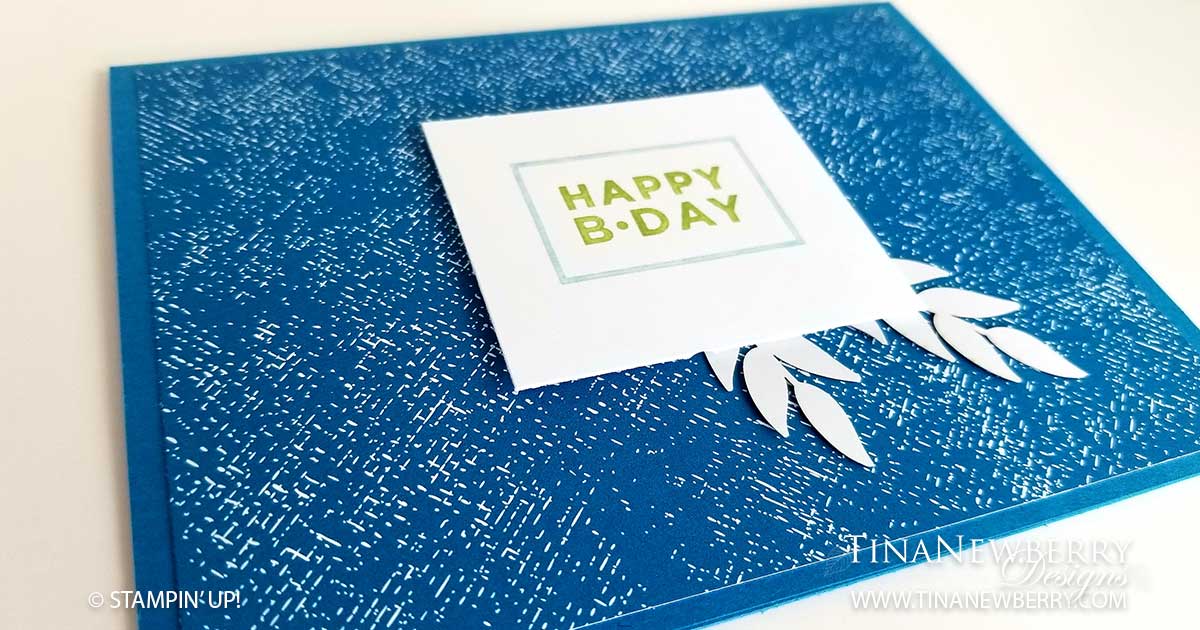
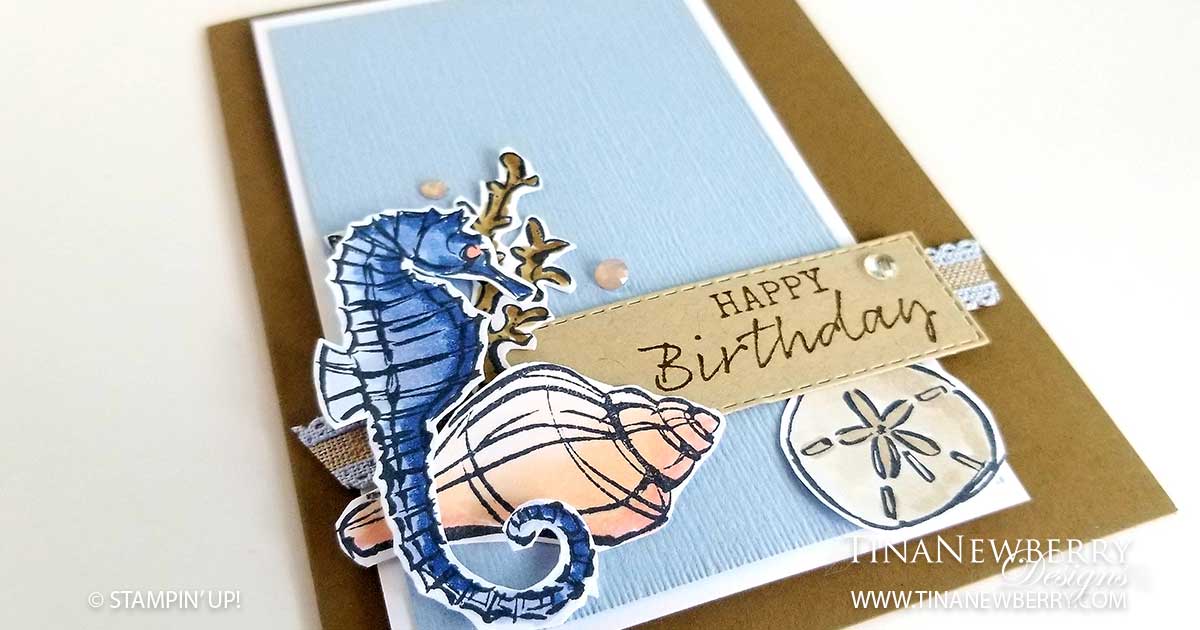
This one’s for the boys! This super simple, cute card took me just 10 minutes to make. I used my resources with the printed paper, some markers and the white side of the Forever Greenery Gold Foil Die Cuts. The Happiest of Birthdays Stamp Set pulled it all together. Now, if only I could stamp straight! LOL.

Full list of supplies needed, listed below.
Card Base: Pacific Point Cardstock 8 1/2 h” x 5 1/2″ w folded to 4 1/4″ h x 5 1/2″ w.
Background: Brights DSP 4″ h x 5 1/4″ w
Sentiment Layer: 
Whisper White Cardstock 2″ h x 2 1/4″ w

  1. Affix the stamp to an Acrylic Block.
  2. Fold the Card Base in half using a Bone Folder to sharpen the crease.
  3. Attach the Background Layer to the Card Base using Stampin’ Seal.
  4. Use the Stampin’ Write Markers to color the Sentiment. When you are done, huff on the stamp to re-wet it and stamp the Sentiment onto the Sentiment Layer.
  5. Affix the leaves or sprigs of your choice with Multipurpose Liquid Glue or Stampin’ Seal.
  6. Attach the Sentiment Layer to the Card using Dimensionals
  7. Ta Da! Who will you send it to?

Learn the Markering Technique

The products listed in this video are out of date, but the techniques work just as well on current Stampin’ Write Markers.

Product List

Recommended Stamper’s Toolkit ❤


It’s Your Day!

Isn’t this card cheery? Hard to believe dandelions are weeds when they are so pretty. I copied this card straight from the 2020-20201 Annual Catalog. You can find it on page 103. I was intrigued to figure out how the designer made the dandelions. I thought for sure she inked her embossing folder. Boy was I wrong! She embossed vellum. SO much easier and very pretty. The original artist used the Watercolor Pencils to color the stems. I don’t have those so I first tried the Stampin’ Write Markers. I didn’t love that look, as expected it was streaky. I had better luck with the Stampin’ Blend, but I would like to try the Watercolor Pencils. (Add those to my list! LOL). I tried very hard to at least change up the colors from what was used in the catalog, but in the end I really liked the original color scheme, so that’s what I went with. I love it!

Full list of supplies needed, listed below. A die cutting/embossing machine is needed for this project.
Card Base: Seaside Spray 8 1/2 h” x 5 1/2″ w folded to 4 1/4″ w x 5 1/2″ h.
Background: Vellum Cardstock 5 1/4″ h x 4 ″ w
Sentiment Layer: 
Whisper White Cardstock 1″ h x 3″ w
Ribbon: 5″ Denim Ribbon
Thread: 3″ Linen Thread

  1. Affix the stamp to an Acrylic Block.
  2. Fold the Card Base in half using a Bone Folder to sharpen the crease.
  3. Emboss the Vellum with the Dandelion 3D Embossing Folder.
  4. Color the back of the stems on the Embossed image with the light Old Olive Blend.
  5. Lay the Ribbon in place along the front of the card and attach the ends to the back of the Vellum Background Layer using Stampin’ Seal.
  6. Adhere the Vellum Background to the Card Base, by adding Stampin’ Seal strategically so it doesn’t show through.
  7. Stamp the Sentiment in Bumble Bee ink on the Sentiment Layer.
  8. Adhere the Sentiment Layer using Stampin’ Dimensionals.
  9. Tie a bow with the Linen Thread and attach with a Mini Glue Dot.
  10. Affix the Misty Moonlight Enamel Dots to the card.
  11. Ta Da! That was easy. Who will you send it to?

Product List

Recommended Stamper’s Toolkit ❤


Thinking of You Seaside

Every time my son, Logan, goes to the Gulf of Mexico he loves diving for sand dollars. His treasures are so beautiful! I enjoyed the walk down memory lane making this cute card with the Seaside Notions stamp Set.

Cutting Dimensions

Full list of supplies needed, listed below. A die cutting machine is needed for this card.
Card Base: Whisper White Thick 8 1/2″ x 5 1/2″ folder to 4 1/4″ h x 5 1/2″ w
Background Matte: Coastal Cabana Cardstock 4”h x 5 1/4″ w
Background Layer: Subtles Designs Series Paper 3 7/8″ h x 4 3/8″ w
Decorative Background: Subtles Designs Series Paper 1 3/4″ h x 4 3/8″ w

Instructions

  1. Affix all stamps to Acrylic Blocks.
  2. Fold the Card Base in half using a Bone Folder to sharpen the crease.
  3. Stamp the Sand Dollar images using Coastal Cabana Ink.
  4. Die cut the Sand Dollars using Layering Squares.
  5. Use Seal Adhesive to affix:
    1. The Sand Dollar Squares to the Decorative Background.
    2. The Decorative Background to the Background Layer.
    3. The Crinkle Ribbon to the Background Layer.
    4. The Background Layer to the Background Matte.
    5. The Background Matte to the Card Base.
  6. Stamp off the Sand Stamp with Coastal Cabana Ink and Stamp the Sentiment with Bermuda Bay Ink over the Sand Stamp.
  7. Die Cut the Sentiment with the Stitched So Sweetly Dies.
  8. Affix the Sentiment with Stampin’ Dimensionals.
  9. You did it! Go ahead, make someone’s day!

Product List

Stamper’s Toolkit

Design inspired by Robin Messenheimer.

Seaside Happy Birthday

Whether it’s at the Atlantic Ocean in New Hampshire or the Gulf of Mexico in Florida, we sure have had some fun at the beach. I don’t get to the beach as much as I would like to. Nowadays I enjoy my sea adventures of the aquarium variety and with Seaside Notions, of the stamping and card making variety.

Cutting Dimensions

Full list of supplies needed, listed below. An embossing machine is needed for this card.
Card Base: Soft Suede 8 1/2″ x 5 1/2″ folder to 5 1/2″ h x 4 1/4″ w
Background Matte: Whisper White Cardstock 5″ h x 3 1/2” w
Background Layer: Seaside Spray Cardstock 4 3/4″ h x 3 1/4” w
Ribbon: 4″ w

Instructions

  1. Affix all stamps to Acrylic Blocks.
  2. Fold the Card Base in half using a Bone Folder to sharpen the crease.
  3. Emboss the Background Layer with the Subtle Embossing Folder.
  4. Affix the Background Layer to the Background Matte with Stampin’ Seal.
  5. Adhere the Background Matter to the Card Base with Stampin’ Dimensionals.
  6. Adhere the Ribbon with Tear & Tape.
  7. Stamp the Sentiment with Soft Suede Ink.
  8. Adhere the Sentiment with Stampin’ Dimensionals.
  9. Stamp the Images with the Tuxedo Memento Ink.
  10. Color the Stamped Images with the Stampin’ Blends.
  11. Use scissors to cut the Stamped Images.
  12. Adhere the Images with Stampin’ Seal and Stampin’ Dimensionals.
  13. So cute! Now send it to someone special.

Product List

Stamper’s Toolkit

Design inspired by Helene den Breejan.