You Are Amazing, That’s a Fact

I took a SIP for this card. I used only Stamps, Ink and Paper to make this beauty! I wasn’t really sure how it would come out, honestly, but I LOVE it. Such a simple little card with a lot of heart. I made ten of these in about thirty minutes and I can’t wait to send them to my military pen pals.

Cutting Dimensions

Full list of supplies needed, listed below.
Card Base: Old Olive Cardstock 8 1/2″ x 5 1/2″ folder to 4 1/4″ x 5 1/2″ w
Background Layer: Whisper White Cardstock 4”h x 5 1/4″ w

Instructions

  1. Affix all stamps to Acrylic Blocks.
  2. Fold the Card Base in half using a Bone Folder to sharpen the crease.
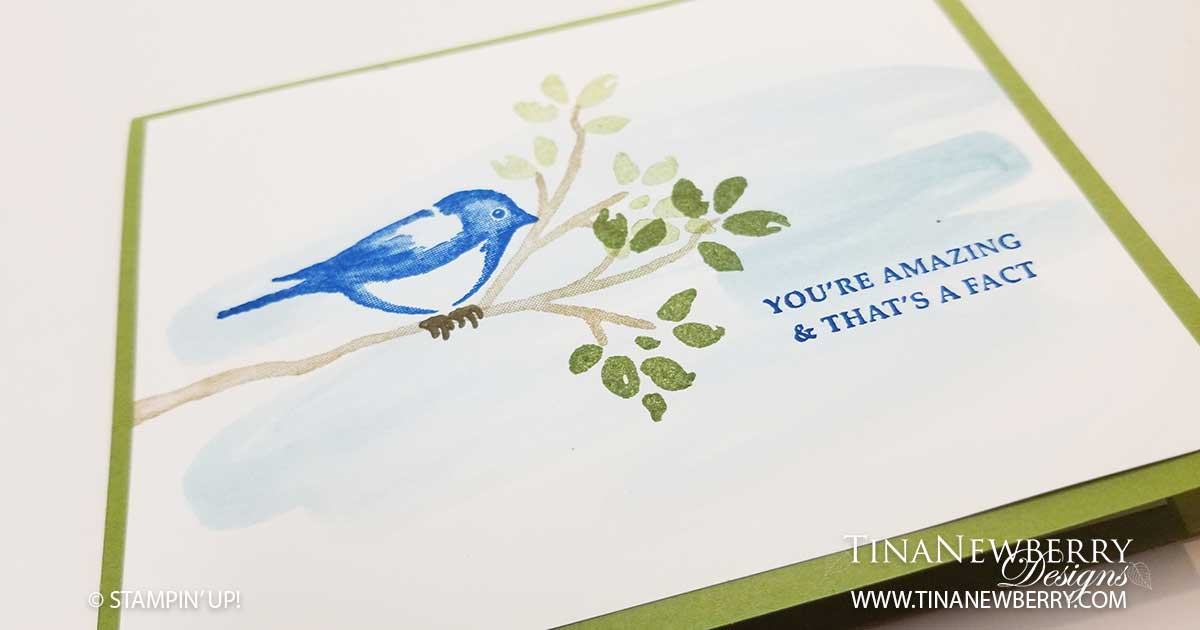
  3. Use a Water Painter to lay down a light Balmy Blue Background Wash on the Background Layer. Be careful not to over-water or the Cardstock will pill.
  4. Stamp the branches in Crumb Cake Ink.
  5. Stamp the Leaves twice with Old Olive Ink without re-inking in between.
  6. Stamp the Bird Feet in Soft Suede Ink and the Bird in Pacific Point Ink.
  7. Stamp the Sentiment in Pacific Point Ink.
  8. That’s It! I made 10 of these adorable cards and I’m sending mine to my military pen pals. Who are you going to send it to?

Product List


Stamper’s Toolkit


Hello There

When I saw a card similar to this, I just HAD to make my own version. I love the color combination and the Tin Tile embossed Vellum is just stunning! Plus, when I last lived in New Hampshire, the desk in my home office overlooked a southeast facing window and this card brings back memories to the days when cute little yellow finches would entertain the cats and I at the feeder on the front lawn. This bird is finch-like to me, but it could also be a blue bird with some Balmy Blue Ink or a Robin.

Cutting Dimensions

Full list of supplies needed, listed below. A die cutting machine is needed for this card.
Card Base: Pool Party Cardstock 8 1/2 h” x 5 1/2″ w folded to 5 1/2″ w x 4 1/4″ h.
Background Rectangles (2): Basic Grey and So Saffron Cardstock. Die cut with the largest Rectangle Die from the Stitched Rectangles Dies. Then re-align the die on the short edges to create a shorter rectangle about 1 1/2 to 1 1/4″ h.
Vellum Layer: 2 3/4″ h x 4″ w and embossed with the Tin Tile Embossing Folder.
Sentiment Layer: Whisper White Cardstock die cut with the 3/4″h x 2 3/4″ Stitched Rectangle Die.
Linen Thread: About 9 or 10″

Instructions

  1. Affix all stamps to Acrylic Blocks.
  2. Fold the Card Base in half using a Bone Folder to sharpen the crease.
  3. Use Stampin’ Seal to adhere the Background Rectangles to the Card Base.
  4. Use Stampin’ Seal to adhere the Vellum Layer to the Card.
  5. Coil the Linen Thread and affix to the Card with Glue Dots.
  6. Use Basic Gray Ink to stamp the Sentiment on the Sentiment Layer.
  7. Adhere the Sentiment Layer to the Card with Dimensionals.
  8. On scrap Whisper White Cardstock stamp the bird filler in So Saffron Ink and then stamp the bird outline in Tuxedo Black Memento Ink. Die cut the bird out.
  9. Die cut the Branch with Pear Pizzaz Cardstock.
  10. Use Stampin’ Seal or Fine Tip Liquid Glue to adhere the Branch to the card.
  11. Use Stampin’ Seal to adhere the Bird to the Card.
  12. Lovely! Now send it to someone!

Product List


Stamper’s Toolkit


Design inspired by Chelsey Hart Christensen.

From My Heart

Today I’m taking you on an adventure into the pages of the new Stampin’ Up! catalog. There are so many beautiful ideas in the catalog it seems a shame not to make and send them and CASE-ing (Copy and Share Everything) the catalog gets me to PaperCrafting faster. I’m all about that. This one brings us all the way back to page 168, where the Heart Punch Pack is found and this card uses both of these fun punches. I’m also on a mission this week to prove to myself that hearts aren’t just for Valentine’s. Enjoy!

Cutting Dimensions

Full list of supplies needed, listed below.
Card Base: Sahara Sand Cardstock 8 1/2 h” x 5 1/2″ w folded to 4 1/4″ w x 5 1/2″ h
Background: Flowers for Every Season DSP 3″ h x 4 1/4″ w
Scalloped Heart: Shaded Spruce Cardstock
Plain Heart: Whisper White Cardstock
Sentiment Layer: Whisper White Cardstock 1 1/4″ h x 1 1/2″ w
Arrow Layer: Flowers for Every Season DSP 3/4″ h x 3 1/2″ w

Instructions

  1. Affix all stamps to Acrylic Blocks.
  2. Fold the Card Base in half using a Bone Folder to sharpen the crease.
  3. Use Stampin’ Seal to adhere the Background to the Card Base.
  4. Punch the Scalloped Heart from the Shaded Spruce Card Stock.
  5. Stamp the Dotted Heart with Shaded Spruce ink on Whisper White Cardstock and punch out with the Plain Heart Punch.
  6. Use Stampin’ Seal to adhere the Plain Heart to the Scalloped Heart.
  7. Stamp the Arrow on the Arrow Layer using Bumblebee Ink.
  8. Use Stampin’ Seal to adhere the Arrow Layer to the Hearts.
  9. Stamp the Sentiment with Poppy Parade ink on the Sentiment Layer.
  10. Use Dimensionals to adhere the Sentiment to the Arrow and Hearts.
  11. Use Dimensionals to adhere the Hearts to the Card Base.
  12. Wow Quick & Easy! Who are you going to send it to?

Product List


Recommended Stamper’s Toolkit