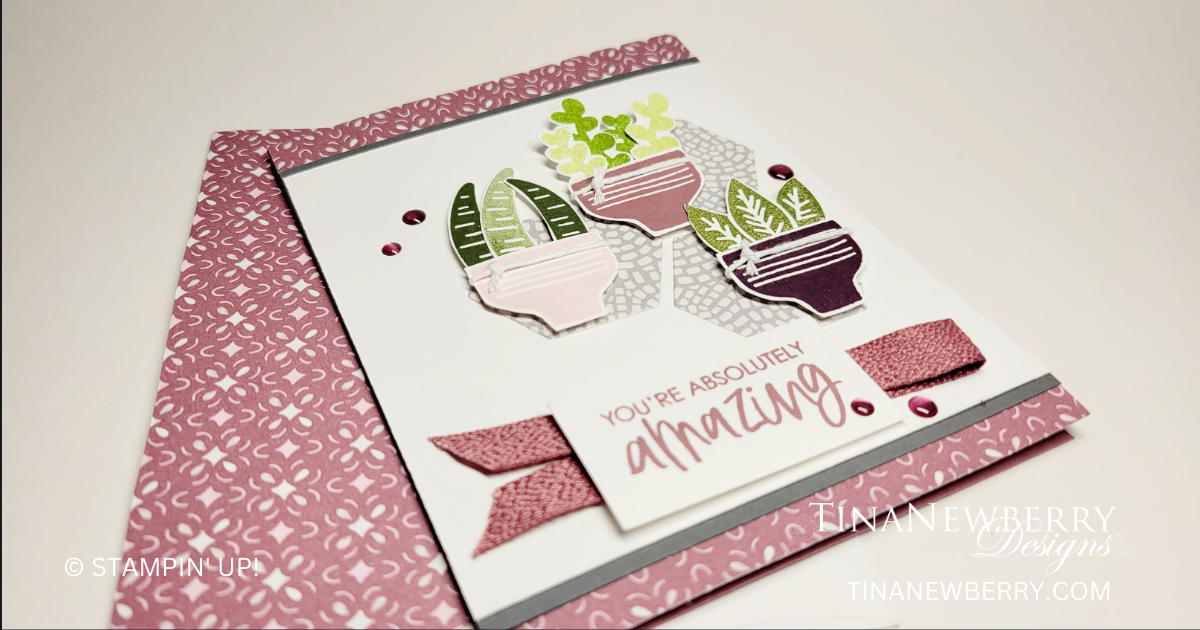
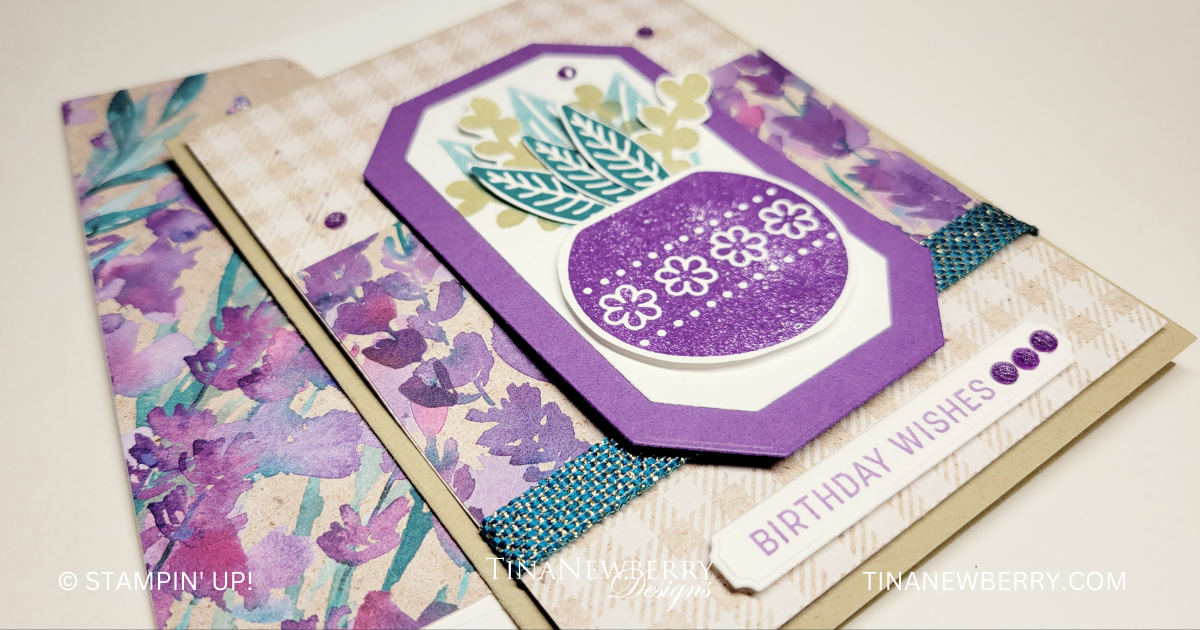
The Stampin’ Up! creative team is SO talented! Check out the stunning color combination used in the Perennial Lavender paper on this fun card eaturing the new Planted Paradise Stamp Set. This is a Reversibles™ set, giving you not only detailed stamps, but also stamps to fill in or to use to create shadows.
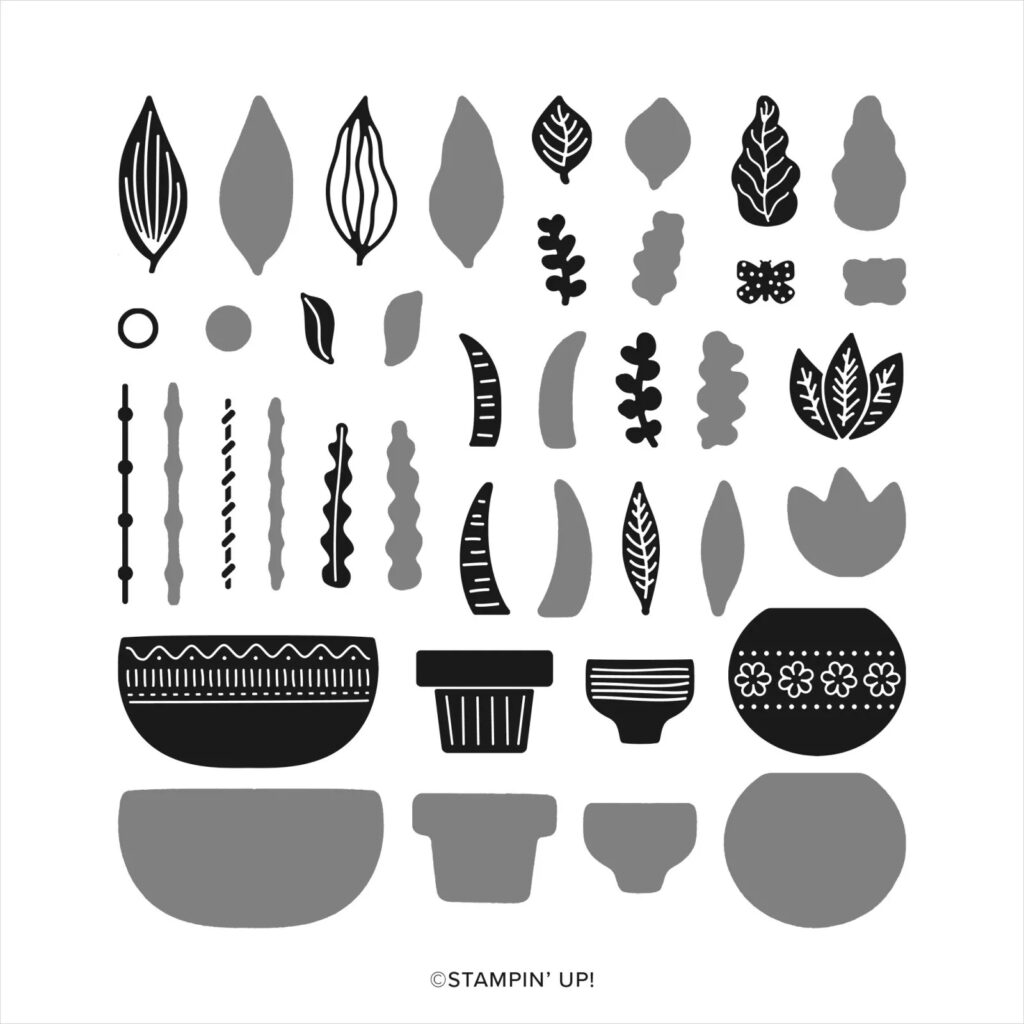
Calling all plant lovers: the Planted Paradise Stamp Set is for YOU! These organic shapes and relaxed details are sure to take your love for plants to the next level. Perfect for birthdays, wedding showers, and other festivities, you can stamp the vases in a row for a cool indoor potted plant paradise. Or drape the leaves over the vases and turn the vases into hanging baskets. You can even mix and match the side of the stamp you use for some extra foliage! The relaxed, natural designs of this stamp set will help you create cards, banners, gift tags, and other paper crafts that vibe with any space!
Measurements
Full list of supplies needed, listed below. A die cutting machine is needed for this card.
Crumb Cake Cardstock: 5 ½” h x 8 ½” w scored and folded at 4 ¼”
Gorgeous Grape Cardstock: scrap for die cut mat 4 ¼” h x 2 ¾” w
Basic White Cardstock:
5 ¼” x 4” (for inside)
3 ¾” h x 2 ¼” w scrap for die cut
Scraps for sentiment die cut, plants, and pot
Perennial Lavender Designer Series Paper (DSP):
5 1/4:” h x 4” w (gingham pattern)
2 ½” h x 4” w (flower pattern)
Let’s Create
Affix all stamps to Acrylic Blocks.
Fold the Card Base in half using a Bone Folder to sharpen the crease.
Attach the 2 ½” h x 4” w (flower pattern) to the 5 1/4:” h x 4” w (gingham pattern) with Stampin’ Seal.
Wrap Pretty Peacock and Gold ribbon around the bottom of the flower pattern paper and secure in the back with Tear N’ Tape.
Attach the DSP layers to the Card Base with Stampin’ Dimensionals.
On scrap Basic White cardstock, stamp:
The pot in Gorgeous Grape ink
Three thin leaves in Pretty Peacock ink
Two bulb stems in Crumb Cake.
The sentiment in Highland Heather ink.
Fussy cut the pot, leaves and stems and die cut the sentiment with the tag from the Sending Dies.
Die cut the Gorgeous Grape and Basic White panels from Countryside Corners Dies.
Create the potted arrangement:
On the Basic White die cut, arrange the pot, leaves, and stems.
Use a pencil to make a faint mark on the Basic White panel at the top of the pot.
Remove the pot, leaves, and stems.
Stamp off Pretty Peacock ink and stamp the three leaves on the panel.
Stamp two Crumb Cake bulb stems.
Use Mini Glue dots to attach the die cut leaves and stems.
Use Stampin’ Dimensionals to attach the pot.
Use Stampin’ Seal to attach the Basic White die cut panel to the Gorgeous Grape panel, then attach to the front with Stampin’ Dimensionals.
Use Stampin’ Dimensionals to attach the sentiment.
Sprinkle on some Purple Fine Shimmer Gems.
Stamp and decorate the remaining 5 ¼” x 4” Basic White cardstock and attach to the inside with Stampin’ Seal.
Decorate your envelope.
Stunning! Who will you send this birthday wish to?
Order online from the convenience of your own home or send me your order and I’ll take care of you. ❤ Either way, please use the host code ANTD9UHS. Order online AND, if your order is $50 or more using host code ANTD9UHS between now and the end of the month you’ll receive a free pack of embellishment as a THANK YOU gift from me. ❤ If your order is over $150, skip the host code, earn Stampin’ Rewards for free stuff yourself and I’ll still send you a free pack of embellishment as a THANK YOU gift from me. ❤
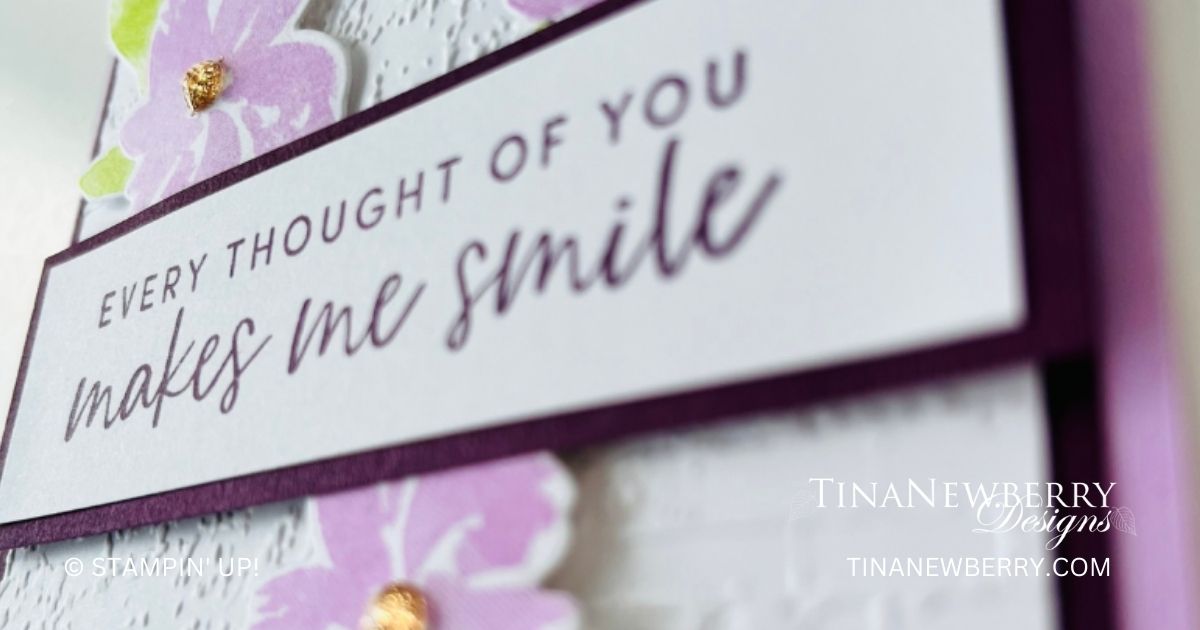
A sweet and simple design with an impactful sentiment. I love the exposed brick embossing folder on the background, but you could use any embossing folder from your stash or simply crumple the cardstock panel and flatten it out before adhering to the background. The photos show the dark layers as black, but they are Blackberry Bliss, which looks fabulous with Fresh Freesia. Let’s see what see what you make with this design. Join us at PaperCrafty Time on Facebook.
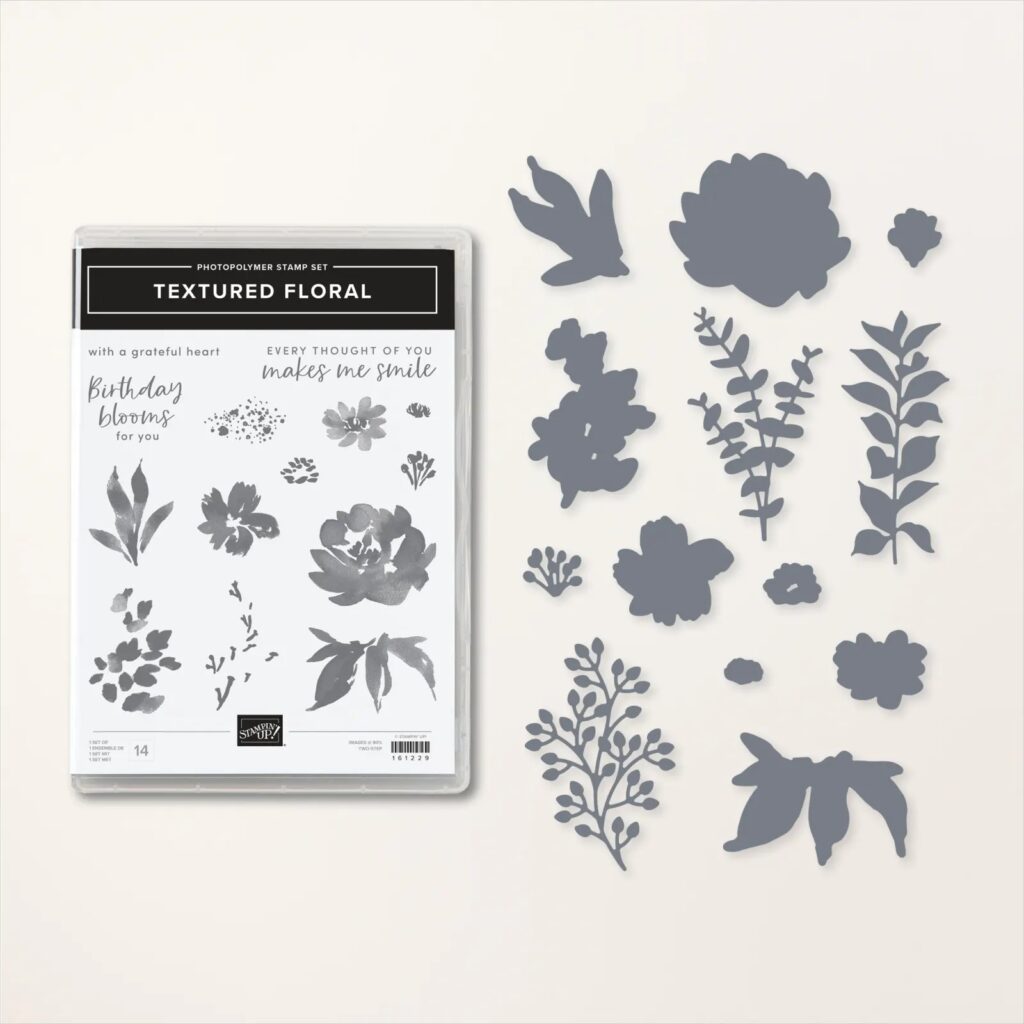
It’s flowers upon flowers in the bold, beautiful Textured Florals bundle. Use them to create projects for weddings, Mother’s Day, spring, summer, and so much more! See what you can do!
Measurements
Full list of supplies needed, listed below. A die cutting machine is needed for this card.
Card base – Fresh Freesia Cardstock: 5 ½” x 8 ½” scored at 4 ¼”
Blackberry Bliss Cardstock
4” x 5 ¼”
1 ¼” x 4”
Basic White Cardstock:
3 ¾” x 5”
1” x 3 ¾”
Scraps for stamping and die cutting
Let’s Create
Affix all stamps to acrylic blocks.
Fold and burnish card base using bone folder.
Add the Blackberry Bliss panel to the card front centering on all sides.
Use the Exposed Brick Embossing folder to emboss the White panel. Add it to the card front using Tear & Tape making sure to center on all sides.
Stamp the sentiment onto the strip of White using Blackberry Bliss ink making sure to center it on the strip
Glue the strip from Step 5 to the strip of Blackberry Bliss. Use dimensionals to add the strip to the card front centering it top to bottom and making sure the sides are even with the Blackberry Bliss panel on the card front.
Stamp the middle sized flower on the scrap of White using Fresh Freesia ink.
Stamp the small leaf pattern on the scrap of White using Lemon Lime Twist.
Use the coordinating dies to cut out the flower and leaf.
Using dimensionals add a flower with part of the petal tucked under the sentiment on the left hand top of the sentiment making sure the leaves do not extend beyond the card base. Add another flower using dimensionals to the top right hand side of the sentiment with a petal tucked under the strip. Add the last flower to the bottom of the sentiment using dimensionals so it matches the open space at the top of the sentiment strip. See photo above.
Add a Champagne Adhesive backed sparkle gem to the center of each flower.
Use the middle size flower and leaf stamp to decorate the inside of the card and envelope.
Order online from the convenience of your own home or send me your order and I’ll take care of you. ❤ Either way, please use the host code ANTD9UHS. Order online AND, if your order is $50 or more using host code ANTD9UHS between now and the end of the month you’ll receive a free pack of embellishment as a THANK YOU gift from me. ❤ If your order is over $150, skip the host code, earn Stampin’ Rewards for free stuff yourself and I’ll still send you a free pack of embellishment as a THANK YOU gift from me. ❤
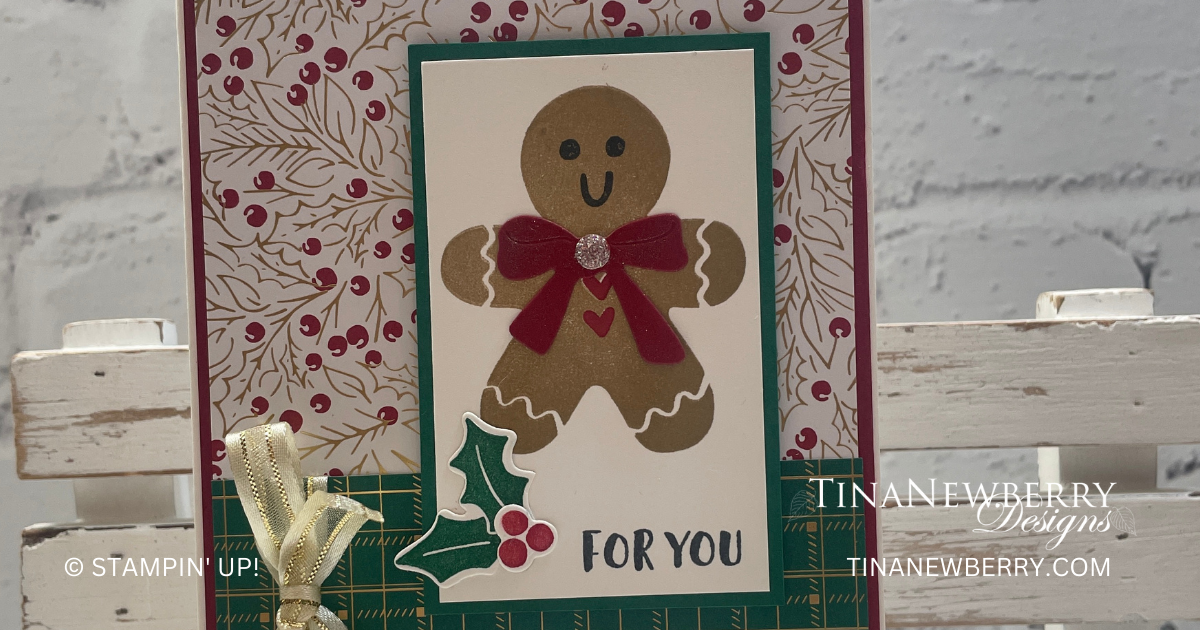
Such a cute little gingerbread boy! Sadly the dies that coordinate with the retiring Sending Cheer Stamp Set, have sold out, but don’t let that stop you from getting this adorable set. All of the shapes are easy to cut with your scissors. Get this before it’s gone for good.
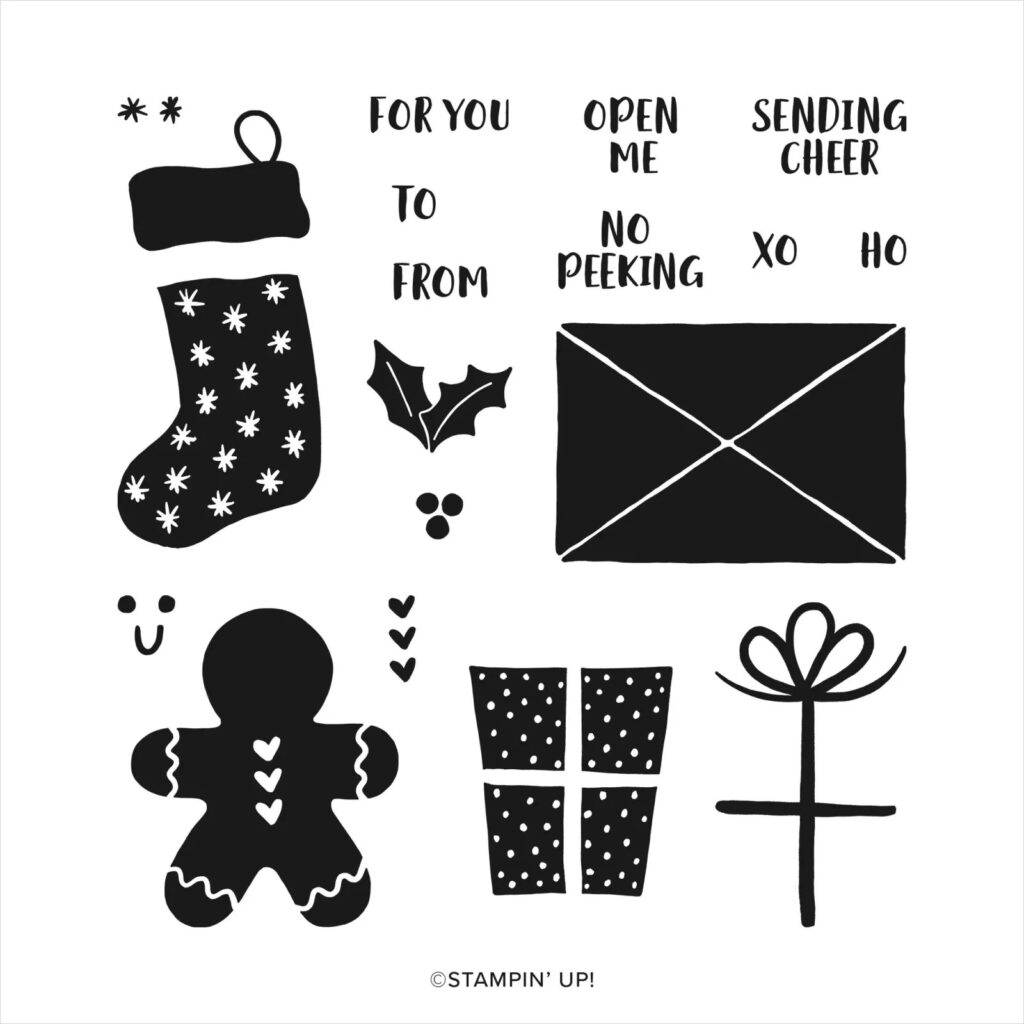
This holiday season, make your own gift tags and cards with the Sending Cheer Stamp Set. Stamp an image, then punch or die cut it and you have a tag—it’s quick and easy! But quick and easy doesn’t mean boring. Stamp a gift image in one color, then stamp a bow image on it in a bright ink for fun contrast. Or stamp a stack of stocking images and top each with a different color cuff. And don’t forget cards! Just imagine how festive these images will look on handmade cards.
Measurements
Full list of supplies needed, listed below. A die cutting machine is needed for this card.
Basic White
5 ½” x 8 ½” scored and folded on the long-side at 4 ¼”
3 ¼” x 2”
1 ½” x 1 ½” (for stamping and die cutting holly leaves and berries)
Cherry Cobbler
4 ⅛” x 5 ⅜”
2” x 2” (for die cutting bow)
Shaded Spruce
2 ⅛” x 3 ⅜”
Joyful DSP
5 ¼” x 4” (Gold Holly Leaves with Cherry Cobbler Berries print)
4” x 1 ¼” (Shaded Spruce & Gold Plaid)
Let’s Create
Affix all stamps to Acrylic Blocks.
Fold the Card Base in half using a Bone Folder to sharpen the crease.
Using Crumb Cake ink, stamp the Gingerbread Boy towards the top of the 3 ¼” x 2” piece of Basic White. Using Black Memento stamp the face onto the Gingerbread Boy, and using Cherry Cobbler ink, stamp the hearts onto the Gingerbread Boy.
Using Shaded Spruce ink pad, stamp the holly leaves onto the 1 ½” x 1 ½”. Using the Cherry Cobbler ink pad, stamp the holly berries. Die cut these pieces using the coordinating dies from the Sending Cheer die set.
Using the 2” x 2” and the gift bow die from the Sending Cheer die set, cut the bow out. You’ll need to cut the bow apart from the ribbon.
Attach the bow to the Gingerbread Boy.
Using Black Memento stamp the sentiment toward the bottom right of the Basic White stamped piece.
Adhere the holly leaves and berries to the right of the sentiment.
Using a piece of Gold & Vanilla Satin Edged Ribbon, tie a bow toward the right side of the Shaded Spruce Designer Series Paper.
Assembling the card: Adhere the Cherry Cobbler 5 ⅜” x 4 ⅛” cardstock to the folded card base.
Adhere the 5 ¼” x 4” piece of Designer Series Paper to the card. Adhere the Shaded Spruce Designer Series Paper toward the lower edge of the card leaving about ½” at the bottom.
Using Dimensionals, adhere the Gingerbread Boy Panel to the card off centered toward the right just a bit.
Add a touch of Wink of Stella to the bow and the holly leaves and berries.
Place an Adhesive Backed Glitter Sequin to the center of the bow.
Be sure to decorate the inside of the card as well as the envelope before sending off to someone special!
Order online from the convenience of your own home or send me your order and I’ll take care of you. ❤ Either way, please use the host code ANTD9UHS. Order online AND, if your order is $50 or more using host code ANTD9UHS between now and the end of the month you’ll receive a free pack of embellishment as a THANK YOU gift from me. ❤ If your order is over $150, skip the host code, earn Stampin’ Rewards for free stuff yourself and I’ll still send you a free pack of embellishment as a THANK YOU gift from me. ❤
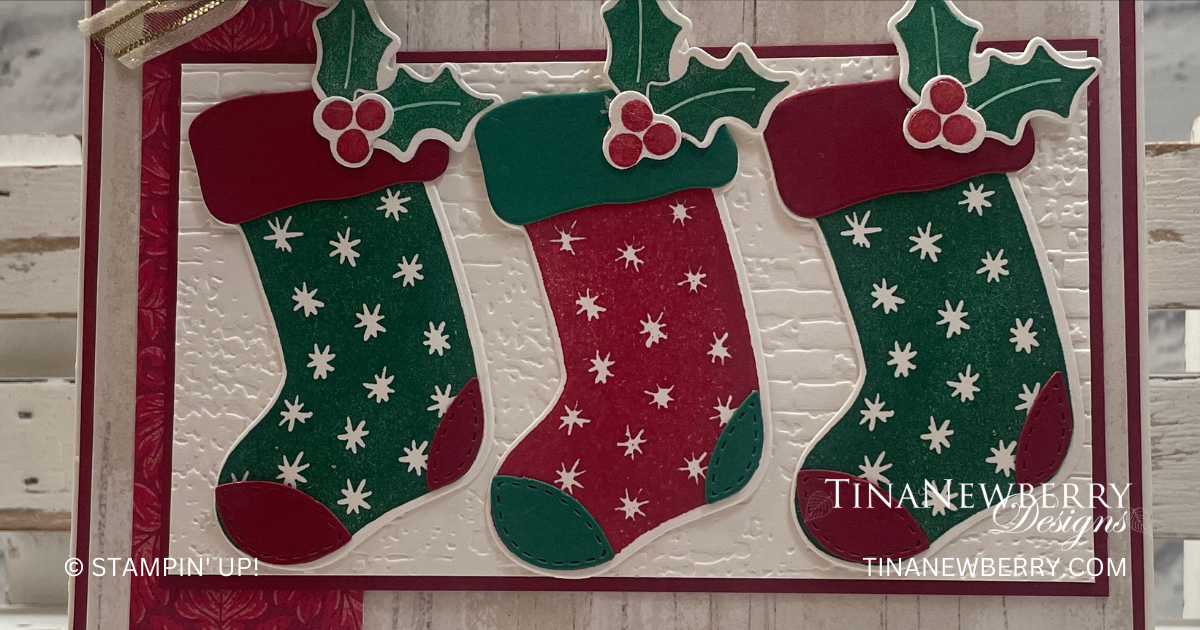
Make custom Christmas stockings with the Sending Cheer Stamp Set! What color will yours be? Mine will be Caribbean blue, of course! Ha! Be sure to get it before it’s gone, because once this bundle retires, it will be gone forever.
This holiday season, make your own gift tags and cards with the Sending Cheer Stamp Set. Stamp an image, then punch or die cut it and you have a tag—it’s quick and easy! But quick and easy doesn’t mean boring. Stamp a gift image in one color, then stamp a bow image on it in a bright ink for fun contrast. Or stamp a stack of stocking images and top each with a different color cuff. And don’t forget cards! Just imagine how festive these images will look on handmade cards.
Measurements
Full list of supplies needed, listed below. A die cutting machine is needed for this card.
Basic White
5 ½” x 8 ½” scored and folded on the long-side at 4 ¼”
4 ⅝” x 2 ⅝”
5 ½” x 4 ¼” (for stamping and die cutting stockings, holly leaves & berries)
Cherry Cobbler
4 ⅛” x 5 ⅜”
2” x 3” (for die cutting stocking parts)
One Horse Open Sleigh Designer Series Paper (DSP)
5 ¼” x 4” (light wood grain print)
Shaded Spruce
2” x 2” (for die cutting stocking parts)
Traditions of St. Nick Designer Series Paper (DSP)
4” x 1 ¼” (Cherry Cobbler floral print)
Let’s Create
Affix all stamps to Acrylic Blocks.
Fold the Card Base in half using a Bone Folder to sharpen the crease.
On 5 ½” x 4 ¼” Basic White Cardstock, stamp 2 stockings in Shaded Spruce Ink, and 1 stocking using Cherry Cobler ink. On this same paper, stamp 3 sets of the holly leaves in Shaded Spruce ink and holly berries in Cherry Cobbler ink.
Die cut the stockings and the leaves and berries.
Die cut the cuff, heel and toe for the stockings. Two sets in Cherry Cobbler and One set in Shaded Spruce. Adhere these pieces to the stockings – Cherry Cobbler onto the Shaded Spruce stockings and the Shaded Spruce to the Cherry Cobbler stocking. Adhere the holly leaves and berries to each of the stockings.
Using the Exposed Brick 3D Embossing Folder, emboss the 4 ⅝” x 2 ⅝” piece of Basic White Cardstock.
Using the Gold & Vanilla satin edged ribbon, tie a bow around the top edge of the 5 ⅝” x 4 ⅛” Cherry Cobbler Designer Series Paper.
Assembling your card: Adhere the 3 stockings to the embossed Basic White Panel.
Adhere the strip of Designer Series Paper towards the left side of the wood grain Designer Series Paper, with the bow at the top, leaving about ¼” of the wood grain paper showing on the left.
Adhere the woodgrain paper to the Cherry Cobbler Cardstock panel.
And then these layers can be adhered to the folded card base.
Add a little Wink of Stella to the holly leaves and berries.
Be sure to decorate the inside of your card and your envelope and it’s ready to send off to wish someone a Merry Christmas.
Order online from the convenience of your own home or send me your order and I’ll take care of you. ❤ Either way, please use the host code ANTD9UHS. Order online AND, if your order is $50 or more using host code ANTD9UHS between now and the end of the month you’ll receive a free pack of embellishment as a THANK YOU gift from me. ❤ If your order is over $150, skip the host code, earn Stampin’ Rewards for free stuff yourself and I’ll still send you a free pack of embellishment as a THANK YOU gift from me. ❤

")


 Designer Series Paper")

 Metallic Ribbon")


")


 Specialty Designer Series Paper")


 Satin Edged Ribbon")

 Designer Series Paper")
 Designer Series Paper")