Technique Tuesday: Take Your Pick

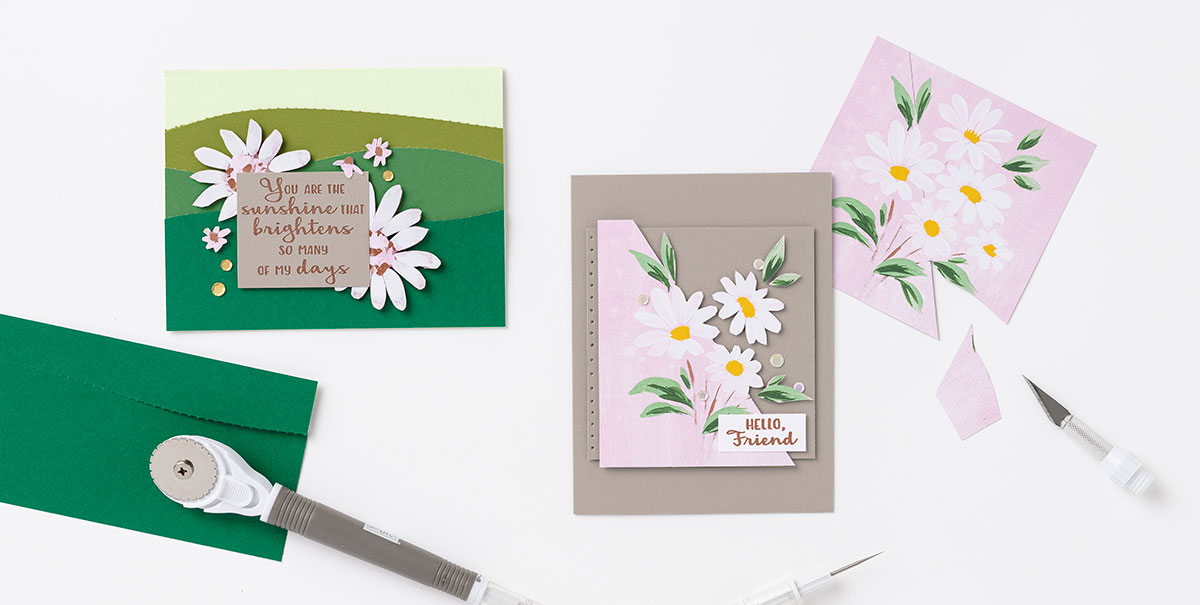
If you’re looking for a new technique to use on your next project, look no further than the small but powerful Take Your Pick™ tool. It’s incredibly versatile, and the different attachments make it the perfect crafting partner. We used the Take Your Pick tool to make our cards this week, and we love how they turned out!

Take Your Pick
$11.00
Take Your Pick Die Brush Tip
$12.00
Take Your Pick Crafter Tips
$21.00
Take Your Pick Putty Refill
$4.00

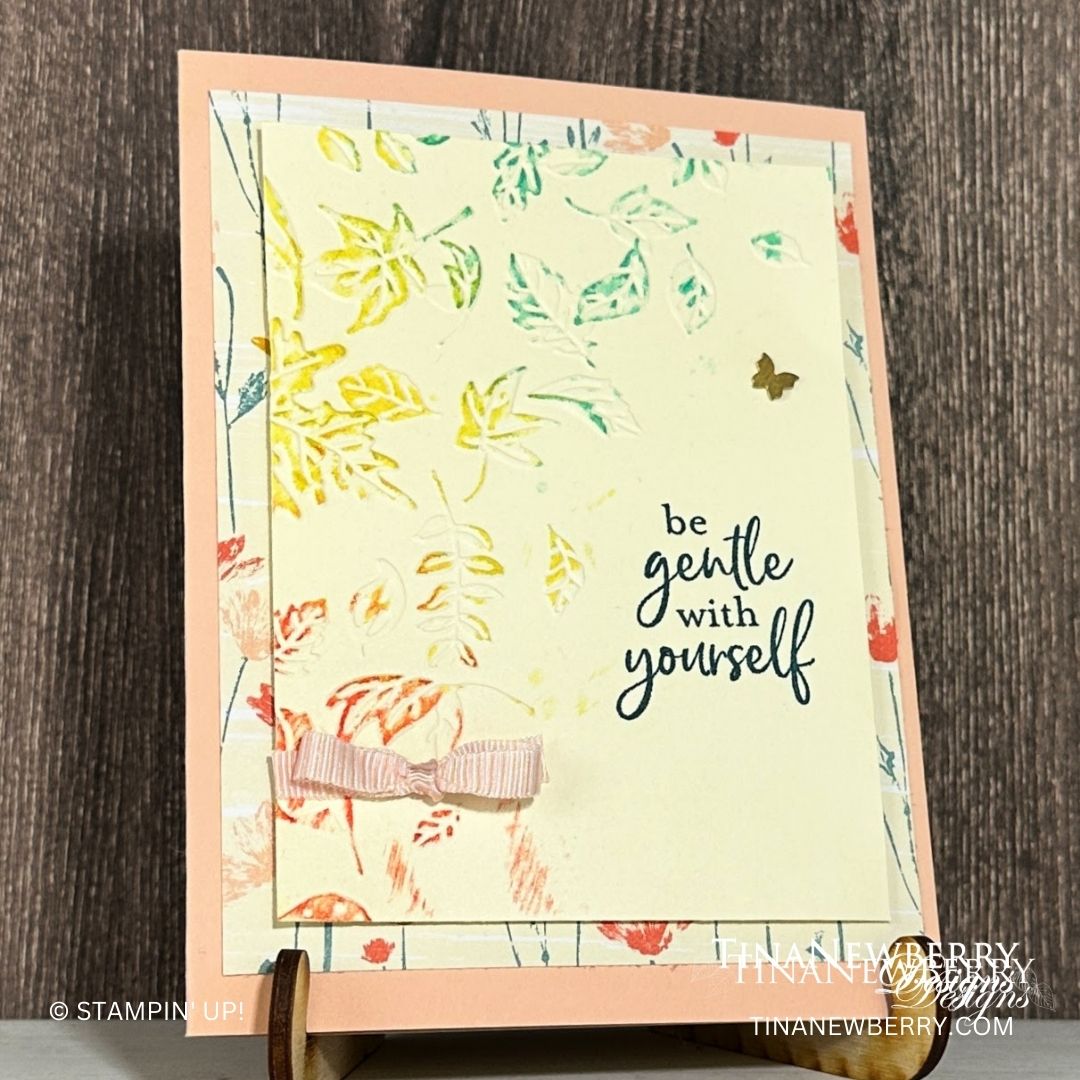
To make the You Are the Sunshine card, we cut Old Olive, Garden Green, and Shaded Spruce Cardstock using the rotary attachment on the Take Your Pick tool. Note: if you use this attachment, be sure to cut on a mat or a glass surface. We adhered the cardstock to our Soft Sea Foam card base and added a few flowers that we cut from the Fresh as a Daisy Designer Series Paper using the knife blade attachment.

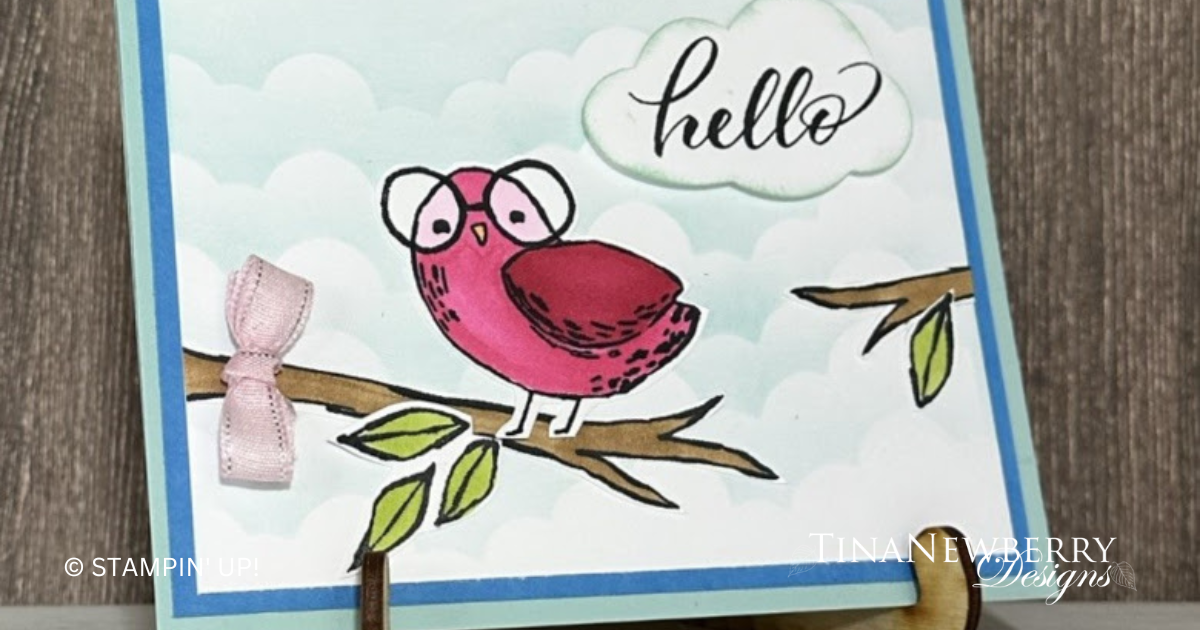
To make the Hello, Friend card, we drew a line in pencil diagonally across a square of Fresh as a Daisy Designer Series Paper to outline where we wanted to cut. We used the knife blade attachment to cut across the paper, then we cut out a daisy and a few extra leaves. We adhered the Designer Series Paper and additional flowers and leaves to a panel of Gray Granite Cardstock. On the left side of the panel, we pierced holes into the cardstock using the paper piercer attachment.

We had so much fun using the Take Your Pick tool in our card making. Try out the tool this week and see how many fun projects you can make!

Shopping List

Hope You Know Cling Stamp Set (English)
$24.00
Pecan Pie Classic Stampin' Pad
$9.00
Old Olive 8-1/2" X 11" Cardstock
$10.00
Garden Green 8-1/2" X 11" Cardstock
$10.00
Shaded Spruce 8-1/2" X 11" Cardstock
$10.00
Soft Sea Foam 8-1/2" X 11" Cardstock
$10.00
Gray Granite 8-1/2" X 11" Cardstock
$10.00
Fresh As A Daisy 12" X 12" (30.5 X 30.5 Cm) Designer Series Paper
$12.50
Take Your Pick
$11.00
Take Your Pick Die Brush Tip
$12.00
Take Your Pick Crafter Tips
$21.00
Take Your Pick Putty Refill
$4.00

Joy of Christmas – Noel

Check out this fun-fold! Perfect for showing off your pretty patterned paper. What Designer Series Paper will you use for your card?

Add the Joy of Noel Bundle to your paper crafting collection and create all sorts of elegant paper crafts! Mix and match the stamp and die set greetings and designs to make wonderful Christmas wreaths and winter floral arrangements. From tags to cards to home decor elements, share the joy of Christmas with simple or sophisticated projects!

Measurements

Full list of supplies needed, listed below. A die cutting machine is needed for this card.

Card Base Pecan Pie 5 ½” x 4 ¼”

Joy of Christmas Designer Series Paper 5 ¼” x 11 ¾” (pay attention to the orientation).

  • Score at 1 ¾”, 4 ¾”, 7 ¾”
  • Basic White 2 ¼” x 5”
  • Basic White 1 ½” x 5”

Joyful 12×12 Specialty Paper 1 ½ ” x 5”

Die-Cut two sprigs in Shaded Spruce DSP

DIe-Cut two sentiment labels in Basic White

Die-Cut NOEL in Distressed Gold

Let’s Create

  1. Affix all stamps to Acrylic Blocks.
  2. Cut Card Base Pecan Pie 5 ½” x 4 ¼”
  3. Cut Designer Series Paper 5 ¼” x 11 ¾” (pay attention to the orientation).
    1. Score at 1 ¾”, 4 ¾”, 7 ¾”. Use Bone Folder to burnish the folds well.
  4. Fold the left flap back over on itself so the back of the DSP (brown wood grain) shows on the left-most flap.
  5. Adhere DSP to card base.
  6. Cut Specialty Paper 1” x 5” (Gold wood pattern). Adhere to the left-most flap.
  7. Cut Basic White 1 ½” x 5”. Stamp and adhere to inside as shown.
  8. Cut Basic White 2 ¼” x 5”. Stamp and adhere to last panel as shown.
  9. Die-Cut two sprigs in Shaded Spruce DSP 
  10. DIe-Cut (2) sentiment labels in Basic White.
  11. Die-Cut NOEL in Distressed Gold
  12. Adhere NOEL to sentiment label. Adhere sprigs behind sentiment label. Adhere second sentiment label to make a sandwich (to hide the springs when the card is open).
  13. Adhere sandwich to front panel.
  14. Sprinkle on gems as desired.

Shopping List

Recommended Stamper’s Toolkit

Product List
Order online from the convenience of your own home or send me your order and I’ll take care of you. ❤ Either way, please use the host code ANTD9UHS. Order online AND, if your order is $50 or more using host code ANTD9UHS between now and the end of the month you’ll receive a free pack of embellishment as a THANK YOU gift from me. ❤ If your order is over $150, skip the host code, earn Stampin’ Rewards for free stuff yourself and I’ll still send you a free pack of embellishment as a THANK YOU gift from me. ❤

Sending Hugs

Create a beautiful background in minutes using the Soft Pastels. Keep reading for details on this technique.

Expand your coloring repertoire with the Soft Pastels Assortment! These easy-to-use chalk pastels work with a variety of coloring tools like Stampin’ Up!’s Sponge Daubers, Blending Brushes, and Water Painters. Try scribbling a pastel chalk on a scrap piece of paper to create chalk dust, then use Water Painters to create your very own watercolor paints!

Measurements

Full list of supplies needed, listed below. A die cutting machine is needed for this card.
Card Base Coastal Cabana 8 ½” x 5 ½”, scored at 4 ¼”
Inside Layer Basic White 4” x 5 ¼”
Top Layer Basic White 4” x 5 ¼”
2’ Organdy RIbbon
3 Glossy Dot gems

Let’s Create

  1. Cut Card Base Coastal Cabana 8 ½” x 5 ½”, score at 4 ¼”
  2. Cut Inside Layer Basic White 4” x 5 ¼”
  3. Cut Top Layer Basic White 4” x 5 ¼”
  4. Adhere inside layer. Optional – stamp one of the leaves in the corner in Versamark and add coordinating color of Soft Pastels. Use your finger to run the pastels in to the ink and paper.
  5. Stamp leaves in a pattern along the bottom of the top layer, using Versamark.
  6. Use side of pastel stick to add color. Going from left to right, add a little of the yellow (Daffodil Delight), then the green (Granny Apple Green), then the Coastal Cabana. Repeat. Add a skinny layer of Daffodil Delight color along the top of the leaves. Use your finger to rub the pastels into the ink and paper. Clean your finger of residue before moving on to the next color.
  7. Stamp sentiment in upper right corner.
  8. Wrap ribbon around this layer and tie a bow.
  9. Adhere layer to card front. Sprinkle on a few gems.

Shopping List

Recommended Stamper’s Toolkit

Product List
Order online from the convenience of your own home or send me your order and I’ll take care of you. ❤ Either way, please use the host code ANTD9UHS. Order online AND, if your order is $50 or more using host code ANTD9UHS between now and the end of the month you’ll receive a free pack of embellishment as a THANK YOU gift from me. ❤ If your order is over $150, skip the host code, earn Stampin’ Rewards for free stuff yourself and I’ll still send you a free pack of embellishment as a THANK YOU gift from me. ❤

Be Gentle With Yourself

Use Soft Pastels to add color to your embossing folders! Read on for details on this technique.

Expand your coloring repertoire with the Soft Pastels Assortment! These easy-to-use chalk pastels work with a variety of coloring tools like Stampin’ Up!’s Sponge Daubers, Blending Brushes, and Water Painters. Try scribbling a pastel chalk on a scrap piece of paper to create chalk dust, then use Water Painters to create your very own watercolor paints!

Measurements

Full list of supplies needed, listed below. A die cutting machine is needed for this card.
Card Base Petal Pink 8 ½” x 5 ½”, scored at 4 ¼”
Inside Layer Very Vanilla 4” x 5 ¼”
Front Layer Inked Botanicals Designer Series Paper 4” x 5 ¼”
Very Vanilla 3 ½” x 4 ¾”, rolled through Leaf Fall 3D Embossing folder (paper on the diagonal)
Petal Pink bow (RIbbon Duo Pack)
Brass Butterfly Gem
Optional: Extra DSP scrap to add a little splash of color to the inside of the card


Let’s Create

  1. Affix all stamps to Acrylic Blocks.
  2. Cut Card Base Petal Pink 8 ½” x 5 ½”, score at 4 ¼”. Fold the Card Base in half using a Bone Folder to sharpen the crease.
  3. Cut Inside Layer Very Vanilla 4” x 5 ¼”. Adhere to inside.
  4. Cut Front Layer Inked Botanicals Designer Series Paper 4” x 5 ¼”. Adhere centered to front of card.
  5. Cut Very Vanilla 3 ½” x 4 ¾”, and roll through Leaf Fall 3D Embossing folder (paper on the diagonal)
  6. Use side of pastel stick to add color. Going from top right to bottom left, add a section of Coastal Cabana in the upper right. DO NOT rub in, let it set on top of the embossed image. Add a section of Daffodil Delight down the center. Add a small amount of Poppy Parade in the bottom left corner. Again, DO NOT rub in. Let the pastels set on top of the embossed image.
  7. Take your layer outside, and cover the bottom right on the diagonal. Apply a light spray of Krylon Fixatif across the pastel areas. Let dry.
  8. Take card back inside. Stamp sentiment in Pretty Peacock. Adhere a little butterfly.
  9. Add layer to card front, centered, with Stampin’ Dimensionals.
  10. Tie a cute little bow and add it to the bottom left corner.
  11. Decorate your envelope.
  12. Pretty!! Now send it to someone special.

Shopping List

Recommended Stamper’s Toolkit

Product List
Order online from the convenience of your own home or send me your order and I’ll take care of you. ❤ Either way, please use the host code ANTD9UHS. Order online AND, if your order is $50 or more using host code ANTD9UHS between now and the end of the month you’ll receive a free pack of embellishment as a THANK YOU gift from me. ❤ If your order is over $150, skip the host code, earn Stampin’ Rewards for free stuff yourself and I’ll still send you a free pack of embellishment as a THANK YOU gift from me. ❤

Clouds! Get Your Blending Brushes

Isn’t this bird from the Bird’s Eye View stamp set SO CUTE? Use your blending brushes and a stencil to make a background of clouds to set off this little cutie.

Measurements

Full list of supplies needed, listed below. A die cutting machine is needed for this card.
Card Base Pool Party cardstock 8 ½” h x 5 ½” w, scored at 4 ¼”
Layer 1 Azure Afternoon cardstock – 4” h x 5 ¼” w
Layer 2 Basic White cardstock – 3 ¾” h x 5” w
Inside Layer Basic White cardstock – 4” h x 5 ¼” w
Punch cloud from Basic White cardstock scrap4” h x 5 ¼” w4” h x 5 ¼” w
Stamp and fussy cut bird and branches and leaves from Basic White scrap
Create a stencil from Thick Basic White cardstock using the Basic Borders die


Let’s Create

  1. Affix all stamps to Acrylic Blocks.
  2. Fold the Card Base in half using a Bone Folder to sharpen the crease.
  3. Adhere Azure Afternoon layer to card front with Stampin’ Seal.
  4. Create cloud-patterned stencil from Basic Borders Dies.
  5. Using the stencil, very lightly brush Pool Party to create your first row of clouds across the top of the layer. Shift the position of the stencil, move down the page ½” or so, and very lightly brush another row of clouds. Repeat until you reach the bottom of the layer.
  6. Adhere Cloud layer to card front with Stampin’ Seal.
  7. Punch Basic White cloud. Use sponge dauber to add color to the edges of the Cloud, in Pool Party ink.
  8. Adhere cloud to front of card with Stampin’ DImensionals.
  9. Use Tuxedo Black Memento Ink Pad to stamp the bird and leaves on a Basic White scrap. And the branches on the Cloud layer.
  10. Color as desired with Blends or Stampin’ Write Markers.
  11. For this card, I used Stampin’ Blends. I colored the branches in Pecan Pie, the leaves in Granny Apple Green, and the bird using Melon Mambo Dark on the wing. I used Melon Mambo Light on the body of the bird. And I used Bubble Bath behind the glasses.
  12. Fussy cut leaves and bird.
  13. Arrange in a pleasing manner on the card front and attach with preferred adhesive.
  14. Add sweet little pink bow with Mini Glue Dots on the branch.
  15. Stamp and decorate the inside 4” h x 5 ¼” w Basic White cardstock and attach with Stampin’ Seal.
  16. Decorate your envelope.
  17. So cute! Now send it to someone special.

Shopping List

Recommended Stamper’s Toolkit

Product List
Order online from the convenience of your own home or send me your order and I’ll take care of you. ❤ Either way, please use the host code ANTD9UHS. Order online AND, if your order is $50 or more using host code ANTD9UHS between now and the end of the month you’ll receive a free pack of embellishment as a THANK YOU gift from me. ❤ If your order is over $150, skip the host code, earn Stampin’ Rewards for free stuff yourself and I’ll still send you a free pack of embellishment as a THANK YOU gift from me. ❤