The designer series patterned paper sets the scene for a quick and easy birthday card.
The Garden Meadow Bundle will help you create dreamy gardens and perfect meadows set for spring. By pairing the stamps and dies, you’ll be able to make cards, gift tags, and scrapbook details full of lovely blossoming flowers, gardening tools, and endearing sentiments.
Measurements
Full list of supplies needed, listed below. A die cutting machine is needed for this card.
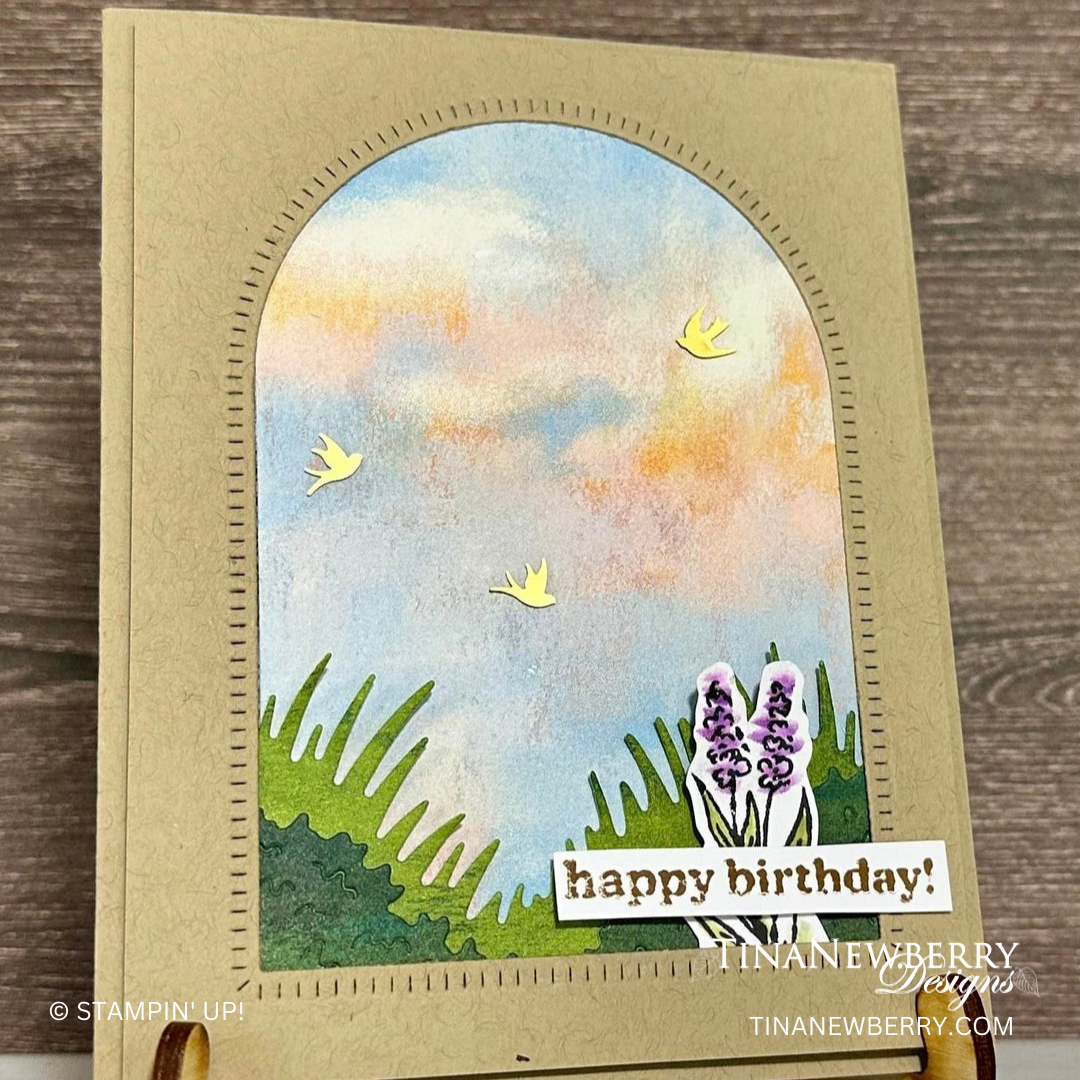
Card Base Fresh Freesia 8 ½” x 5 ½”, score at 4 ¼” Basic White 4” x 5 ¼” Fresh Freesia 4” x 5 ¼” Die-cut pathway DSP pattern with Garden Meadow arch die. Use the inside. Die-cut fence from Pecan Pie DSP
Let’s Create
Affix all stamps to Acrylic Blocks.
Cut Card Base Fresh Freesia 8 ½” x 5 ½”, score at 4 ¼”
Cut Basic White 4” x 5 ¼”. Adhere to inside of card.
Cut Fresh Freesia 4” x 5 ¼”. Set aside.
Die-cut pathway DSP pattern with Garden Meadow arch die. Use the inside and set the frame aside for a future project.
Die-cut fence from Pecan Pie DSP
Assemble card. Adhere DSP archway with liquid glue.
Stamp sentiment in Fresh Freesia or Gorgeous Grape.
Cut fence in half. NOTE: cut carefully and exactly in the middle, it is thin and finicky
Adhere fence to front of card.
Adhere Fresh Freesia layer with Stampin’ Dimensionals.
Add bird.
Use a little Wink-of-Stella to add some sparkle to your beautiful meadow scene.
Use the detailed arched die and beautiful scenery paper to create a simple scene for a happy birthday card.
The Garden Meadow Bundle will help you create dreamy gardens and perfect meadows set for spring. By pairing the stamps and dies, you’ll be able to make cards, gift tags, and scrapbook details full of lovely blossoming flowers, gardening tools, and endearing sentiments.
Measurements
Full list of supplies needed, listed below. A die cutting machine is needed for this card.
Card Base Crumb Cake 8 ½ x 5 ½, score at 4 ¼” Inside Layer Basic White 4”x 5 ¼” Card Stock layer 4” x 5 ¼”, die-cut with Garden Meadow arch die. Use the frame. Grassy meadow Die-Cuts (from DSP) using Garden Meadow grass dies Meandering Meadows DSP (Cloudy Sky pattern) 3” x 5”
Let’s Create
Affix all stamps to Acrylic Blocks.
Cut Card Base Crumb Cake 8 ½ x 5 ½, score at 4 ¼”
Cut Inside Layer Basic White 4”x 5 ¼”. Adhere to inside of card.
Cut Card Stock layer 4” x 5 ¼”, and die-cut with Garden Meadow arch die. Use the frame and save the insert for another project.
Die-Cut (2) DSP using Garden Meadow grass dies (with two different colors)
Cut Meandering Meadows DSP (Cloudy Sky pattern) 3” x 5”.
Stamp flower in Memento on Basic White. Color with Blender Pen using color from Highland Heather and Old Olive ink pads. Fussy cut.
Stamp sentiment in Pecan Pie and fussy cut.
Assemble. Adhere two grass pieces together. Adhere those to the back of the frame. Adhere the Sky DSP to the back of the frame. Note that at 3” wide it is the EXACT width of the frame so you need to place it carefully before affixing the glue. Turn it over to confirm the placement and then burnish the glue solidly.
Adhere flower.
Adhere sentiment with Mini-Stampin’ Dimensionals.
Add birds to the cloudy sky.
Use a little Wink-of-Stella to add some sparkle to your beautiful meadow scene.
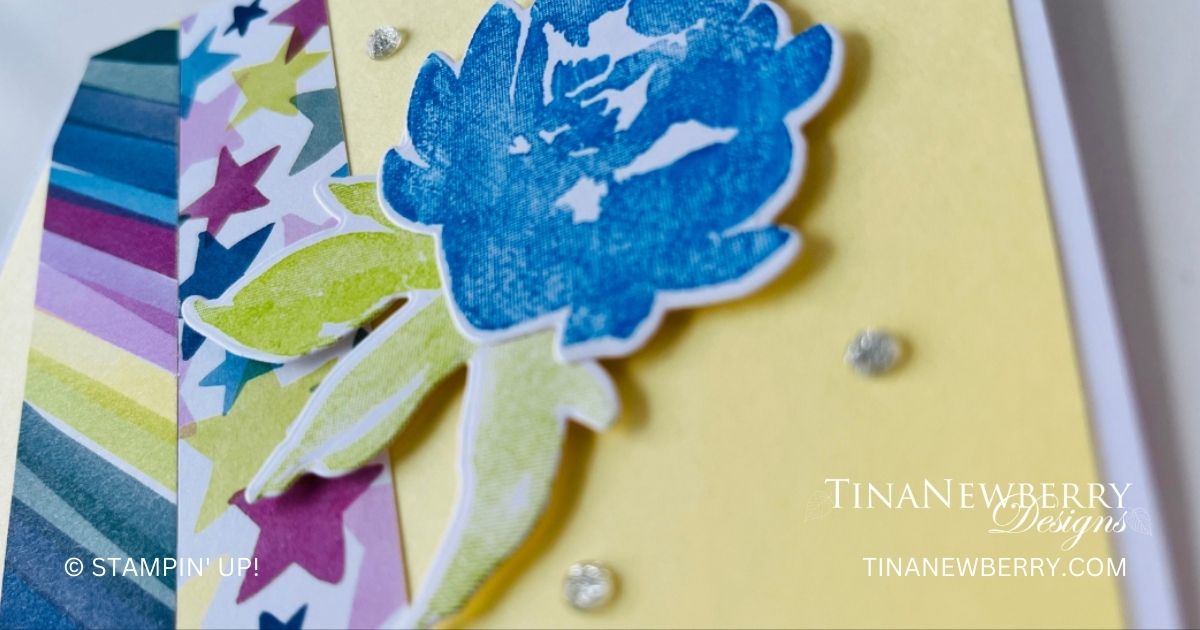
Brighten someone’s day with a cheery birthday card. Your design comes together quickly with a couple strips of designer series paper and a beautiful flower stamped in coordinating colors. Who doesn’t like happy mail?
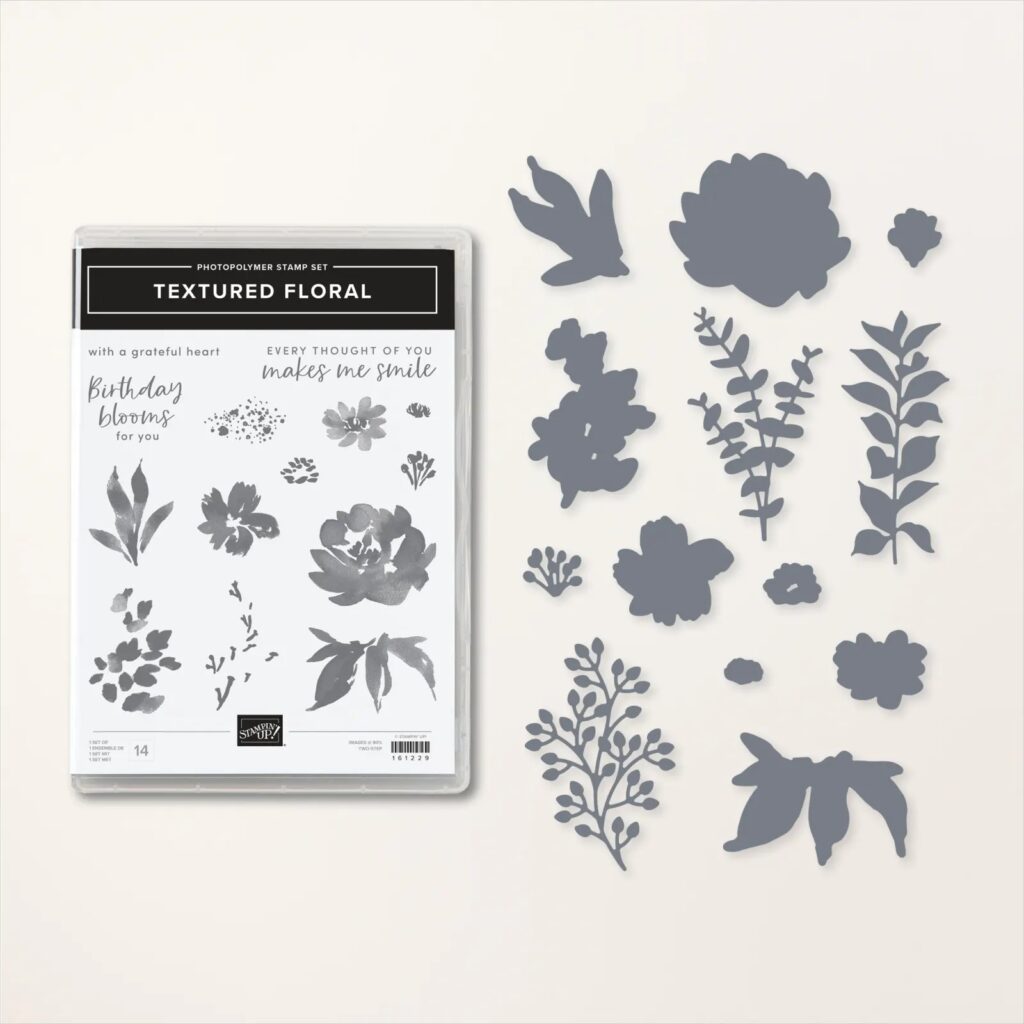
It’s flowers upon flowers in the bold, beautiful Textured Florals Bundle. Use them to create projects for weddings, Mother’s Day, spring, summer, and so much more! See what you can do!
Measurements
Full list of supplies needed, listed below. A die cutting machine is needed for this card.
Basic White Cardstock – Card Base
5 ½” x 8 ½” scored at 4 ¼”
Scrap for stamping and die cutting
Lemon Lolly Cardstock – 4” x 5 ¼”
Bright & Beautiful Designer Series Paper – multicolored diagonal stripe pattern
1” x 6”
multicolored star pattern
1” x 6”
Let’s Create
Affix all stamps to acrylic blocks.
Fold and burnish card base using bone folder.
Take the striped dsp and add it to the left side of the Lemon Lolly panel at an angle so the top of the strip covers the entire point. Make sure the bottom of the strip hangs below the bottom of the panel. See photo above.
Use your snips to trim the dsp so the top corner and the bottom of the panel are even with the Lemon Lolly panel.
Take the star pattern and glue it next to the striped pattern butting the edges against each other and make sure the top and bottom of the strip cover the Lemon Lolly panel. See photo above. Trim the excess away.
Mask off the bottom portion of the stamp so that only the words “Birthday Blooms” are visible and ink up the sentiment. Remove the mask and stamp. The sentiment in the upper right hand corner of the Lemon Lolly panel. See photo above.
Add the Lemon Lolly panel from Step 6 to the card base centering on all sides.
Stamp the large flower on the scrap of White using Azure Afternoon ink. Stamp the large leaf pattern on the scrap of White using Lemon Lime Twist.
Use the coordinating dies to cut out the flower and leaf.
Add the leaf to the bottom of the die cut flower using glue. Use dimensionals to add the flower to the right hand side of the card front just under the sentiment.
Sprinkle some Silver Adhesive backed sparkle gems to the card front.
Use the large flower and leaf stamp to decorate the inside of the card and envelope.


")


 Designer Series Paper")


 Designer Series Paper")
