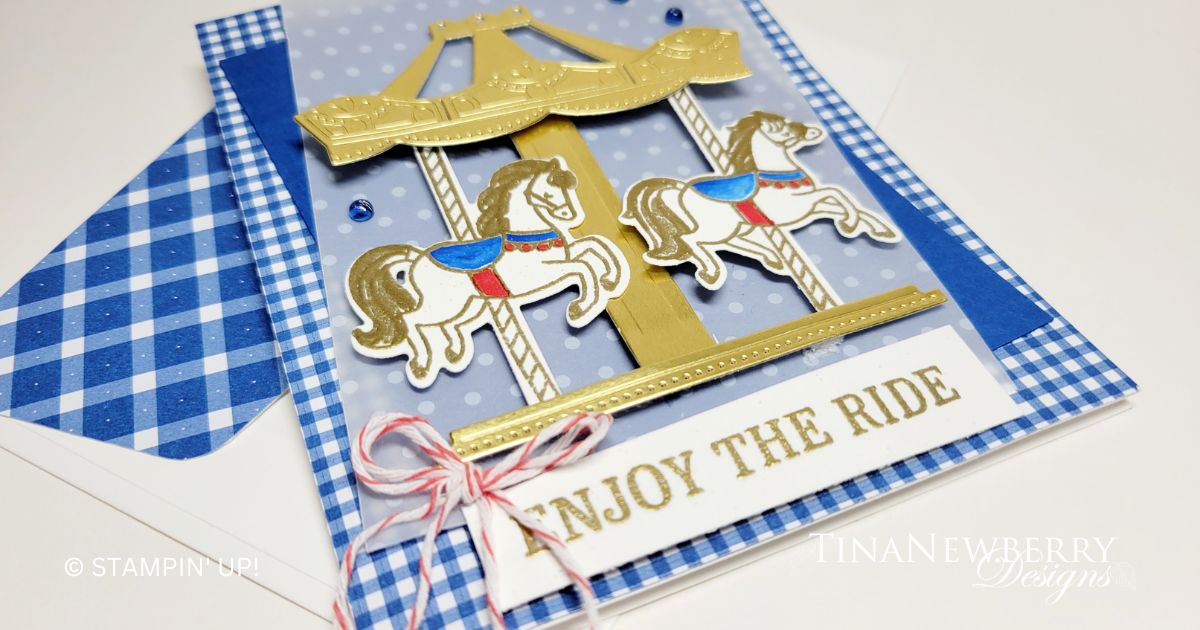
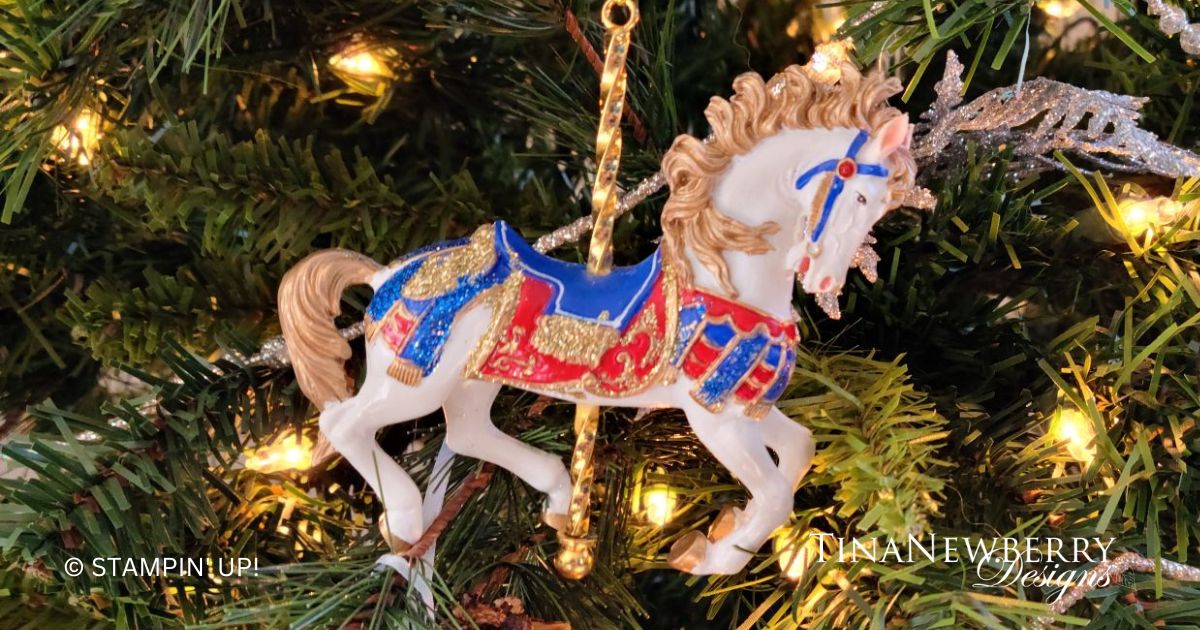
Some of the most beautiful carousels are shiny with gold. I was inspired to recreate the look and mimicked these ornaments from Mum’s tree.
Measurements
Full list of supplies needed, listed below. A die cutting machine is needed for this card.
Basic White Thick Cardstock: 5 ½” h x 8 ½” w scored and folded at 4 ¼” w
Basic White Cardstock:
- 5 ½” h x 4 ¼” w
- Scrap for Carousel Horses and sentiment
Blueberry Cardstock:4 ¾” h x 3 ½” w
Vellum Basics: 4 ¾” h x 3 ½” w
Glorious Gingham Designer Series Paper (DSP): 5 ½” h x 4 ¼” w
Gold Foil Sheets: scrap for Carousel
Let’s Create
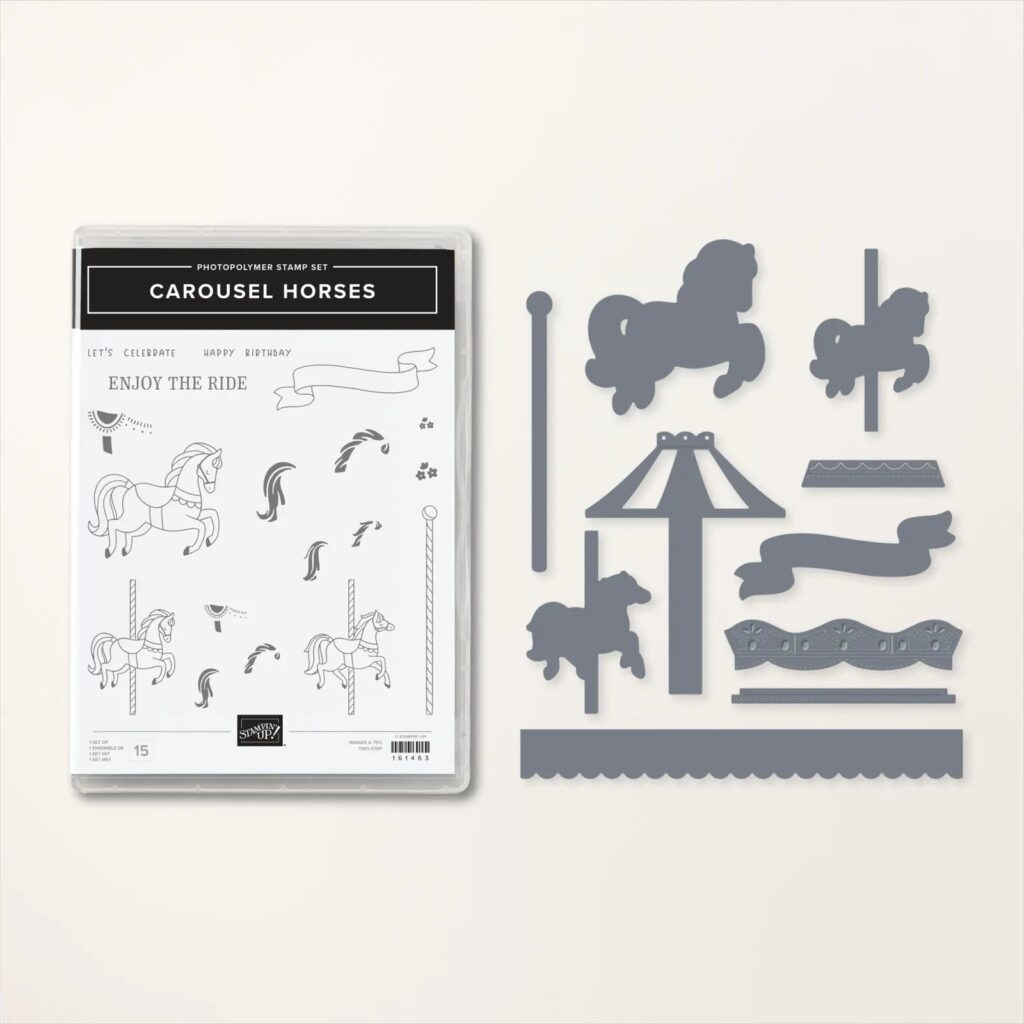
- Affix all stamps to Acrylic Blocks.
- Fold the Card Base in half using a Bone Folder to sharpen the crease.
- Attach the Glorious Gingham to the Card Base with Stampin’ Seal.
- Offset the Blueberry Bushel Cardstock and Vellum Basics panels. Attach with Stampin’ Seal. Adhesive shows behind vellum, so be careful to position the adhesive behind the Carousel and Carousel Horses.
- Die cut the Carousel in Gold Foil.
- Stamp the Carousel Horses on scrap Basic White Cardstock in Versamark and heat emboss in gold. Color with Blueberry Bushel and Real Red Stampin’ Blends.
- Stamp the Sentiment on scrap Basic White Cardstock in Versamark and heat emboss in gold. Trim to size.
- Assemble the Carousel and Horses. Attach with Stampin’ Dimensionals.
- Attach the sentiment with Stampin’ Dimensionals
- Tie a double bow from the Sweet Sorbet Baker’s Twine and attach with a Mini Glue Dot.
- Sprinkle on Tinsel Gems Four Pack
- Stamp and decorate the remaining 5 ¼” w x 4” h for inside
- Decorate your envelope.
- Cute! Who will you send it to?
Shopping List

$52.00

$9.50

$18.00


 Specialty Designer Series Paper")
 Designer Series Paper")

$5.00


$8.00
Recommended Stamper’s Toolkit ❤

$12.00

$7.00

$4.25

$5.75

$5.50

$11.00

$26.00

$7.00

$6.50

$11.00

$20.00

$11.00

$80.75

$128.00


$16.00

$13.00


