Learn how to make a snowflake embossed background using the Mini Stampin’ Cut & Emboss Machine on this two-tone card.

Measurements
Full list of supplies needed, listed below. A die cutting machine is needed for this card.
Sweet Sorbet Cardstock: 5 1/2″ h x 8 1/2″ w scored and folded at 4 1/4″ and 7 1/2″
Real Red Cardstock: 5 1/2″ h x 2 1/2″ w
White Scrap from Kit: 3″ h x 2 3/4″ w
Basic White Cardstock: 5 1/2″ h x 2 1/2″ w
Striped Pattern (from Inside Envelope from Kit) :
- 5 `/2″ h x 1″ w
- Scrap for Deer
Let’s Create
- Affix all stamps to Acrylic Blocks.
- Fold the Card Base in half using a Bone Folder to sharpen the crease and then fold back at the 1″ score line and use a Bone Folder to sharpen the crease.
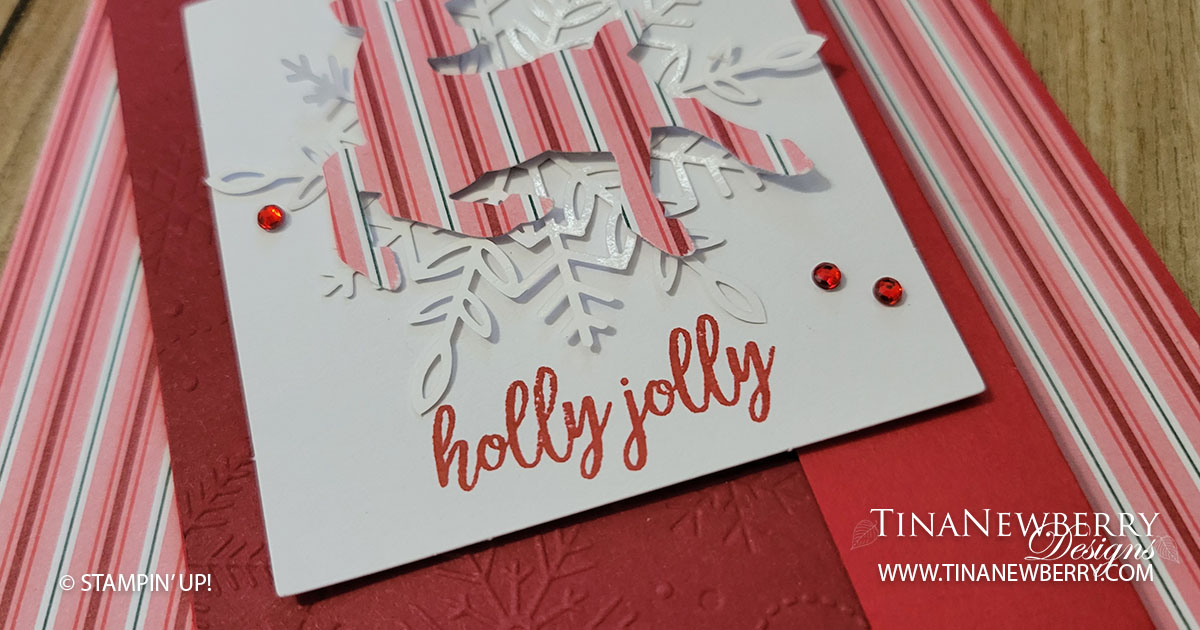
- Run the Real Red panel through the Mini Stampin’ Cut & Emboss Machine with the Snowflake Embossing Folder from the Wintry 3D Embossing Folders Set.
- Attach embossed Real Red Panel to the Card Base with Stampin’ Seal.
- Use Stampin’ Seal to secure the 1″ Card Base Flap in place and also the 1″ striped pattern piece you cut from the envelope.
- Stamp Holly Jolly on the scrap rectangle with Real Red Ink and attach to Card Base with Stampin’ Dimensionals.
- Use a Mini Glue Dot to attach a Wonderful Snowlake to the rectangle.
- Punch a deer from the striped pattern from the envelope, using the Deer Builder Punch and attach to the Wonderful Snowflake with a Stampin’ Dimensional.
- Sprinkle on the Red Rhinestones.
- Stamp and decorate the 5 1/2″ h x 2 1/2″ w Basic White Cardstock and attach to the inside with Stampin’ Seal.
- Decorate your envelope.
- How fun!! Who will you send it to?
Shopping List
This project uses the Ho Ho Ho Paper Pumpkin Kit


$6.00


$10.00

$19.00

Recommended Stamper’s Toolkit ❤
Product List
$12.00

$7.00

$4.25

$5.75

$5.50

$11.00

$26.00

$7.00

$6.50

$11.00

$20.00

$11.00

$80.75

$128.00


$16.00

$13.00


