Make a quick & easy congratulations card with four pieces of rectangle paper.

Measurements
Full list of supplies needed, listed below. A die cutting machine is needed for this card.
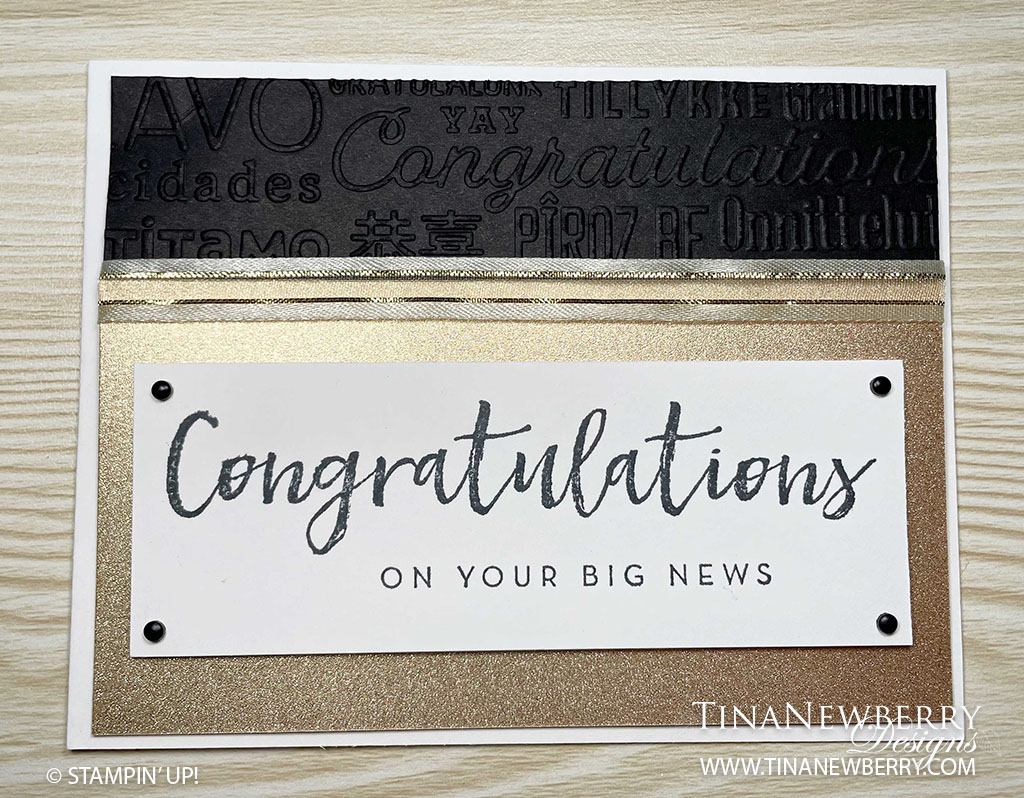
Card Base: Basic White Thick cardstock 4 ¼” h x 11” w folded to 4 1/4″ h x 5 1/2″ w
Background: Basic Black cardstock 2″ h x 5 1/4″ w
Front Layer: Fine Shimmer paper 2 ¾” h x 5 ¼” w
Sentiment Layer: Basic White cardstock 1 ¾” h x 4 ¾” w
Let’s Create
- Affix all stamps to Acrylic Blocks.
- Fold the Card Base in half using a Bone Folder to sharpen the crease.
- Emboss the Basic Black cardstock with the Let’s Celebrate Embossing folder in the Stampin’ Cut & Emboss Machine. I placed the cardstock so that I embossed the “congratulations” word towards the top edge so that it is visible to coordinate with the stamped sentiment.
- Adhere the Fine Shimmer paper onto the Basic Black embossed cardstock, they overlap by ¾” of an inch.
- Wrap the Gold & Vanilla Ribbon around the layers and adhere the ends onto the backside.
- Adhere these layers onto the Basic White Thick card base.
- Stamp the sentiment with Tuxedo Black Memento ink pad onto the Basic White cardstock layer.
- Use Dimensionals to adhere the stamped sentiment layer onto the card front.
- Place 4 black Classic Matte Dots in the four corners of the sentiment layer.
- Stamp and decorate the inside.
- Decorate your envelope.
- So cute! Now send it to someone special.
")


 Paper Pack")

$7.00
 Satin Edged Ribbon")

Recommended Stamper’s Toolkit ❤

$12.00

$7.00

$4.25

$5.75

$5.50

$11.00

$26.00

$7.00

$6.50

$11.00

$20.00

$11.00

$80.75

$128.00

$16.00

$13.00


