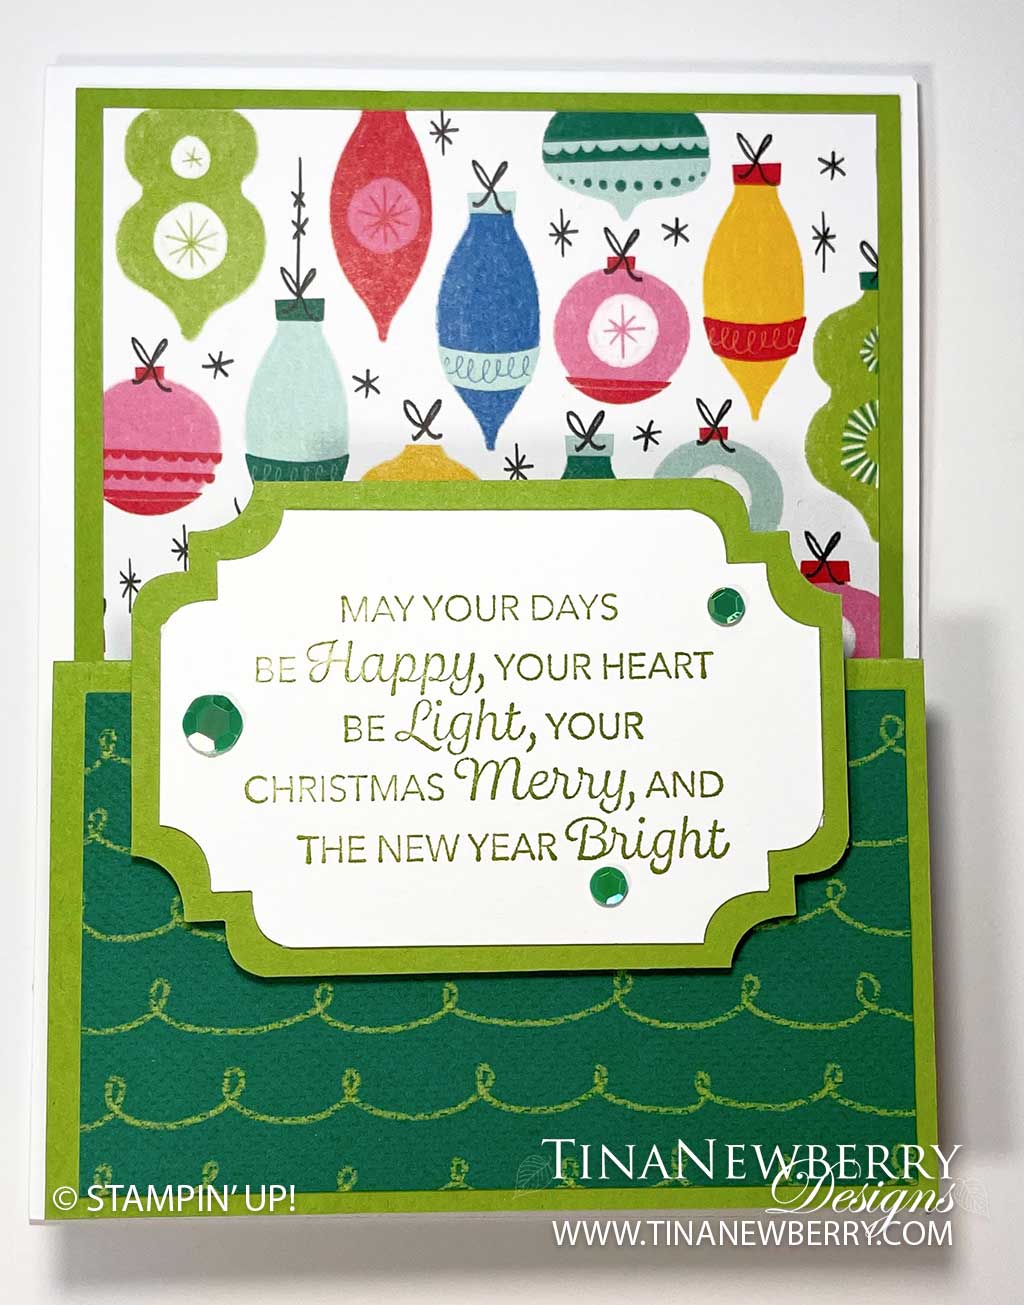
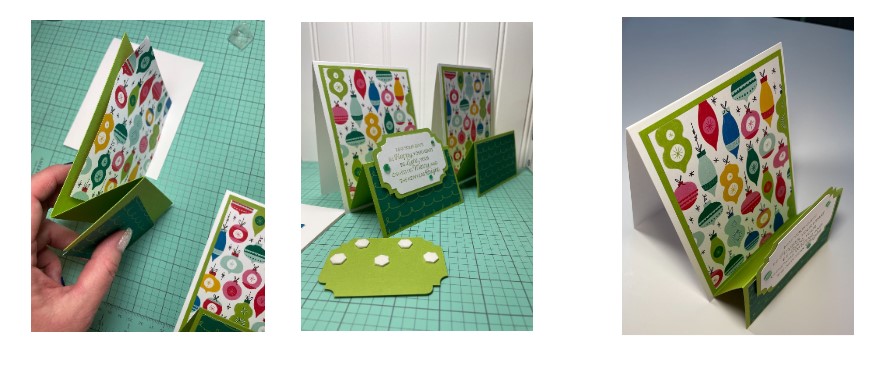
Send well wishes for Christmas or any season with a fun double-easle fold card.
Measurements
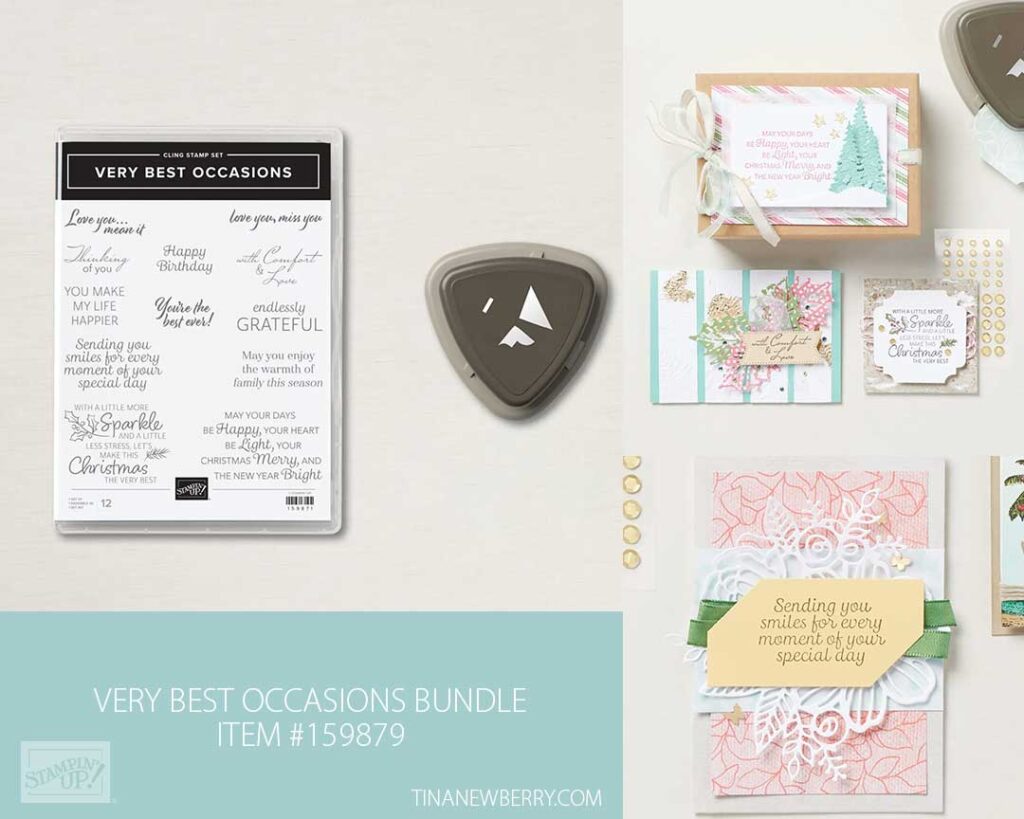
Full list of supplies needed, listed below. A die cutting machine is needed for this card.
Basic White Thick Cardstock: 4 ¼”w x 11″h, scored at 5 ½”
Granny Apple Green Cardstock:
- 4″w x 10 ¼”h, scored at 2 ½” and at 5″. Fold on score lines
- 3 ¼”w x 2 ¼”h
Celebrate Everything 12″ X 12″ Designer Series Paper (DSP)
- 5″ h x 3 ¾” w
- 2 ¼” h x 3 ¾” w
Basic White Cardstock:
- 3” w x 2”h
Let’s Create
- Affix all stamps to Acrylic Blocks.
- Fold the Thick Basic White card base in half on the score line.
- Stamp the sentiment with Granny Apple Green Stampin’ Pad onto the Basic White cardstock layer.
- Punch the corners of the Basic White and Granny Apple Green card stock rectangles with the Very Best Trio punch.
- Adhere the two layers together.
- Adhere the two DSP layers onto the Granny Apple layer. See photo for what placement is like.
- Adhere the Granny Apple Green Layer onto the Basic White card front.
- Use Dimensionals to adhere the sentiment layers onto the front folded section of the card front.
- Embellish with Seasonal Sequins around the sentiment.
- Decorate your envelope with a piece of DSP on the flap and/or stamping a on the front.
- Stamp and decorate the inside.
- Now put it in the mail!
Shopping List
")


 Designer Series Paper")

Recommended Stamper’s Toolkit
Product List
$12.00

$7.00

$4.25

$5.75

$5.50

$11.00

$26.00

$7.00

$6.50

$11.00

$20.00

$11.00

$80.75

$128.00


$16.00

$13.00