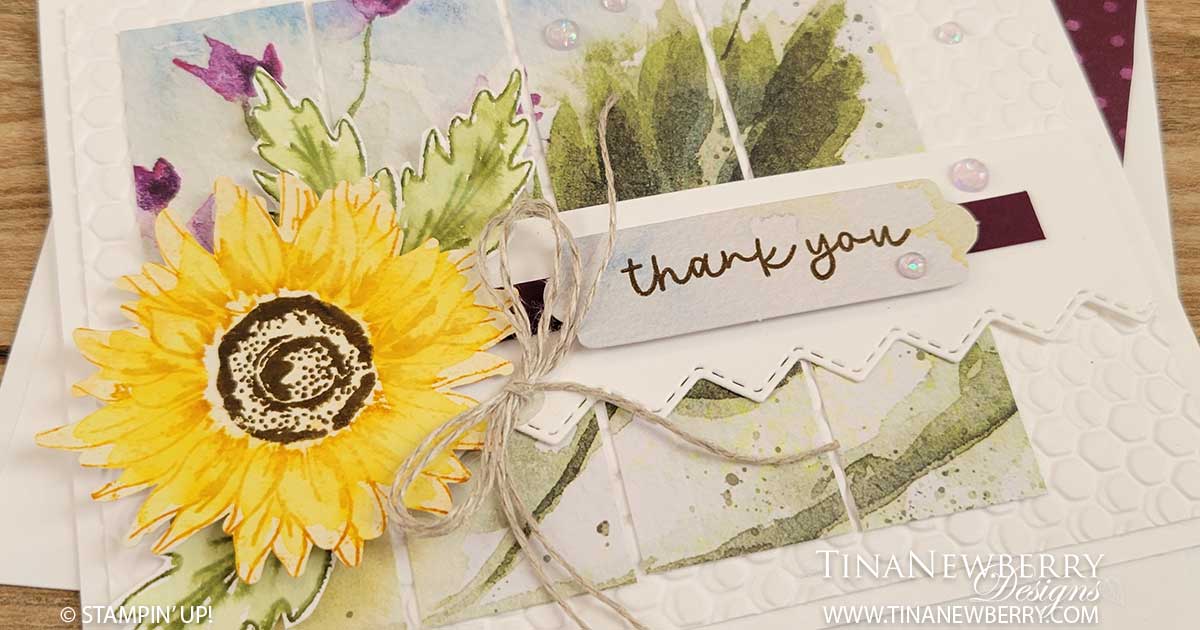
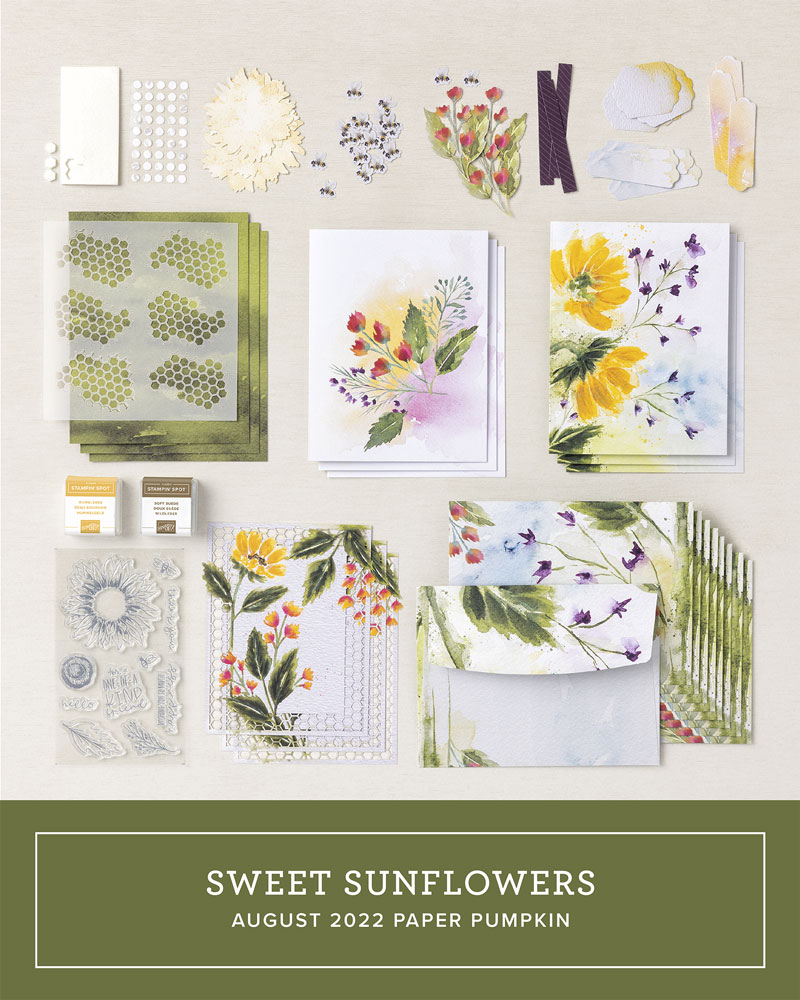
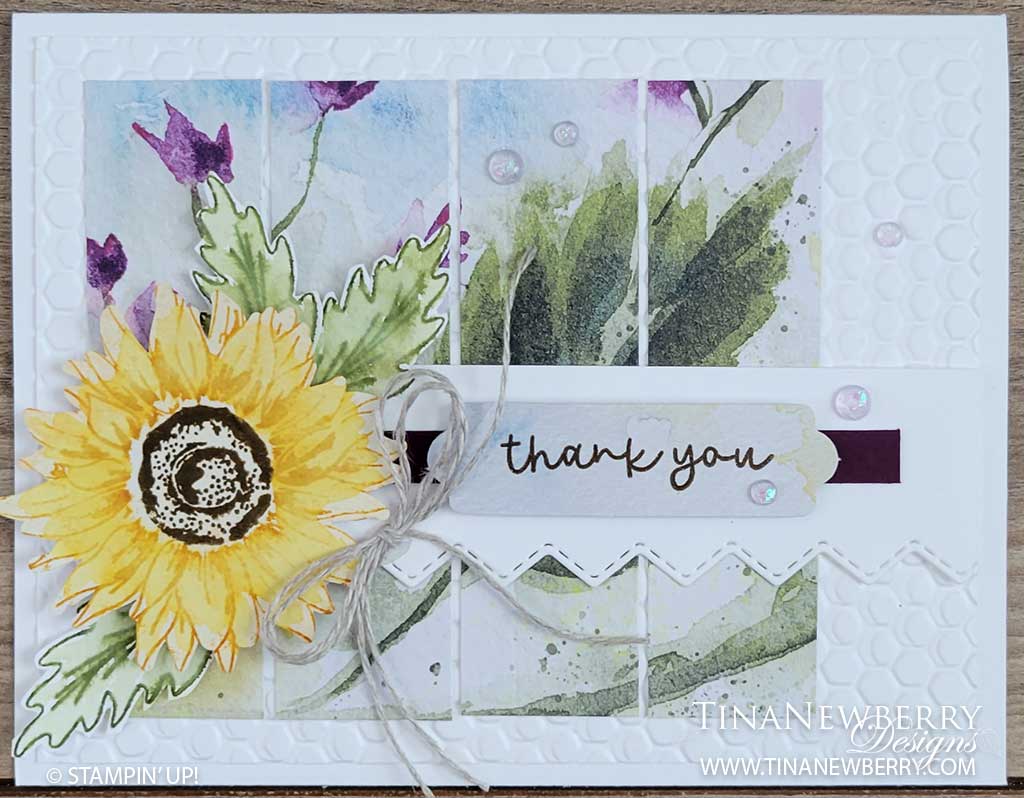
Use one of the beautiful envelopes from the August Sweet Sunflowers Paper Pumpkin kit for a pretty patterned background and then pop up one of the extra coordinating tags for a sweet sentiment using the stamp set from the kit.
Measurements
Full list of supplies needed, listed below. A die cutting machine is needed for this card.
Basic White Thick Cardstock 5 1/2″ w x 8 1/2″ h folded to 5 1/2″ h x 4 1/4″ w
Basic White Cardstock:
- 5 1/4″ w x 4″ h
- 1 1/2″ h x 4″ w
- scrap for leaves
Blackberry Bliss Cardstock:
- 1/4″ h x 3″ w
From the Sweet Sunflowers Kit:
- Envelope
- Tag
- Sunflower Shape
Let’s Create
- Affix all stamps to Acrylic Blocks.
- Fold the Card Base in half using a Bone Folder to sharpen the crease.
- Run the 5 1/4″ w x 4″ h Basic White Cardstock through the Stampin’ Cut & Emboss Machine with the Hive Embossing Folder. Attach with Stampin’ Seal.
- On the sunflower die cut from the kit, stamp the Sunflower with Crushed Cutty and the Sunflower Center with Soft Suede.
- On scrap Basic White Cardstock, stamp three leaves in Old Olive ink. Then use a Water Painter to add a light Old Olive color wash. Be advised, you may opt to use Watercolor Fluid Paper to manage the watercoloring better. Fussy cut with Paper Snips.
- On the tag from the kit, stamp the sentiment in Soft Suede.
- Disassemble the envelope, lay flat and trim down to 3 1/2″ x 3 3/4″ w. Then trim into 3/4″ to 1″ x 3″ strips and layout in order to maintain the image. Layout on the Hive embossed layer and attach strips with Stampin’ Seal.
- Run the 1 1/2″ h x 4″ w Basic White Cardstock through the Stampin’ Cut & Emboss Machine with the Basic Borders Die. Attach with Stampin’ Seal.
- Attach the Blackberry Bliss strip with Stampin’ Seal.
- Attach the Sunflower with Stampin’ Dimensionals.
- Tuck the leaves around the sunflower and attach with Mini Glue Dots.
- Tie a double bow using two strands of Linen Thread and attach with a Mini Glue Dot. Trim the ends as needed.
- Sprinkle on some Opal Rounds.
- Stamp and decorate the inside.
- Decorate your envelope.
- So cute! Now send it to someone special.


$5.00

$7.50


$29.00

$13.00
Recommended Stamper’s Toolkit ❤
Product List
$12.00

$7.00

$4.25

$5.75

$5.50

$11.00

$26.00

$7.00

$6.50

$11.00

$20.00

$11.00

$80.75

$128.00


$16.00

$13.00


