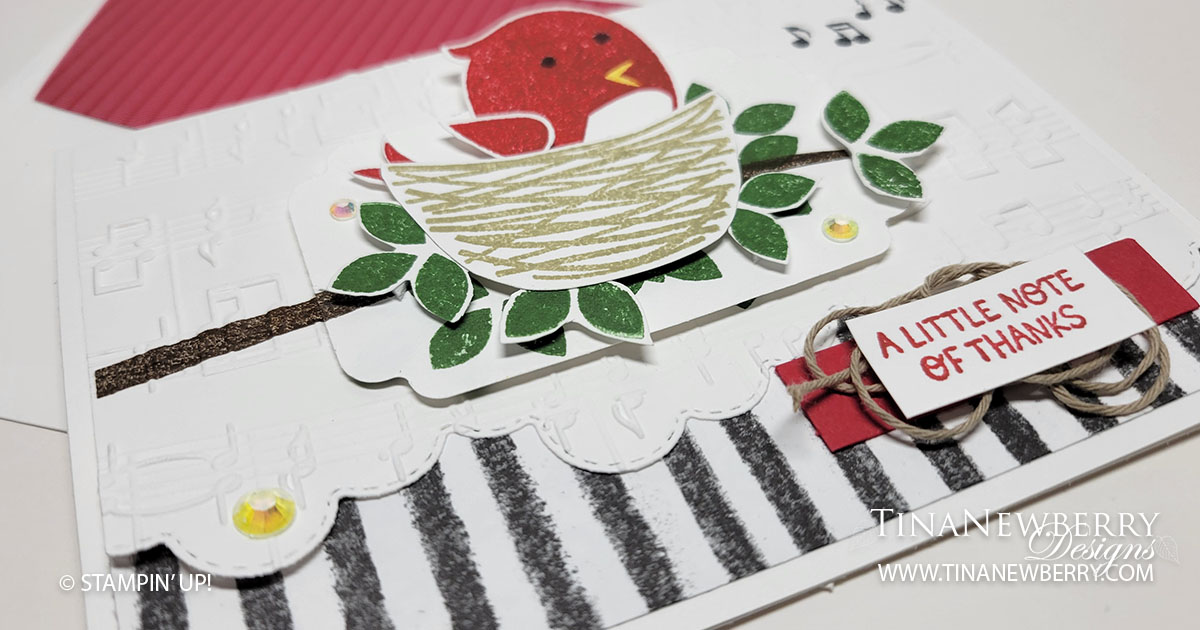
Just a ‘Note’ of Thanks… Get it? Musical notes in the background. 🙂 I HAD to make a Cardinal with the Sweet Songbirds bundle. I added a bit of black and white paper for added drama and the rest came together in a jiffy.
Measurements
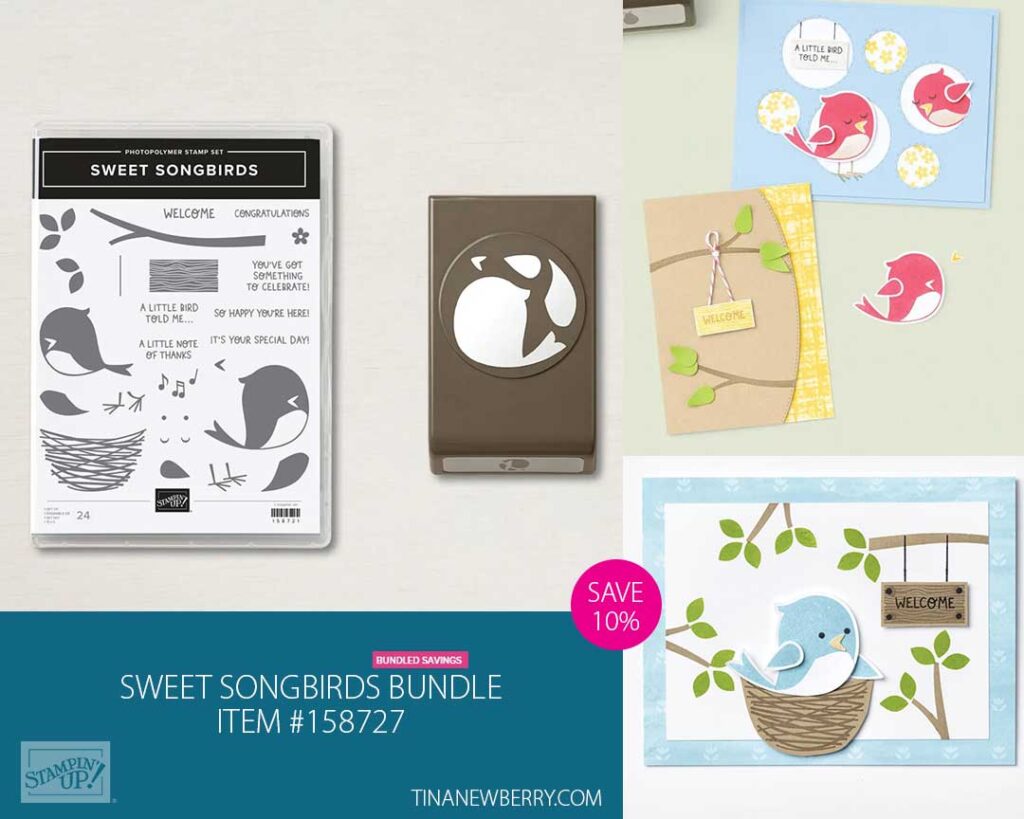
Full list of supplies needed, listed below. A die cutting machine is needed for this card.
Basic White Thick Cardstock: 5 ½” w x 8 ½” h scored and folded on the long-side at 4 ¼”
Basic White Cardstock:
- 5 ¼” w x 4” h
- Scrap for background label, sentiment label, bird, nest, and leaves
Perfectly Penciled Designer Series Paper (DSP): 1 ½” h x 5 ¼” w
Real Red Cardstock: ½” h x 2” w
Let’s Create
- Affix all stamps to Acrylic Blocks.
- Fold the Card Base in half using a Bone Folder to sharpen the crease.
- On scrap Basic White Cardstock, stamp the:
- Bird, wing, and sentiment in Real Red
- Beak in Daffodil Delight
- Eyes in Tuxedo Black
- Leaves in Garden Green (two of each set of leaves)
- Nest in Crumb Cake
- Use Stampin’ Snips to fussy cut out the bird, wing, leaves, and nest.
- Die cut the background label from Basic White scrap using the largest rectangle in the Something Fancy dies.
- Arrange the background label, bird, and nest on the 5 ¼” w x 4” h Basic White Cardstock. About half way down the left, stamp the tree branch with Early Espresso Ink on the 5 ¼” w x 4” h Basic White Cardstock.
- On the background label, stamp the tree branch about ¾ of the way down the left side in Early Espresso Ink. Stamp leaves in Garden Green..
- Stamp music notes in the upper right corner of the 5 ¼” w x 4” h Basic White Cardstock with Tuxedo Black ink. And about halfway down the left side stamp the tree branch.
- Run the 4 ¼” h x 5 ½” w Basic White Cardstock through the Stampin’ Cut & Emboss machine with the Cloud Borders Die to remove about 1” off the long side. Then run it through again with the Merry Melody Embossing Folder. Attach to the Card Base with Stampin’ Seal.
- Attach the Perfectly Penciled DSP to the Card Base using Stampin’ Seal.And then attach the embossed and die cut Basic White.
- Line up the tree branch from the embossed and die cut layer with the branch on the background label and attach with Stampin’ Dimensionals.
- Arrange the bird, leaves, and nest onto the background layer and attach with Stampin’ DImensionals.
- Trim the sentiment you stamped on scrap Basic White Cardstock to about ⅝” h x 1 ¼’ w. Loop about 6-9” of Crumb Cake Baker’s Twine and attach to back of sentiment with Mini Glue Dots.
- Attach sentiment to Real Red strip with Stampin’ Dimensionals. Attach with Stampin’ Seal.
- Add some Iridescent Rhinestones
- Stamp and decorate the inside.
- Decorate your envelope.
- Adorbs!! Who do you need to thank? Put it in the mail.
Shopping List
")


 Designer Series Paper")


$29.00


$28.00
Recommended Stamper’s Toolkit ❤
Product List
$12.00

$7.00

$4.25

$5.75

$5.50

$11.00

$26.00

$7.00

$6.50

$11.00

$20.00

$11.00

$80.75

$128.00

$16.00

$13.00


