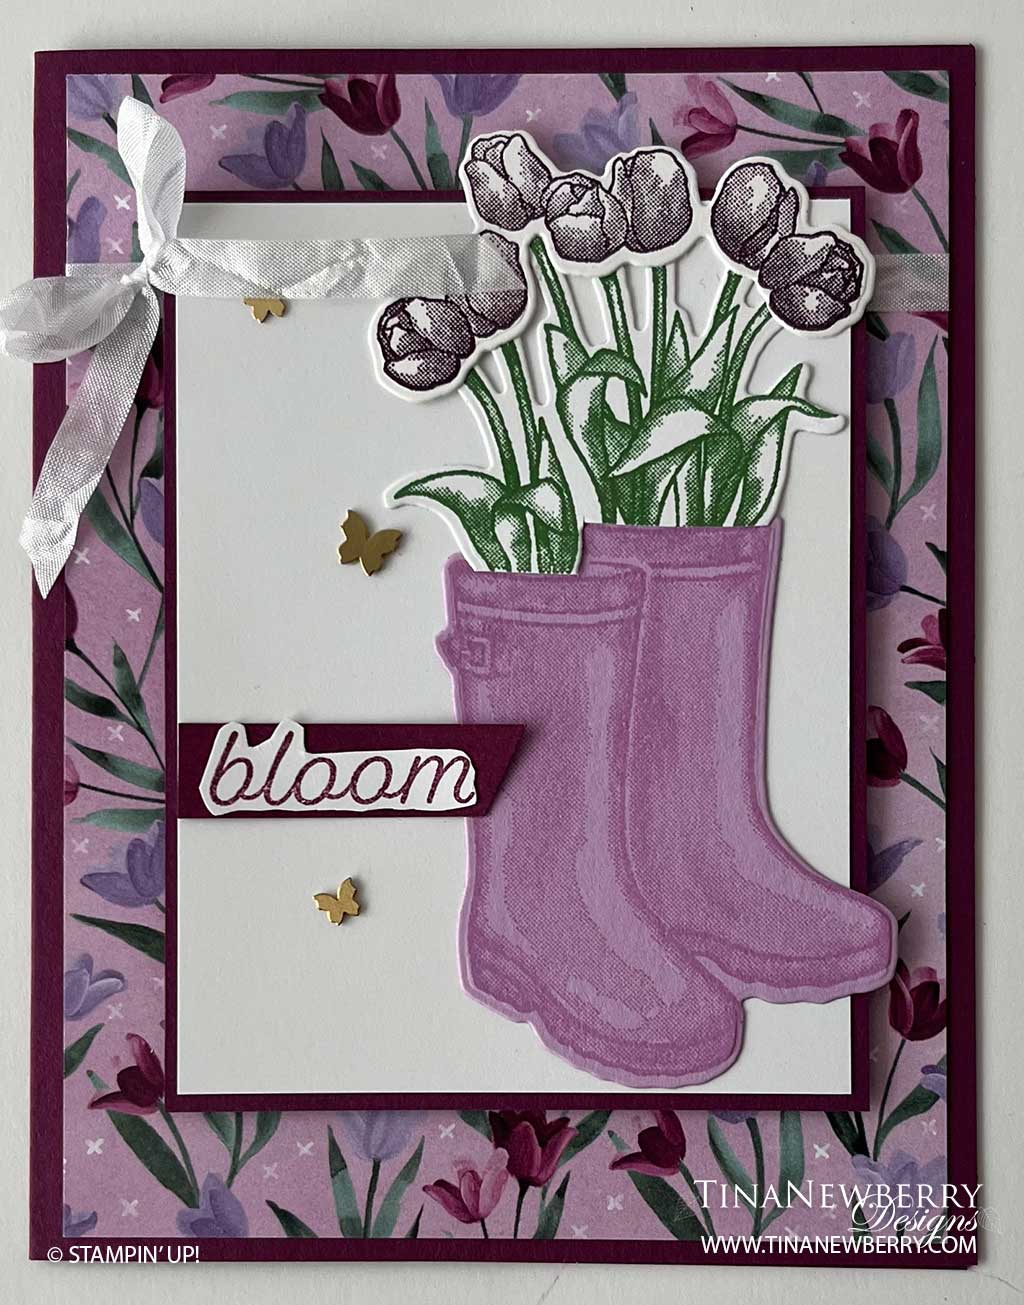
Nothing says spring like a good ole pair of wellies and a bundle of tulips. Create your favorite pair of rain boots with coordinating flowers and send this cheerful card to a friend.
Measurements
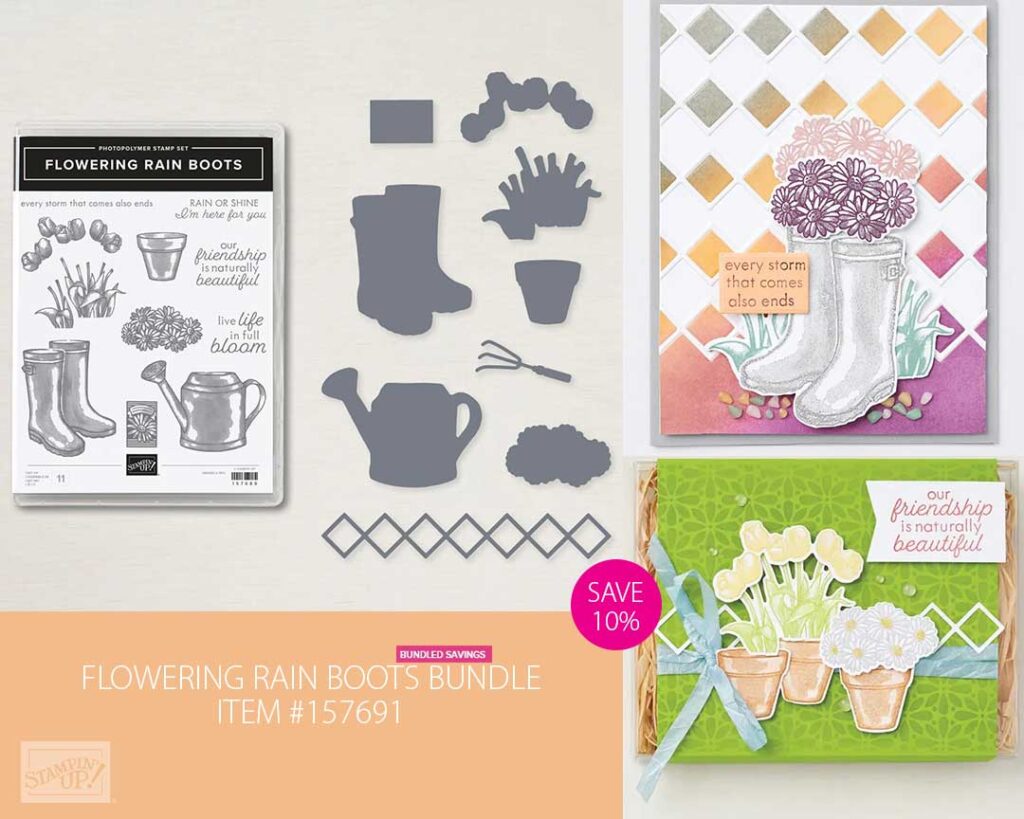
Full list of supplies needed, listed below. A die cutting machine is needed for this card.
Rich Razzleberry Cardstock: 5 ½”h x 8 ½” w scored and folded at 4 ¼” w
Flowering Fields Designer Series Paper (DSP): 5 1/4” h x 4” w
Rich Razzleberry Cardstock:
- 4 1/8” h x 3 1/8” w
- ½” h X 1 ¾” w for sentiment
Fresh Freesia Cardstock – scrap for stamping and die cutting
Basic White Cardstock:
- 4″ h x 3” w
- scraps for stamping and die cutting
- 5 1/4” h x 4” w for inside
Let’s Create
- Affix all stamps to Acrylic Blocks.
- Fold the Card Base in half using a Bone Folder to sharpen the crease.
- Wrap a piece of the White crinkled seam binding around the top of the Flowering Fields DSP and tie a bow.
- Add the Flowering Fields DSP to the card base using Stampin’ Dimensionals.
- Use Stampin’ Seal to add the 4″ h x 3” w Basic White panel to the 4 1/8” h x 3 1/8” w Rich Razzleberry panel then attach to the card front using Stampin’ Dimensionals.
- Stamp the following then cut out with the coordinating die
- Fresh Freesia Cardstock – rain boots with Fresh Freesia ink
- Basic White Cardstock – tulip stems with Shaded Spruce ink and tulip flowers with stamped off Blackberry Bliss ink
- Using Multipurpose Liquid Glue, add the flower stems and tulip flowers to the boots and then to attach to the 4″ h x 3” w Basic White panel
- Use a Rich Razzleberry Stampin’ Write Marker to ink up the word “bloom” and stamp on a scrap of White. Use Paper Snips to fussy cut around the word.
- Add the Bloom sentiment to the ½” strip of Rich Razzleberry Cardstock.
- Trim the left edge of the Rich Razzleberry Strip close to the word, trim the right edge at an angle for interest
- Add the sentiment strip to the card front with Stampin’ Dimensionals.
- Sprinkle on some Brushed Brass Butterflies
- Stamp and decorate the 5 1/4” h x 4” w Basic White Cardstock for the inside and attach with Stampin’ Seal.
- Decorate your envelope.
- So fun! Who will you send it to?
Shopping List

$49.50


 Designer Series Paper")

$10.00
 Crinkled Seam Binding Ribbon")
Recommended Stamper’s Toolkit ❤
Product List
$12.00

$7.00

$4.25

$5.75

$5.50

$11.00

$26.00

$7.00

$6.50

$11.00

$20.00

$11.00

$80.75

$128.00


$16.00

$13.00


