Send a powerful message of hope, thanks, celebration, and more on all your paper crafting projects with the Dainty Delight Stamp Set and Dies.
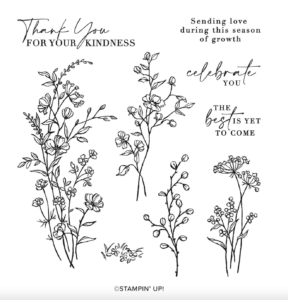
Little flowers send a big message when you use this Dainty Delight Stamp Set. Sure, they’re dainty, but they’ll send a powerful message of hope, thanks, celebration, and more on all your paper crafting projects. Use these beautiful florals on your handmade cards and watch the smiles bloom! The line art images can be custom colored using your favorite Stampin’ Up! coloring technique. Stamp a single stem for a clean, minimalist look, or mix and match the images for a lovely field of dainty delights—no matter how you style them, you can’t go wrong with these delicate beauties!
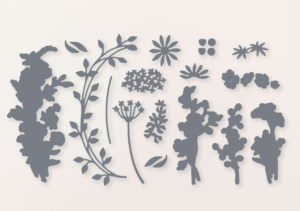
Make quick work of cutting out delicate floral images with these Dainty Delight Dies. Add these die-cut images to your handmade cards and wow everyone as they wonder just how you managed to get such perfect, delicate, and detailed floral cutouts (thank you, dainty dies!). Die cut the images then use your favorite coloring technique to customize and make each flower a unique work of art, just like nature intended!
Measurements
Full list of supplies needed, listed below. A die cutting machine is needed for this card.
Card base – White
5 ½” x 8 ½” scored at 4 ¼”
Scrap for die cutting and embossing
Berry Burst: 4” x 5 ¼”
Bubble Bath: ½” x 6 ½”
Perennial Lavender – Queen Anne’s lace clustered pattern: 4” x 4”
Let’s Create
- Affix all stamps to acrylic blocks.
- Fold and burnish card base at the score line using bone folder.
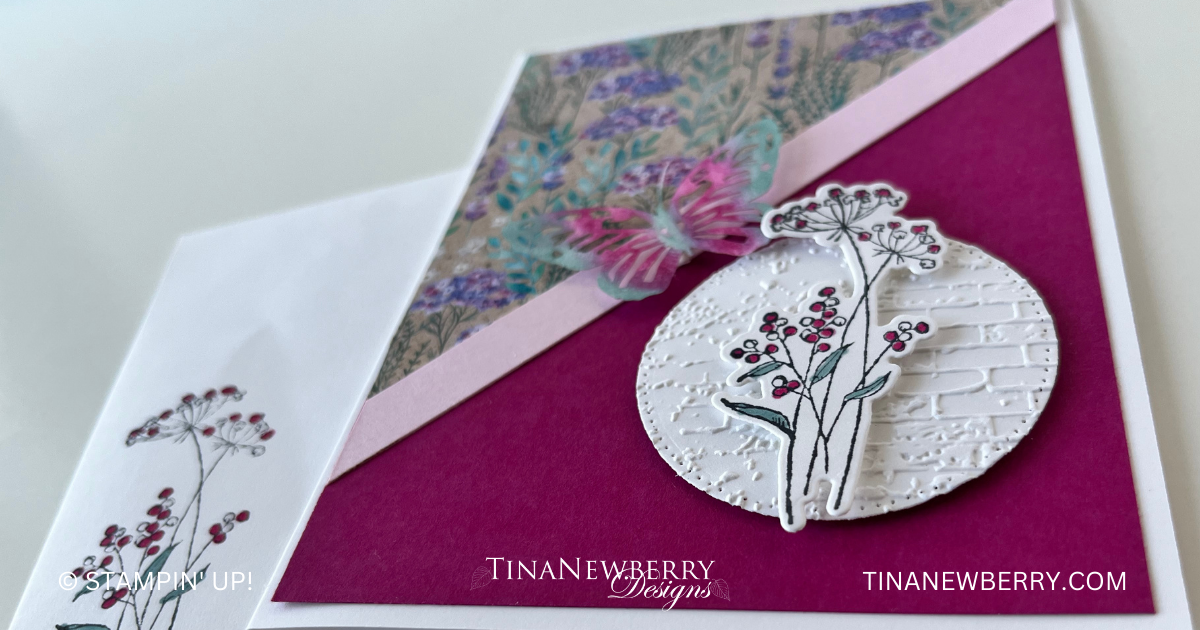
- Glue the large panel of Berry Burst to the card front centering on all sides.
- Take the panel of dsp and cut in half from top right to bottom left to form a triangle. Add the triangle to the top of the card front. See photo above.
- Add the strip of Bubble Bath to the card front butting the strip up against the dsp making sure the strip hangs over the panel at the top and bottom. Trim the Bubble Bath to be even with the sides of the Berry Burst. See photo above.
- Used the next to the largest of the Stylish Shapes circle dies to die cut a White circle.
- Use the embossing folder to emboss the circle from Step 6. Add it to the lower right hand corner of the card front using dimensionals. See photo above.
- Stamp the Queen Anne’s Lace image on a scrap of White with Memento Tuxedo Black ink.
- Color the image as below.
- Flower heads – Berry Burst blend Note – randomly color the flower heads to mimic the flower heads in the dsp
- Leaves – Shaded Spruce blends
- Use the die to cut out the colored image from Step 9. Add the image to the embossed circle using dimensionals. See photo above.
- Take the sheet of Paper Butterfly Accents and the smallest full butterfly and color the body with Lost Lagoon and the inside of the wings with the Berry Burst and the outside of the wings with Lost Lagoon using blending brushes. Note – Leave the butterfly in the die cut sheet as it will be easier to color. See photo above.
- Add small pieces of dimensionals to the back of the butterfly body and add the butterfly to the center of the Bubble Bath strip. See photo above.
- Use the same coloring procedure and Queen Anne’s Lace stamp to decorate the inside of the card and envelope.
Shopping List
")


 Designer Series Paper")


Recommended Stamper’s Toolkit ❤
Product List


