
Show off your stunning patterned paper with this layout! Swap up the two rectangles and accent with coordinating cardstock for a whole new look.
Measurements
Full list of supplies needed, listed below. A die cutting machine is needed for this card.
Very Vanilla
- 5 ½” x 8 ½” scored and folded on the long-side at 4 ¼”
- 3” x 2 ¼” (for die cutting the rectangle layer behind the leaf)
- 2 ⅛” x ¾” (for stamping the sentiment)
- 3” x 3” (for stamping and die leaf)
Copper Clay
- 1 ⅞” x 5 ⅜”
- 3 ⅜” x 2 ⅞”
Gold Foil
- 2 ½” x 1 ¼” (for die cutting the mat around the sentiment)
- 3 ½” x 3” (for die cutting the veins in the leaf)
All About Autumn Designer Series Paper
- 5 ¼” x 1 ¾” (Wood Print)
- 4 ¼” x 2 ¾” (Leaf Print)
Let’s Create
- Affix all stamps to Acrylic Blocks.
- Fold the Card Base in half using a Bone Folder to sharpen the crease.
- Using Copper Clay ink pad, stamp the large maple leaf onto the 3” square Very Vanilla piece of cardstock.
- Using Copper Clay ink pad, stamp the sentiment onto the 5 ⅜” x ¾” piece of Very Vanilla cardstock.
- Using the 2nd largest rectangle die from the Nested Essentials Dies, cut the 3” x 2 ¼” piece of Very Vanilla. Using the Fold Foil Paper, Die cut the layer that goes behind the sentiment.
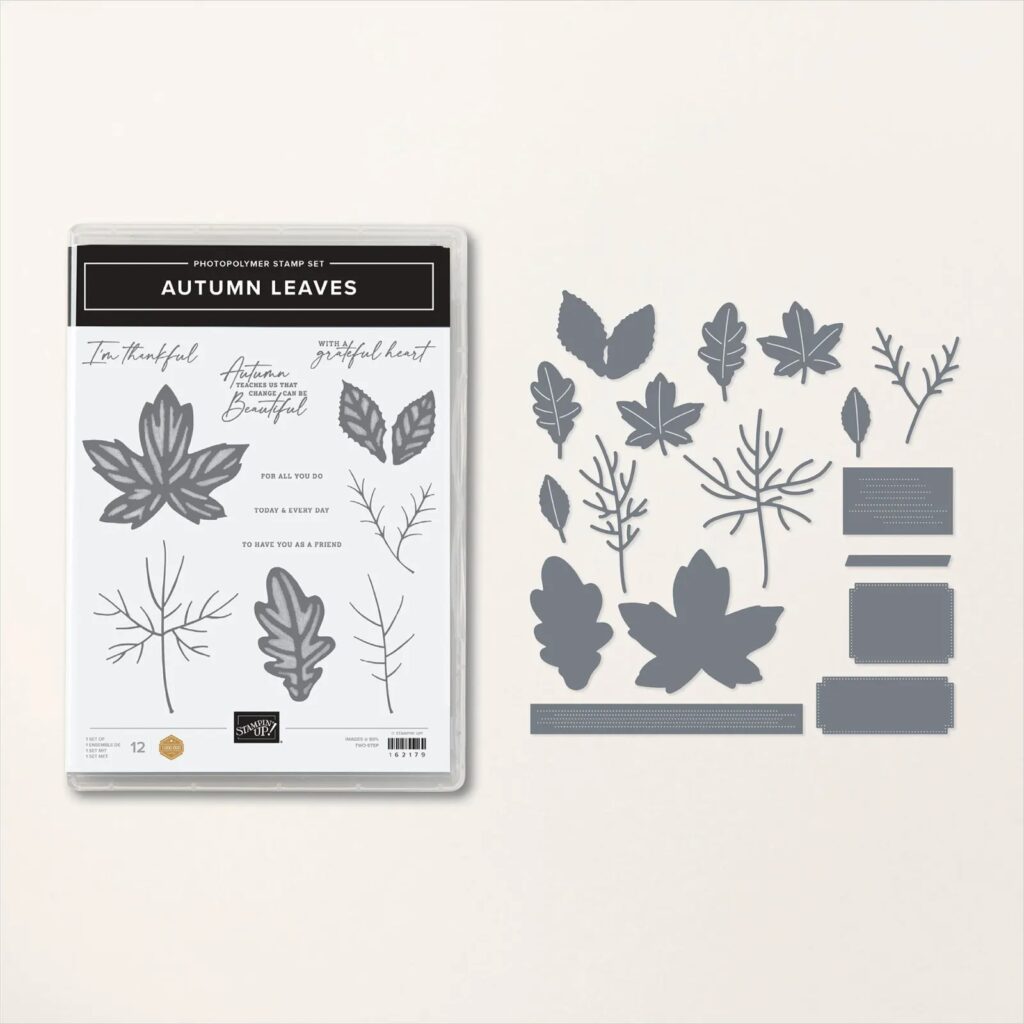
- Die cut the Leaf using the Maple Leaf die from the Autumn Leaves Die Set. Die cut the maple leaf veins from the Gold Foil paper.
- Assemble your card: Adhere the wood print Designer Series Paper to the coordinating size Copper Clay Cardstock, and adhere this toward the left side of the folded card base. Adhere the Leaf print Designer Series Paper to the coordinating size of Copper Clay Cardstock, and adhere this toward the right side of the folded card, overlapping the other panel just a bit.
- Adhere the die cut rectangle to the card front off setting it towards the left just a bit.
- Adhere the gold foil veins to the stamped maple leaf. Using Stampin’ Dimensionals, adhere the die cut leaf to the Very Vanilla rectangle.
- Adhere the sentiment to the die cut foil piece. And adhere these layers to the lower edge of the card.
- Tie a small bow and adhere it to the stem of the leaf using a Mini Glue Dot.
- Randomly place 3 gold sequins Neutrals Adhesive Backed Sequins onto your card.
- Be sure to decorate the inside of your card and the envelope!
Shopping List
")

$34.00


$5.00
 Specialty Designer Series Paper")


 Satin Edged Ribbon")
Recommended Stamper’s Toolkit ❤
Product List
$12.00

$7.00

$4.25

$5.75

$5.50

$11.00

$26.00

$7.00

$6.50

$11.00

$20.00

$11.00

$80.75

$128.00


$16.00

$13.00


