Tropical foliage is my favorite! Large lush leaves in an array of greens make me so happy. I can’t explain it. The Artfully Composed Suite with the Artfully Layered Bundle is my happy place! I really like the look of two different fonts as seen in the sentiments and this color combo using the new Parakeet Party and Orchid Oasis is stunning.

Measurements
Full list of supplies needed, listed below. A die cutting machine is needed for this card.
Basic White Thick: 5 ½” h x 8 ½” w scored and folded on the long-side at 4 ¼” for Card Base
Basic White:
- 4” h x 3 ¼” w
- 4″ h x 5 1/4″ w for inside
- Scrap for leaves and sentiment die cut
Orchid Oasis: scrap for die cutParakeet Party: scrap for leaf
Let’s Create
- Affix all stamps to Acrylic Blocks.
- Fold the Card Base in half using a Bone Folder to sharpen the crease.
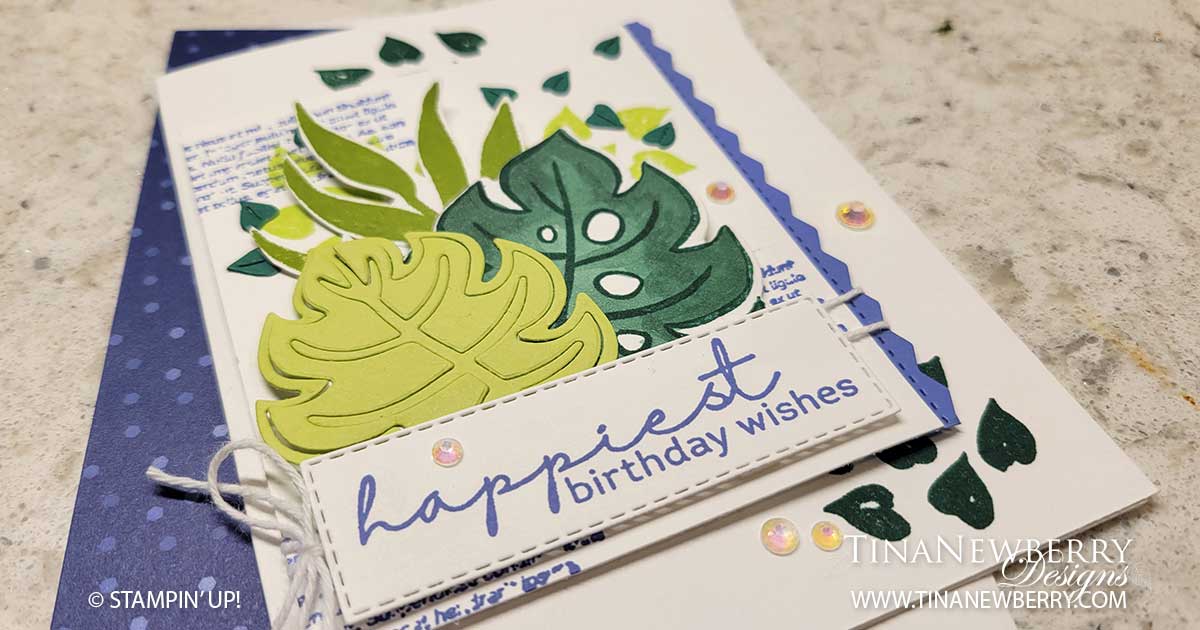
- In Shaded Spruce ink stamp leaves on Card Base and on 4 x 3 ¼” Basic White layer.
- 4 x 3 ¼” Basic White layer, also stamp paragraph stamp in Orchid Oasis and more leaves in Parakeet Party.
- On Basic White scrap, stamp leaf outline in In Shaded Spruce ink and leafy stamp in Granny Apple Green. Then use Shaded Spruce Stampin’ Blends to color in the leaf outline and then die cut. Fussy cut the Granny Apple Green leafy piece.
- Die cut the border in Orchid Oasis cardstock and attach to the edge of the 4 x 3 ¼ Basic White stamped piece.
- Wrap linen thread around the 4 x 3 ¼” Basic White piece twice and tie a bow to the far left side.
- Attach adhesive sheets to the back of a piece of Parakeet Party Cardstock and then Die cut the palm leaf. Remove the backing and adhere the Parakeet Party leaf to a piece of white cardstock to hold all the pieces together.
- Arrange the three leaves, trimming excess as needed, and secure to each other with Mini Glue dots. Then attach to card with Stampin’ Dimensionals.
- Stamp the sentiment on Basic White scrap and die cut out with the stitched rectangle die. Attach with Stampin’ Dimensionals
- Sprinkle on the Iridescent Rhinestones.
- Stamp and decorate the 4″ h x 5 1/4″ w Basic White inside and attach with Stampin’ Seal.
- Decorate your envelope.
- Stunning! Who can you celebrate today?
Shopping List
")


$35.00
Recommended Stamper’s Toolkit ❤
Product List
$12.00

$7.00

$4.25

$5.75

$5.50

$11.00

$26.00

$7.00

$6.50

$11.00

$20.00

$11.00

$80.75

$128.00


$16.00

$13.00


