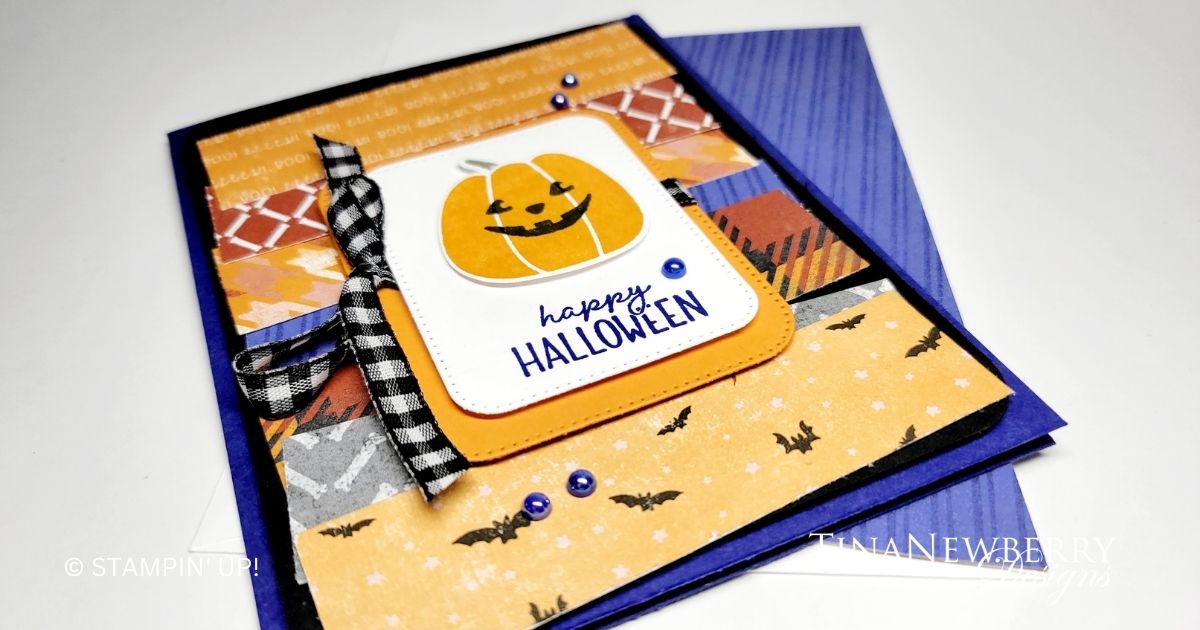
I really like the subtle Halloween prints in the Them Bones Designer Series Paper (DSP) pack and this layout of haphazardly layered DSP strips and a simple pumpkin layered on the sentiment. There is a new Black and Very Vanilla Large Check ribbon coming out in the new mini catalog, but with white cardstock on my card, I opted for the original Black & White gingham ribbon.
Measurements
Full list of supplies needed, listed below. A die cutting machine is needed for this card.
Starry Sky Cardstock: 5 ½” h x 8 ½” w scored and folded at 4 ¼”
Basic Black Cardstock: 5 ¼” h x 4 ¼” w
Pumpkin Pie Cardstock: 2 ½” x 3 ½”
Basic White Cardstock:
- 5 ¼” x 4”
- Scrap for sentiment and pumpkin
Them Bones Designer Series Paper (DSP): 1” h x 3 ¾” w (7)
Let’s Create
- Affix all stamps to Acrylic Blocks.
- Fold the Card Base in half using a Bone Folder to sharpen the crease.
- Round the corners of the 5 ¼” h x 4 ¼” w Basic Black cardstock. I used an old corner rounder punch to snip the edges. If you don’t have a corner rounder, you can trace the edge of any circular object and trim with your Paper Snips.
- Attach the seven DSP strips with Multipurpose Glue haphazardly onto the Basic Black panel.
- Attach the Basic Black panel with Stampin’ Dimensionals.
- Use the Nested Essentials dies to cut the Basic White and Pumpkin Pie cardstock.
- Wrap Black & White Gingham ribbon around the Pumpkin Pie panel and tie a bow.
- Stamp the sentiment in Starry Sky ink onto the Basic White die cut and attach to the Pumpkin Pie panel with Stampin’ Dimensionals.
- Stamp the pumpkin in Pumpkin Pie ink and the Jack O’Lantern face in Tuxedo Black Memento Ink onto the Basic White scrap. Stamp the stem in Crumb Cake. Use the Pick of the Patch Builder punch to punch out the pumpkin and stem. Use a Mini Glue Dot to attach the stem to the pumpkin.
- Attach the pumpkin to the sentiment panel.
- Attach the Pumpkin Pie panel to the DSP strips with Stampin’ Dimensionals.
- Sprinkle on some 2022-2024 In Color Pearls.
- Stamp and decorate the remaining 5 ¼” x 4” Basic White cardstock and attach to the inside
- Decorate your envelope.
- So cute! Who will you send this cheerful card to?
Shopping List
This project uses the Pick of the Patch Bundle [162201] and Them Bones Designer Series Paper [162215] from the Sept – December Mini Catalog available September 6, 2023
Recommended Stamper’s Toolkit ❤
Product List


