True Confession: My love affair with the Brightly Gleaming Designer Series Paper has been going on for over a year. I just could not help myself! It has blues and greens and my all time favorite Pretty Peacock. Last year I bought the entire Christmas Gleaming Suite and made all of my Christmas cards with it. It’s just so pretty! Needless to say I was thrilled when Stampin’ Up! brought it back again this year giving me another opportunity to use this beautiful paper! It’s only around for a few more weeks. I suggest you get you some before it’s GONE GONE GONE.
Full list of supplies needed, listed below.
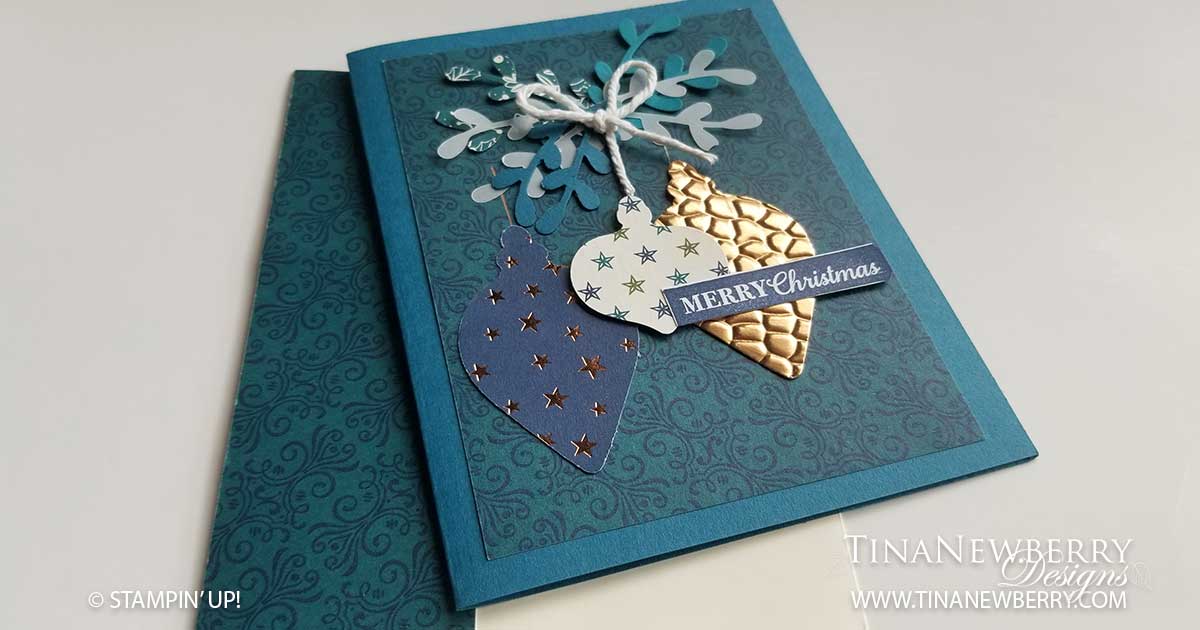
Card Base: Pretty Peacock Cardstock 8 1/2 h” x 5 1/2″ w folded to 5 1/2″ h x 4 1/4″ w.
Background: Brightly Gleaming SDSP 5″ h x 3 3/4″ w
Sentiment Layer: Whisper White Cardstock cut to size (or punch it with the Classic Label punch and snip off the edges) after stamped.
- Affix all stamps to Acrylic Blocks.
- Fold the Card Base in half using a Bone Folder to sharpen the crease.
- Attach the Background using Stampin’ Seal.
- Punch or die cut some foliage from scraps of the Brightly Gleaming DSP, Pretty Peacock Cardstock and Vellum. I used the Sprig Punch and made 5. Affix to the top of the card with Mini Glue Dots.
- Tie a bow in some twine or thread and attach with a Mini Glue Dot.
- Run a piece of scrap Bronze Foil through the Hammered Metal Embossing Folder (optional) and punch an Ornament.
- Punch the two more Ornaments from scraps of the Brightly Gleaming DSP.
- Attach two Ornaments with Stampin’ Seal and one with Stampin’ Dimensionals.
- Stamp the Sentiment on Whisper White Cardstock in Night of Navy Ink and trim to size.
- Decorate the Inside Layer and attach.
- Decorate the envelope.
- So pretty! Put that in the ‘Send’ pile.
Shopping List
")


Recommended Stamper’s Toolkit ❤
Product List


