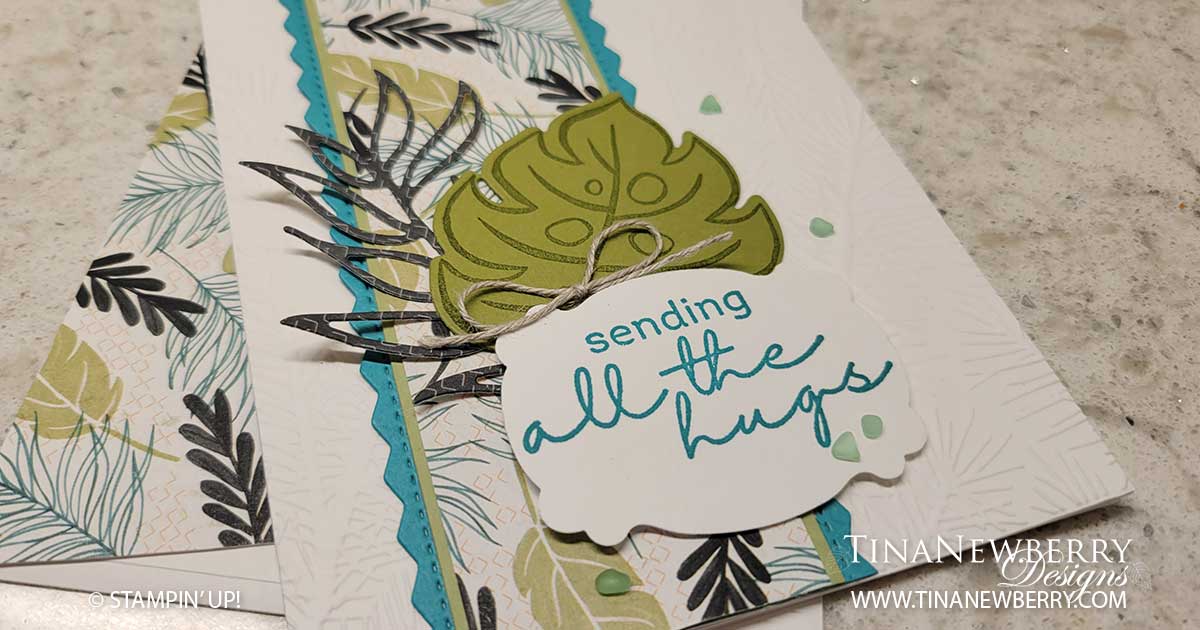
When I saw a card similar to this from Karen Henderson in the UK, I just HAD to make it. I love the way she used the Wintry 3D embossing folder to tie in the various leaf shapes. And well I do love me a white card base! The colors, patterns and textures just pop on this pretty card.

Measurements
Full list of supplies needed, listed below. A die cutting machine is needed for this card.
Basic White Thick Cardstock 5 1/2″ h x 8 1/2″ w folded to 5 1/2″ h x 4 1/4″ w
Basic White Cardstock 5 1/4″ h x 4″ w
Follow the directions in the kit for stamping the Sentiment and making the arrangement
Let’s Create
- Affix all stamps to Acrylic Blocks.
- Fold the Card Base in half using a Bone Folder to sharpen the crease.
- Run the 5 ½” h x 4 ¼” w Basic White panel through the Stampin’ Cut & Emboss Machine with the Wintry 3D Embossing Folder embossing the outer edges. Then attach to Card Base with Stampin’ Seal.
- Run the Bermuda Bay panel through the Stampin’ Cut & Emboss Machine to die cut the edges.
- Layer the Pear Pizzazz and Artfully Composed DSP onto the Bermadu Bay layer and adhere with Stampin’ Seal, then attach to the card with Stampin’ Seal.
- Stamp the broad leaf with Old Olive Ink and die cut.
- Die cut the leafy branch outline with Artfully Composed DSP.
- Attach both leaves to the front with Mini Glue Dots.
- Stamp the sentiment on Basic White Cardstock scap and punch out with the Lasting Label Punch.Attach with Stampin’ Dimensionals
- Tie a bow with Linen Thread and attach with a Mini Glue Dot.
- Sprinkle on the Faux Sea Glass Shapes
- Stamp and decorate the 4″ h x 5 1/4″ w Basic White inside and attach with Stampin’ Seal.
- Decorate your envelope.
- So pretty! Who needs some cheer today?
Shopping List
Recommended Stamper’s Toolkit ❤
Product List


