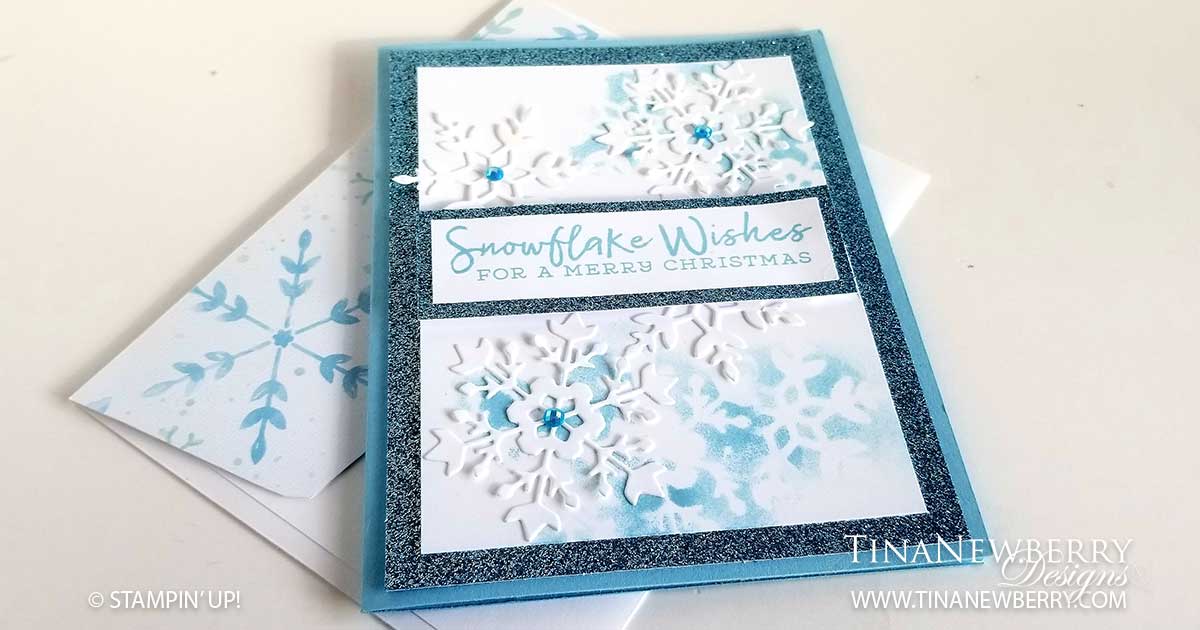
Four of my favorite things came together for this simple, beautiful card: Balmy Blue, glitter paper, white and snowflakes! I really really like snowflakes in winter from Florida. LOL! I learned a new technique to create the reverse snowflake images on the background.
Full list of supplies needed, listed below. A die cutting machine is needed for this card.
Card Base: Balmy Blue Cardstock 8 1/2 h” x 5 1/2″ w folded to 5 1/2″ w x 4 1/4″ h.
Background: Balmy Blue Glimmer Paper 5 1/4″ h x 4 ″ w
Decorative Layer: Whisper White Cardstock 4 3/4″ h x 3 1/2″ w
Sentiment Matte: Balmy Blue Glimmer Paper 1″ h x 3 1/2 ″ w
Sentiment: Whisper White Cardstock 3/4″ x 3 1/4″
- Affix all stamps to Acrylic Blocks.
- Fold the Card Base in half using a Bone Folder to sharpen the crease.
- Attach the Background using Stampin’ Seal.
- Die cut six (6) Snowflakes from scrap Whisper White Cardstock.
- Lay one of the Snowflakes on the Decorative Layer and hold it there as your template. Using a sponge dauber, apply Balmy Blue Ink to the Decorative Layer right over and around the Snowflake template. Be very abstract in the amount and the location of the ink for a less defined look on the Background Layer. Repeat using the second snowflake. And finish with a total of three or four snowflakes. A couple near each other makes for a nice look.
- Attach the Decorative Layer with Stampin’ Seal.
- Add the four remaining Snowflakes to the Decorative Layer.
- Stamp the Sentiment on the Sentiment Layer in Balmy Blue ink and attach to the Sentiment Matte using Stampin’ Seal.
- Attach the Sentiment Matte using Stampin’ Dimensionals.
- Add some Blue Adhesive Backed Gems.
- Decorate the Inside Layer and attach.
- Decorate the envelope.
- So pretty! Put it in the mail to someone special!
Shopping List


Recommended Stamper’s Toolkit ❤
Product List
$12.00

$7.00

$4.25

$5.75

$5.50

$11.00

$26.00

$7.00

$6.50

$11.00

$20.00

$11.00

$80.75

$128.00


$16.00

$13.00


Design inspired by Melva Peters.