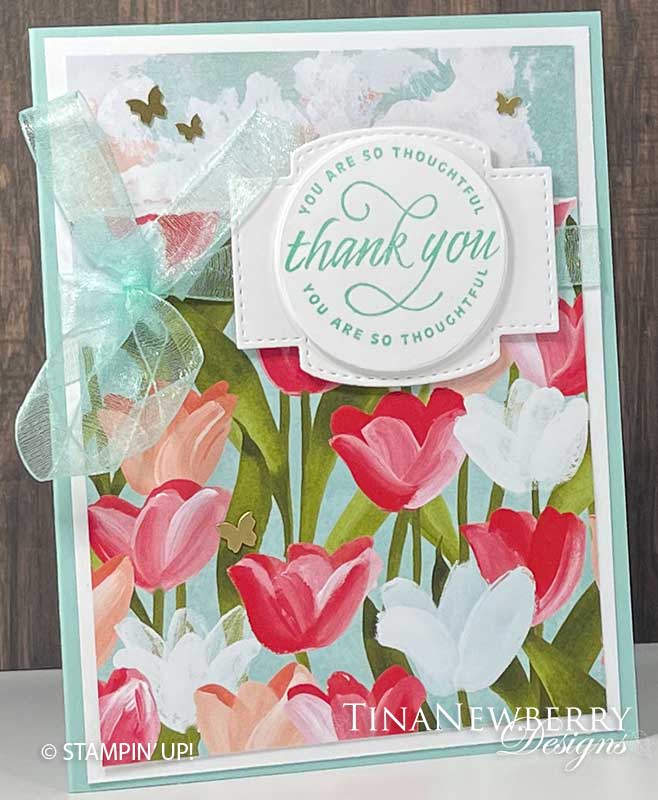
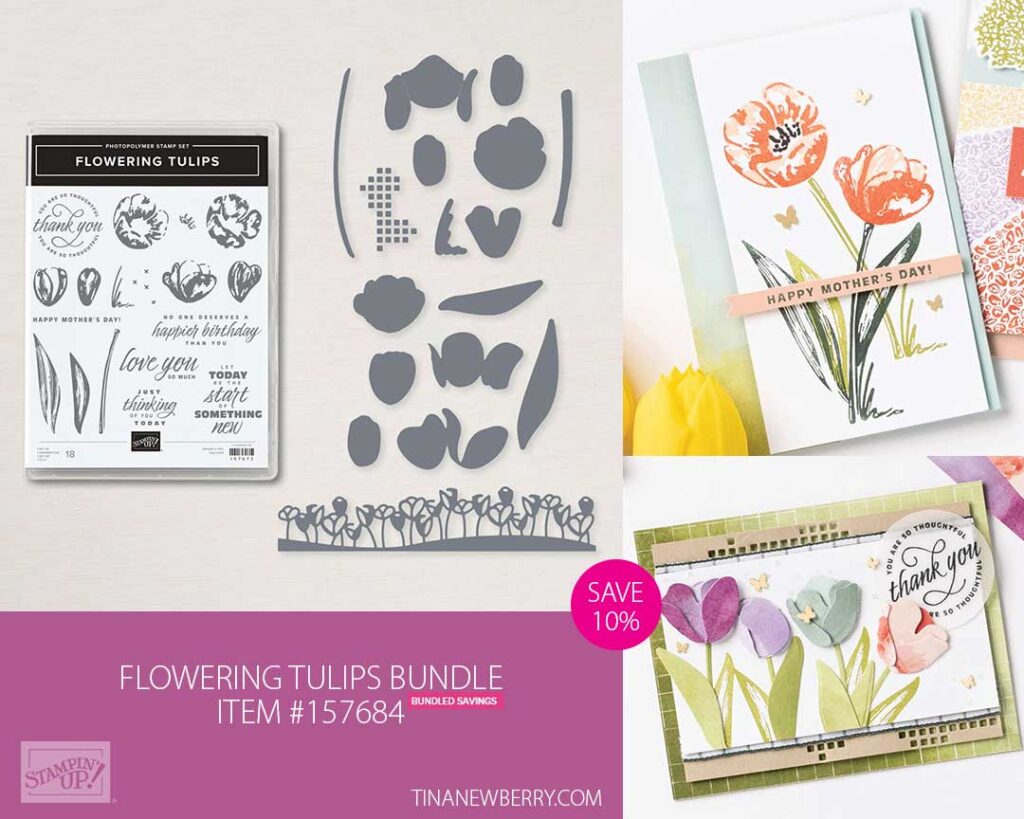
Make a sweet Thank You card in just minutes with the Flowering Fields Suite Collection. The paper and Designer Series Paper and circle sentiment set the scene for this sweet greeting card.
Measurements
Full list of supplies needed, listed below. A die cutting machine is needed for this card.
Pool Party 8 ½” w x 5 ½” h, score at 4 ¼” w for Card Base
Basic White:
- 4” w x 5 ¼” h for inside
- 4” w x 5 ¼” h
- 3” w x 2 ½” h Basic White Scrap
- 1 ¾” Circle from Basic White Scrap
Flowering Fields Designer Series Paper:
- 3 ¾” w x 3” h
- 3 ¾” w x 6” h tulips
Let’s Create
- Affix all stamps to Acrylic Blocks.
- Fold the Pool Party Card Base in half at the score line using a Bone Folder to sharpen the crease.
- Cut Designer Series Paper to 6” x 3-¾”, making sure your tulips are facing the right way. Tear at the top around the 2” mark. Adhere 3 ¾” w x 3” h sky pattern to the top of 4” x 5 ¼” Basic White Layer, and the tulip pattern to the bottom. Tear additional off the top as desired to reveal more of the sky.
- Wrap a length of 12” of Pool Party Sheer ribbon around this panel, leaving enough length to tie a bow. Adhere this panel to the card front with Stampin’ Dimensionals.
- Die Cut Stitched So Sweetly Label from the 3” w x 2 ½” h Basic White Scrap.
- Stamp sentiment on circle label in Pool Party ink. Adhere circle to Stitched So Sweetly label with Stampin’ Dimensionals.
- Attach sentiment panel to card front with Stampin’ Dimensionals.
- Tie a fluffy bow to the left of the sentiment.
- Place the butterflies in the sky, and one fluttering amongst the flowers.
- Stamp and decorate the inside and attach with Stampin’ Seal.
- Decorate your envelope.
- So sweet! Put it in the mail to brighten someone’s day.
Shopping List
")


 Designer Series Paper")
 Sheer Ribbon")

$10.00

$32.00

$35.00
Recommended Stamper’s Toolkit ❤
Product List
$12.00

$7.00

$4.25

$5.75

$5.50

$11.00

$26.00

$7.00

$6.50

$11.00

$20.00

$11.00

$80.75

$128.00


$16.00

$13.00


