Alas all good things must come to an end. This has been my favorite palette of In Colors and I am sad to see them retiring the end of this month. Grab them before they’re gone.

Measurements
Full list of supplies needed, listed below. A die cutting machine is needed for this card.
- Cut Basic White Card Base 8 ½” x 5 ½”, score at 4 ¼”
- Cut Basic White 4” x 5 ¼”
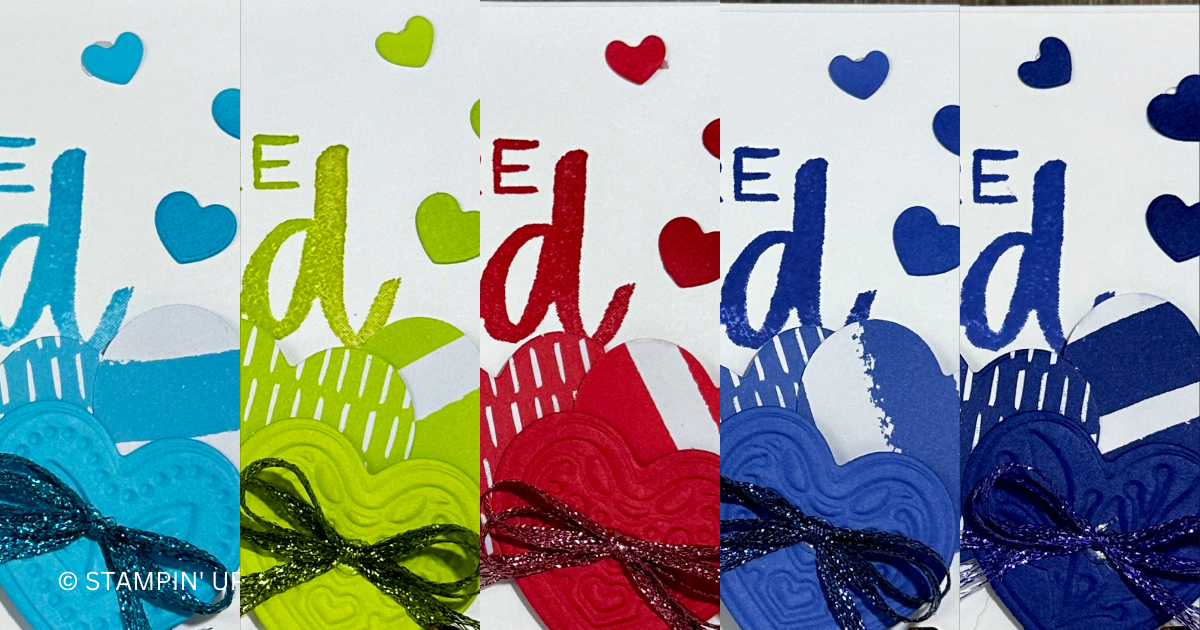
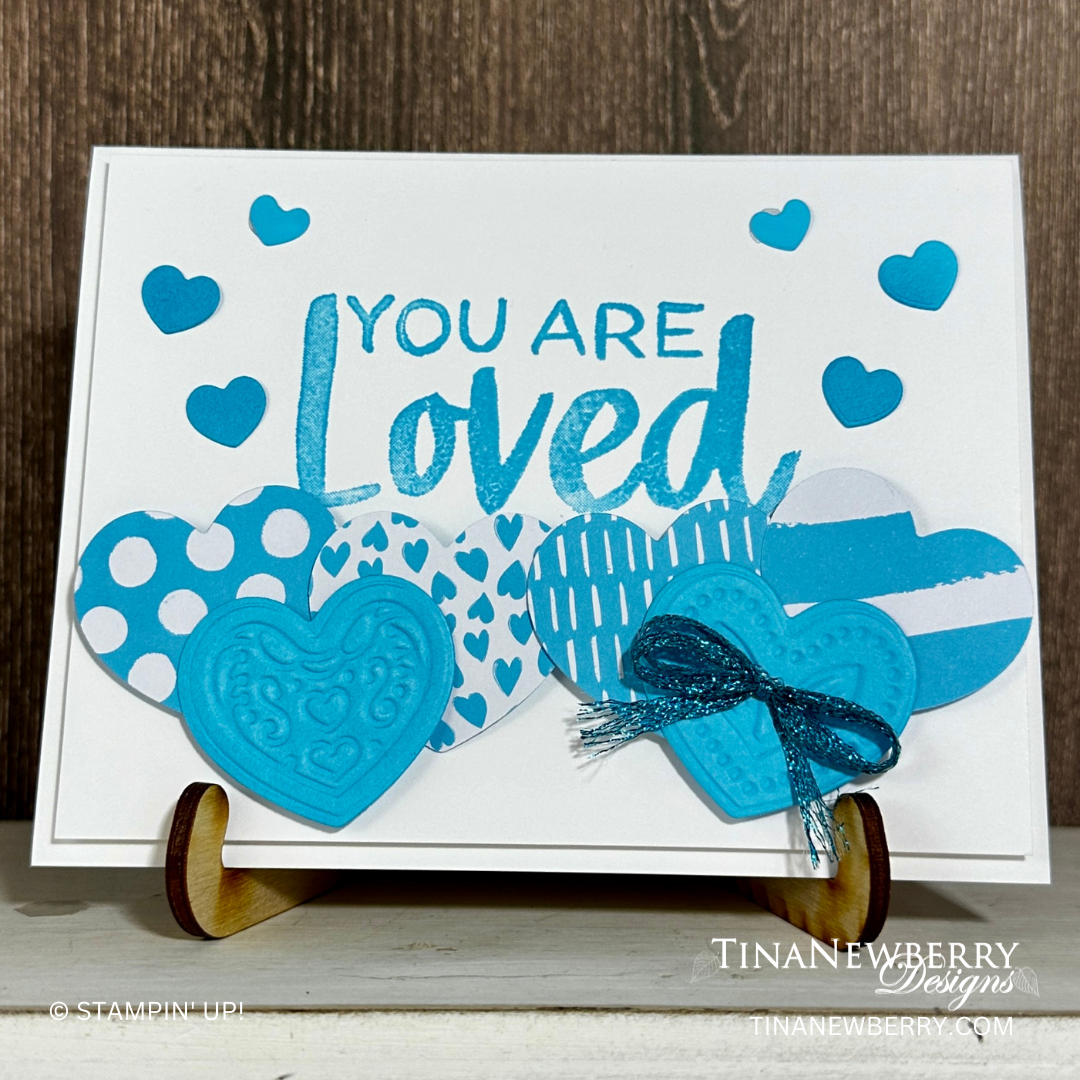
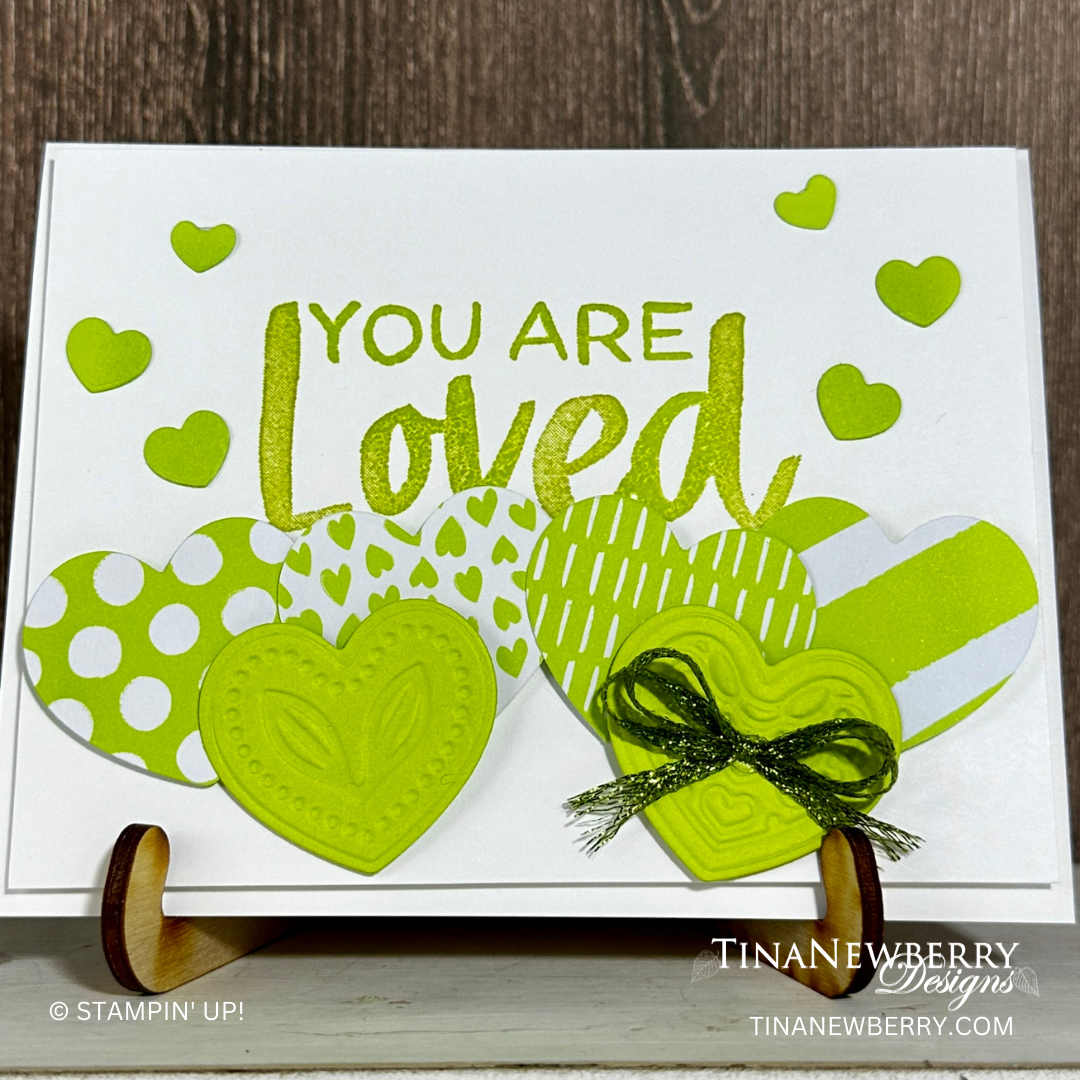
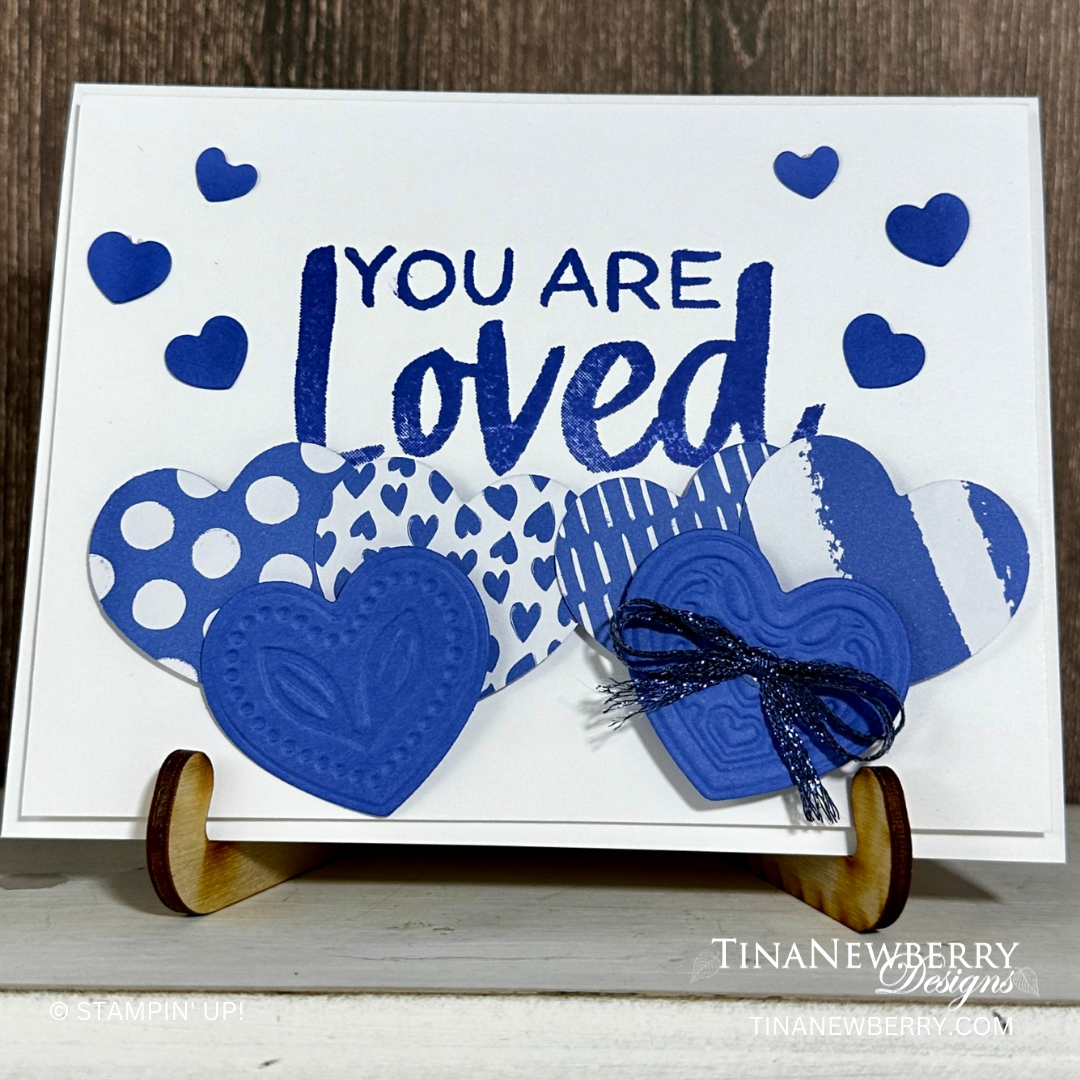
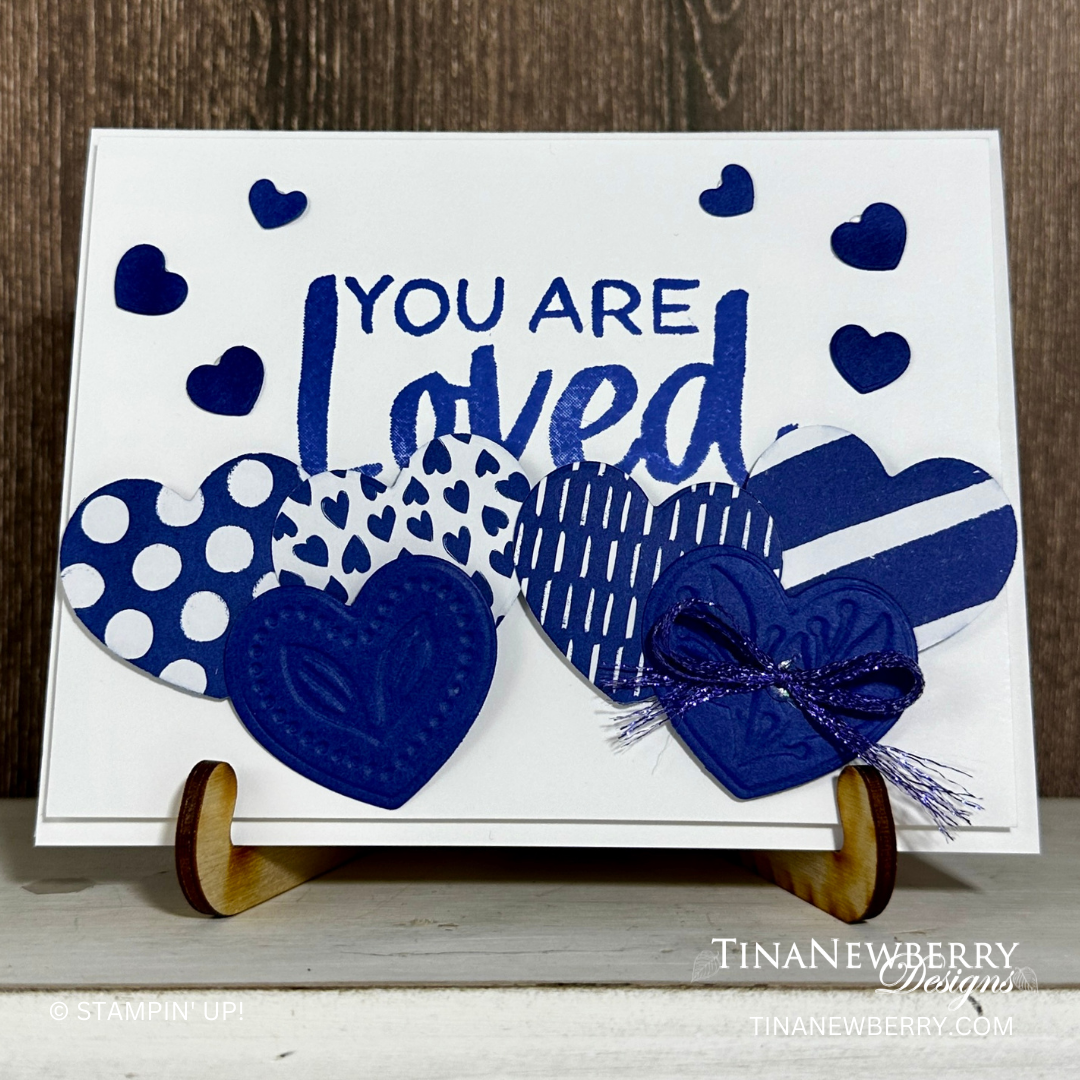
- DIe-cut Hearts from In-Color 6” x 6” Designer Series Paper using Adoring Hearts Bundle
- Emboss and Die-cut hearts from coordinating Cardstock using Adoring Hearts Bundle
Let’s Create
- Affix all stamps to Acrylic Blocks.
- Fold the Card Base in half using a Bone Folder to sharpen the crease.
- Die-cut hearts from In-Color 6” x 6” Designer Series Paper using Adoring Hearts Bundle
- Emboss and Die-cut hearts from coordinating Cardstock using Adoring Hearts Bundle
- Stamp sentiment in In-Color on Basic white layer
- Arrange and adhere hearts from coordinating In-Color around sentiment
- Adhere decorated layer to card front using Stampin’ Dimensionals
- Add bow with Mini-Glue Dot to bottom right heart
- Decorate your envelope.
- So cute! Now send it to someone special.
Shopping List
")
")
 Designer Series Paper")


Recommended Stamper’s Toolkit ❤
Product List
$12.00

$7.00

$4.25

$5.75

$5.50

$11.00

$26.00

$7.00

$6.50

$11.00

$20.00

$11.00

$80.75

$128.00


$16.00

$13.00


