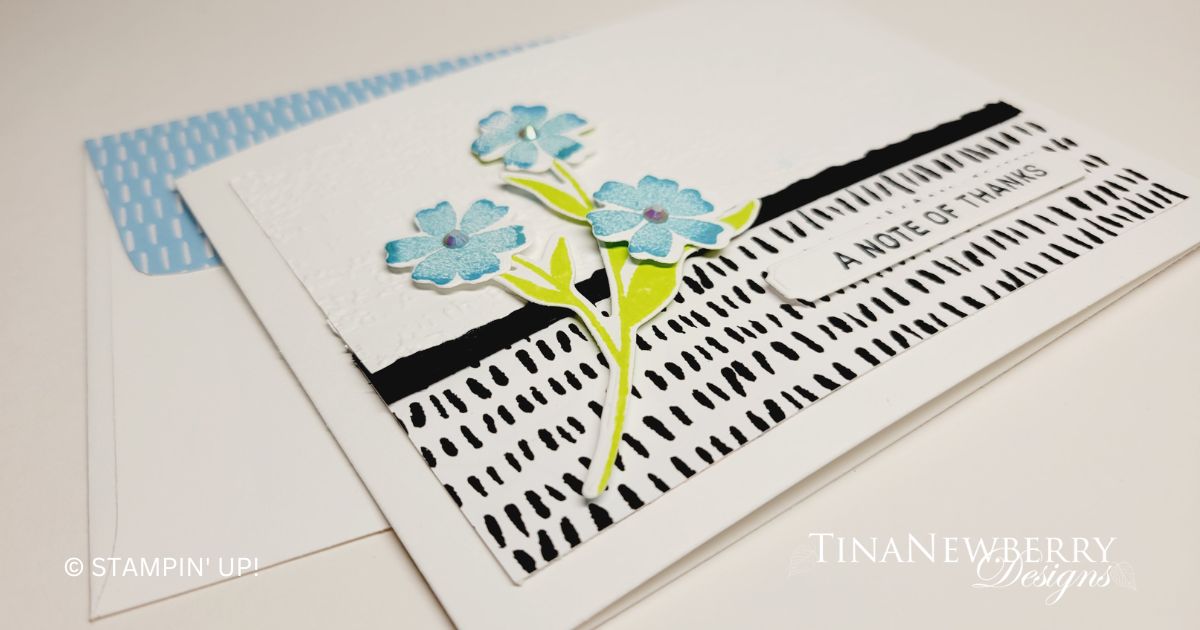
Such a sweet, super easy card- use an embossing folder, a simple pattern and deckled dies to add a bit of interest to three rectangles for the background. Then a stamped focal image and die cut tag. That’s it!
Measurements
Full list of supplies needed, listed below. A die cutting machine is needed for this card.
Basic White Thick Cardstock: 11” w x 4 ¼” h scored and folded on the long-side at 5 ½”
Basic White Cardstock:
- 5 ¼” w x 4” h scrap
- Scrap for sentiment label, blossoms, and stems.
Basic Black Cardstock: 5” w x ½” h
Zoo Crew Designer Series Paper (DSP): 2” h x 5” w
Let’s Create
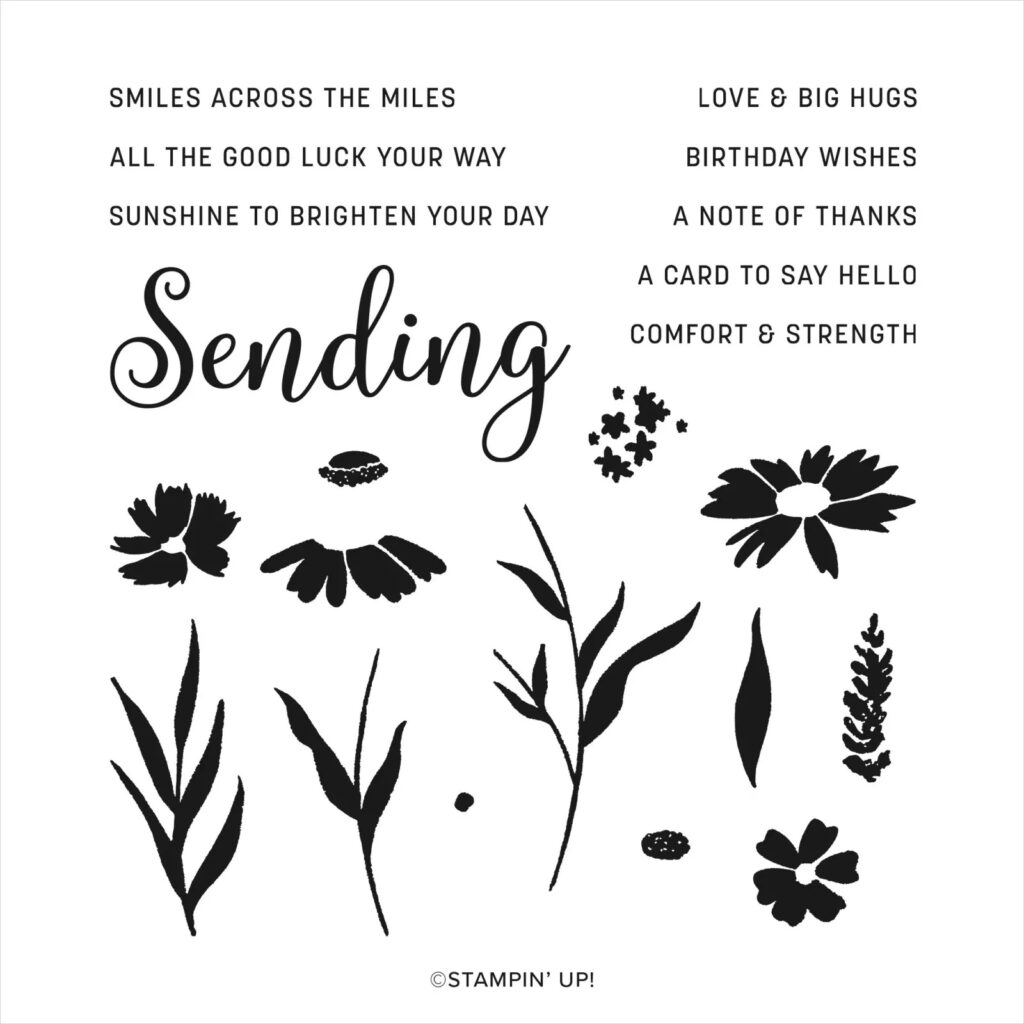
- Affix all stamps to Acrylic Blocks.
- Fold the Card Base in half using a Bone Folder to sharpen the crease.
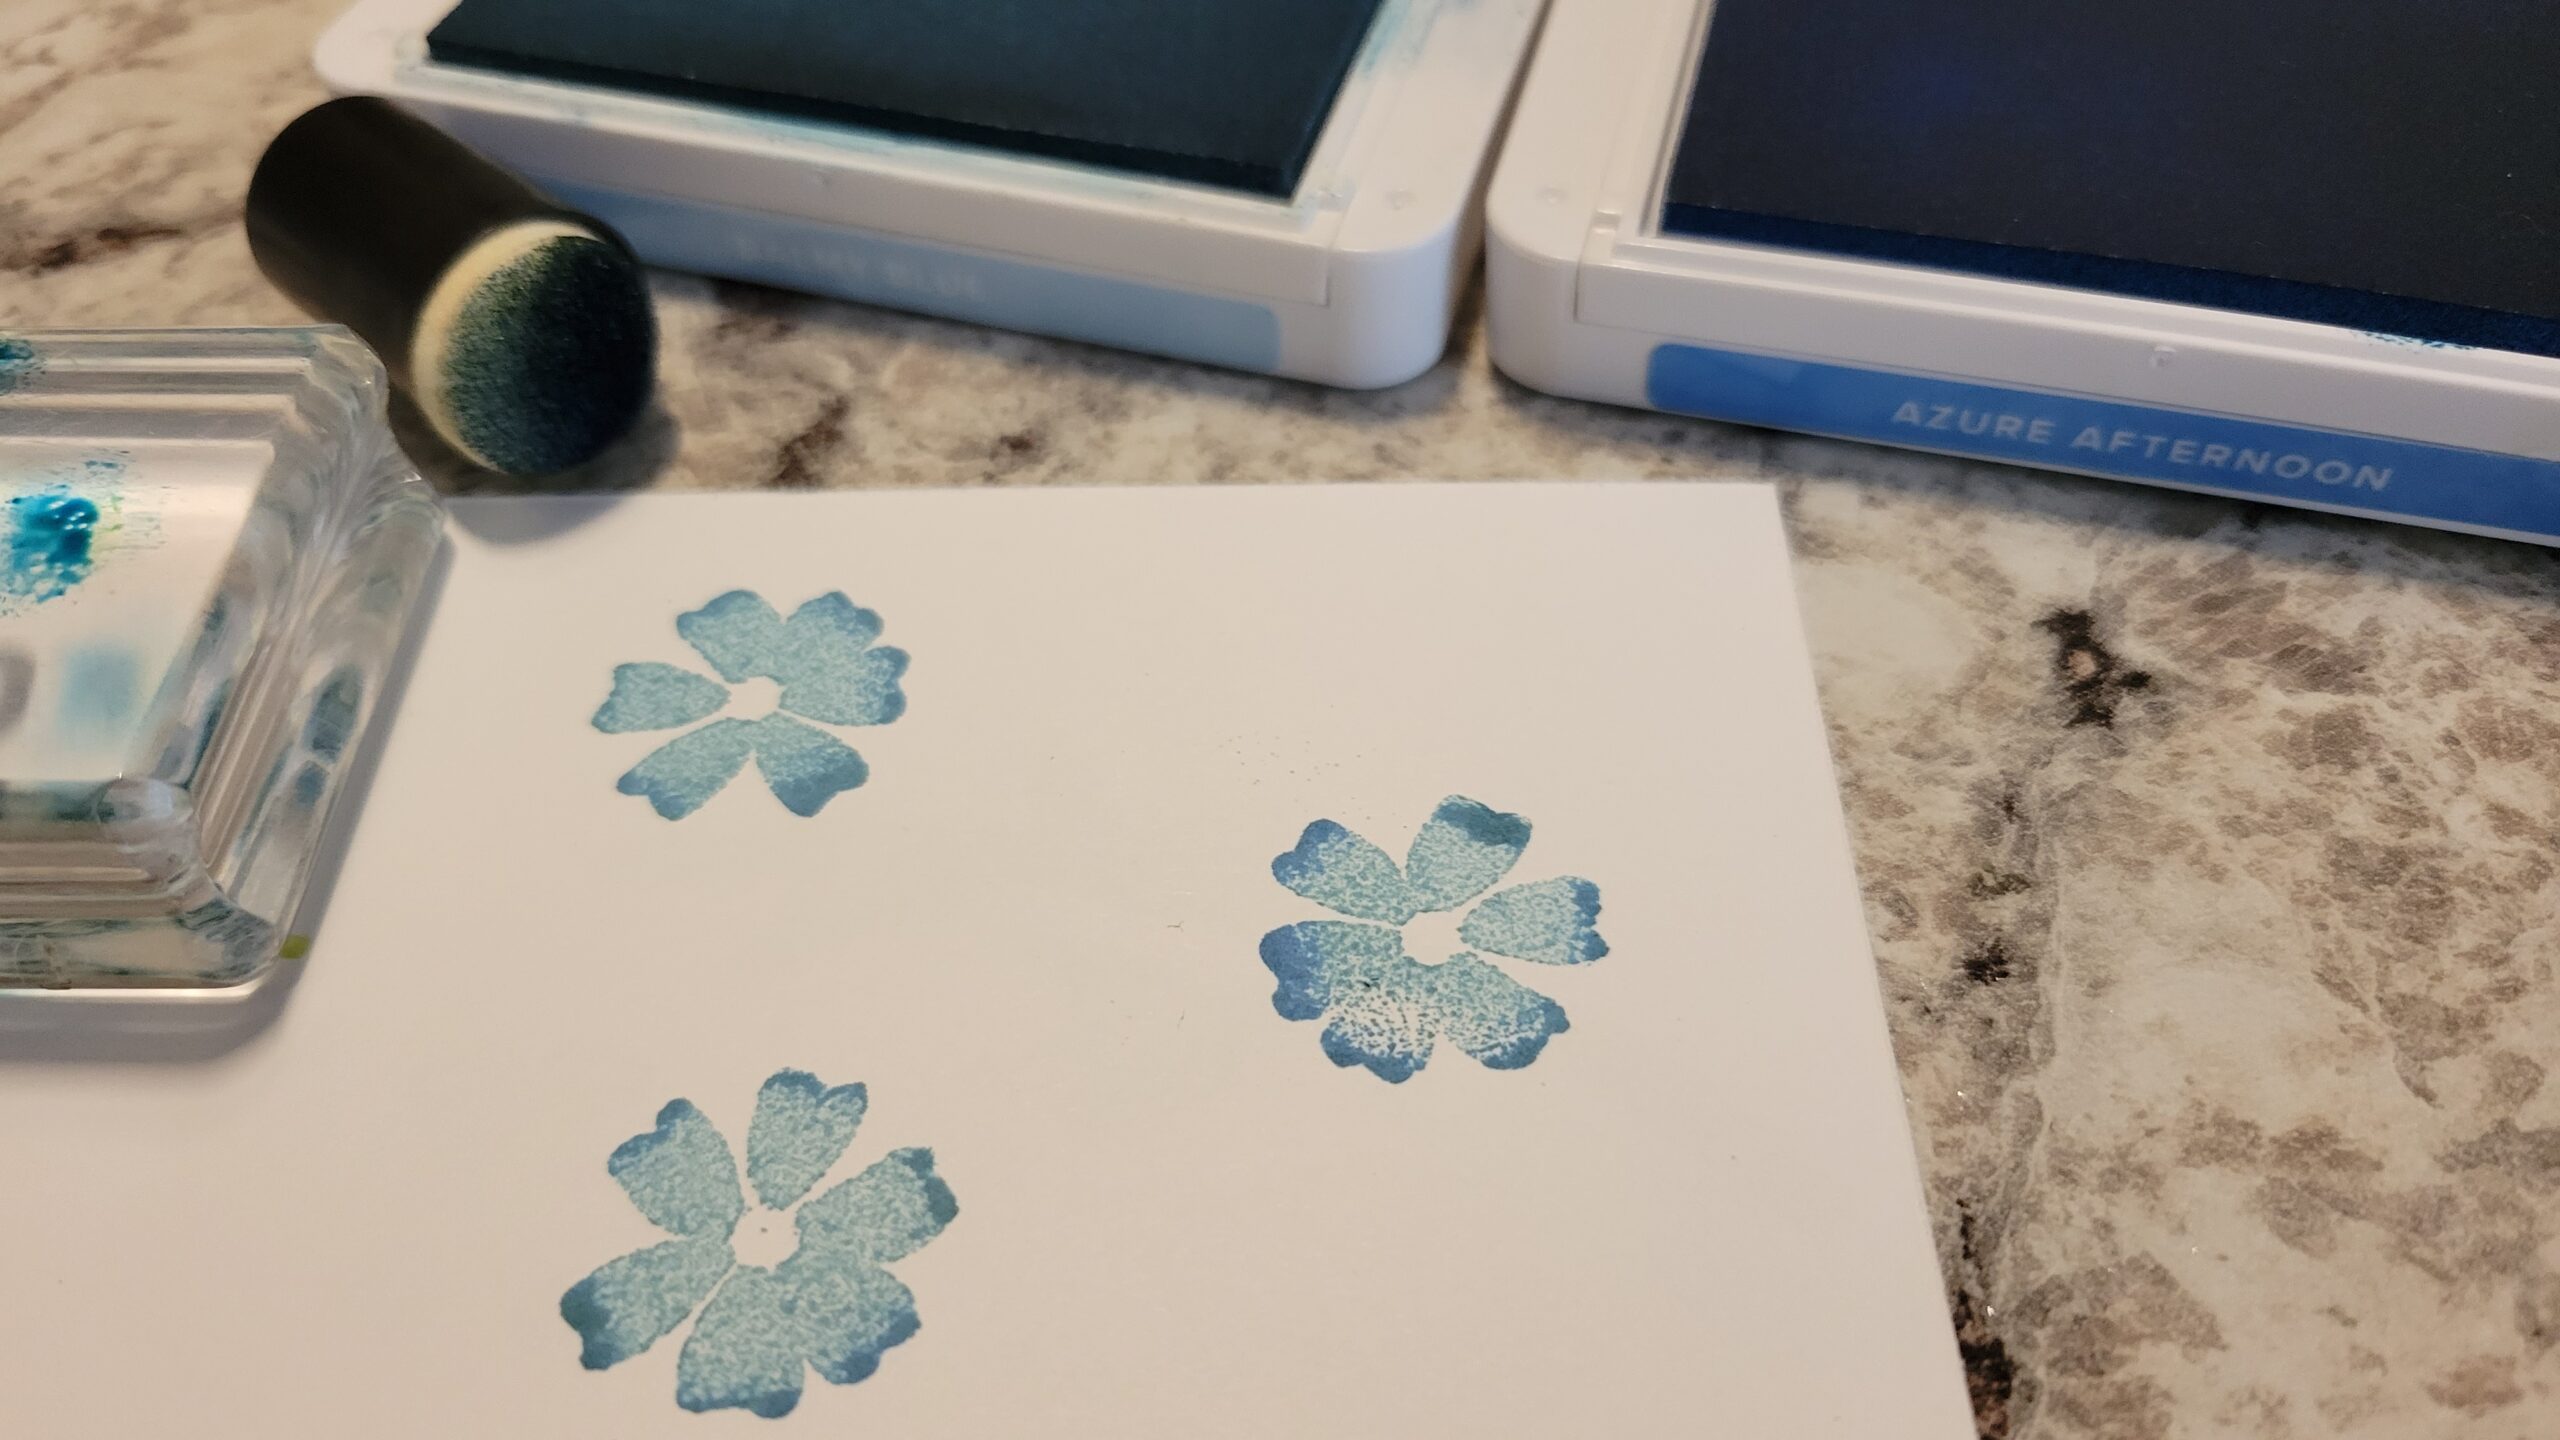
- On scrap Basic White Cardstock:
- Ink the flower blossom in Balmy Blue and use a sponge dauber to add a bit of Azure Afternoon on the edges. Stamp 3 flower blossoms.
- Stamp the large stem in Lemon Lime Twist ink
- Stamp the sentiment in Tuxedo Black ink.
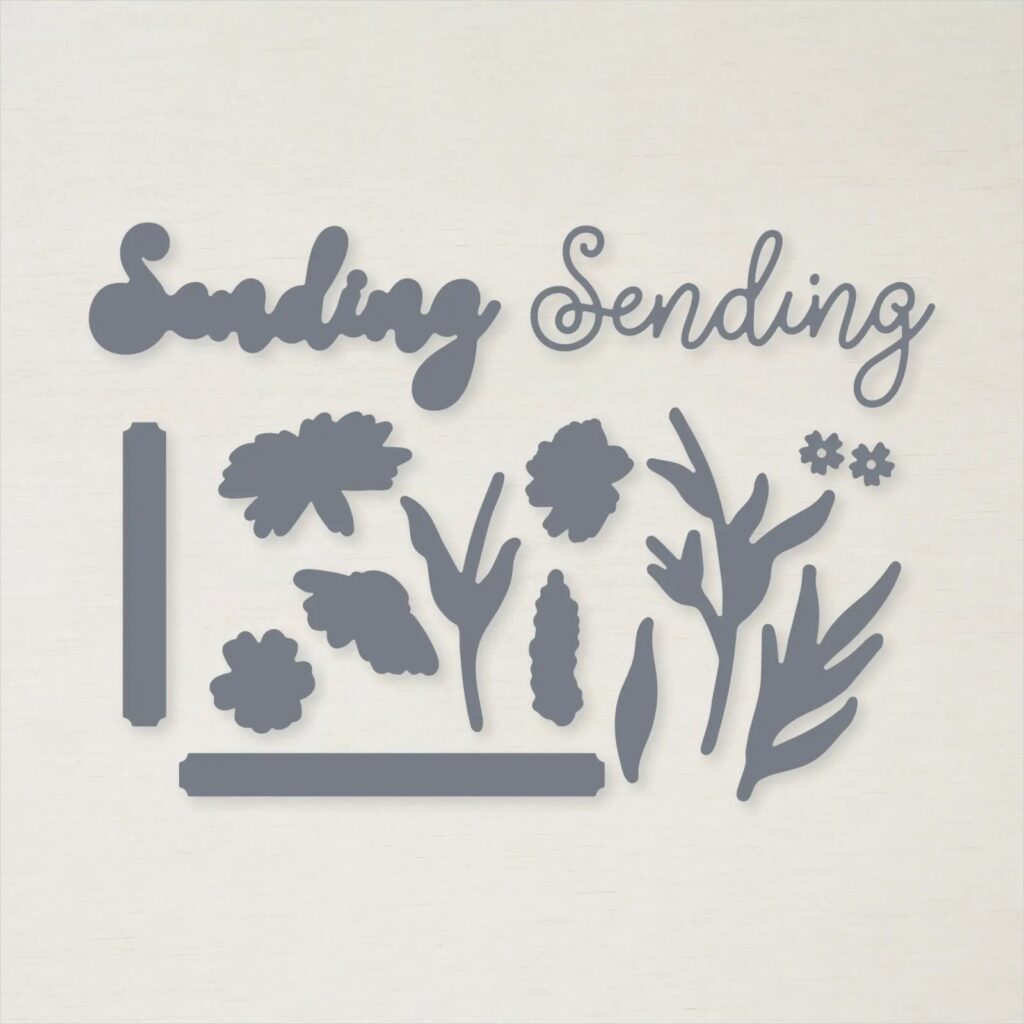
- Die cut all the stamped images.
- Line the Basic White panel up with a long edge of the largest Deckled Rectangle, run through the Stampin’ Cut & Emboss machine. Then use your Paper Trimmer to carefully trim just a smidge of all but one long deckled edge of the rectangle leaving three straight edges and one long edge deckled.
- Attach the Basic Black strip along the back of the deckled edge of the basic white panel so about ⅛-¼” of Basic Black is visible from the front.
- Use Multipurpose Glue to attach the Basic Black.
- Give it a minute to dry and then run the Basic White and Basic Black panel through the Stampin’ Cut & Emboss machine with Timeworn Type Embossing Folder.
- Set the embossed panel on the front of the Card Base toward the top.
- Slide the DSP panel behind the embossed panel carefully positioning the two panels overlapping with an equal border of the Card Base behind them. Attach the two panels together with Stampin’ Seal and trim the edges as needed so they’re all the same width.
- Attach with Stampin’ Seal.
- In the lower right corner, attach the die cut sentiment label with Stampin’ Seal.
- Use Stampin’ Dimensionals to attach the large stem and the flower blossoms.
- Add some Balmy Blue Iridescent Pastel Gems.
- Stamp and decorate the inside.
- Decorate your envelope.
- So pretty!! Who do you need to thank? Put it in the mail.
")
")
$33.00


 Designer Series Paper")

$8.00


$30.00

$5.50
Recommended Stamper’s Toolkit ❤
Product List
$12.00

$7.00

$4.25

$5.75

$5.50

$11.00

$26.00

$7.00

$6.50

$11.00

$20.00

$11.00

$80.75

$128.00

$16.00

$13.00


