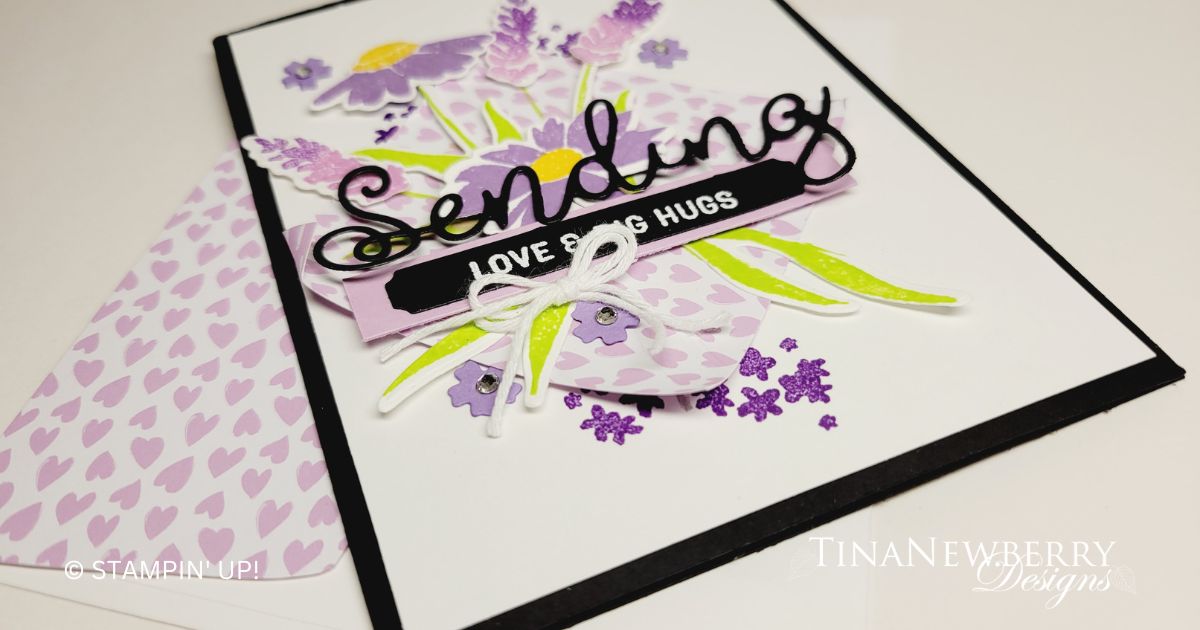
Oh I just love the stems, blossoms, and layers on this card inspired by Yvonne Spikmans, Stampin’ Up! 2022 Artisan Design Team. I used a bit of the new Subtles Designer Series Paper to anchor all of the stems, blossoms, and layers.
Measurements
Full list of supplies needed, listed below. A die cutting machine is needed for this card.
Basic Black Cardstock:
- 5 ½” h x 8 ½” w scored and folded on the long-side at 4 ¼”
- Scrap for sentiment label and die cut
Basic White Cardstock:
- 5 ¼” h x 4” w
- Scrap for flowers and stems
Fresh Freesia Cardstock: 3” w x ½” h
Highland Heather Cardstock: scraps for tiny flower dies
2023-2024 Subtles Designer Series Paper (DSP): 2 ¾” square
Let’s Create
- Affix all stamps to Acrylic Blocks.
- Fold the Card Base in half using a Bone Folder to sharpen the crease.
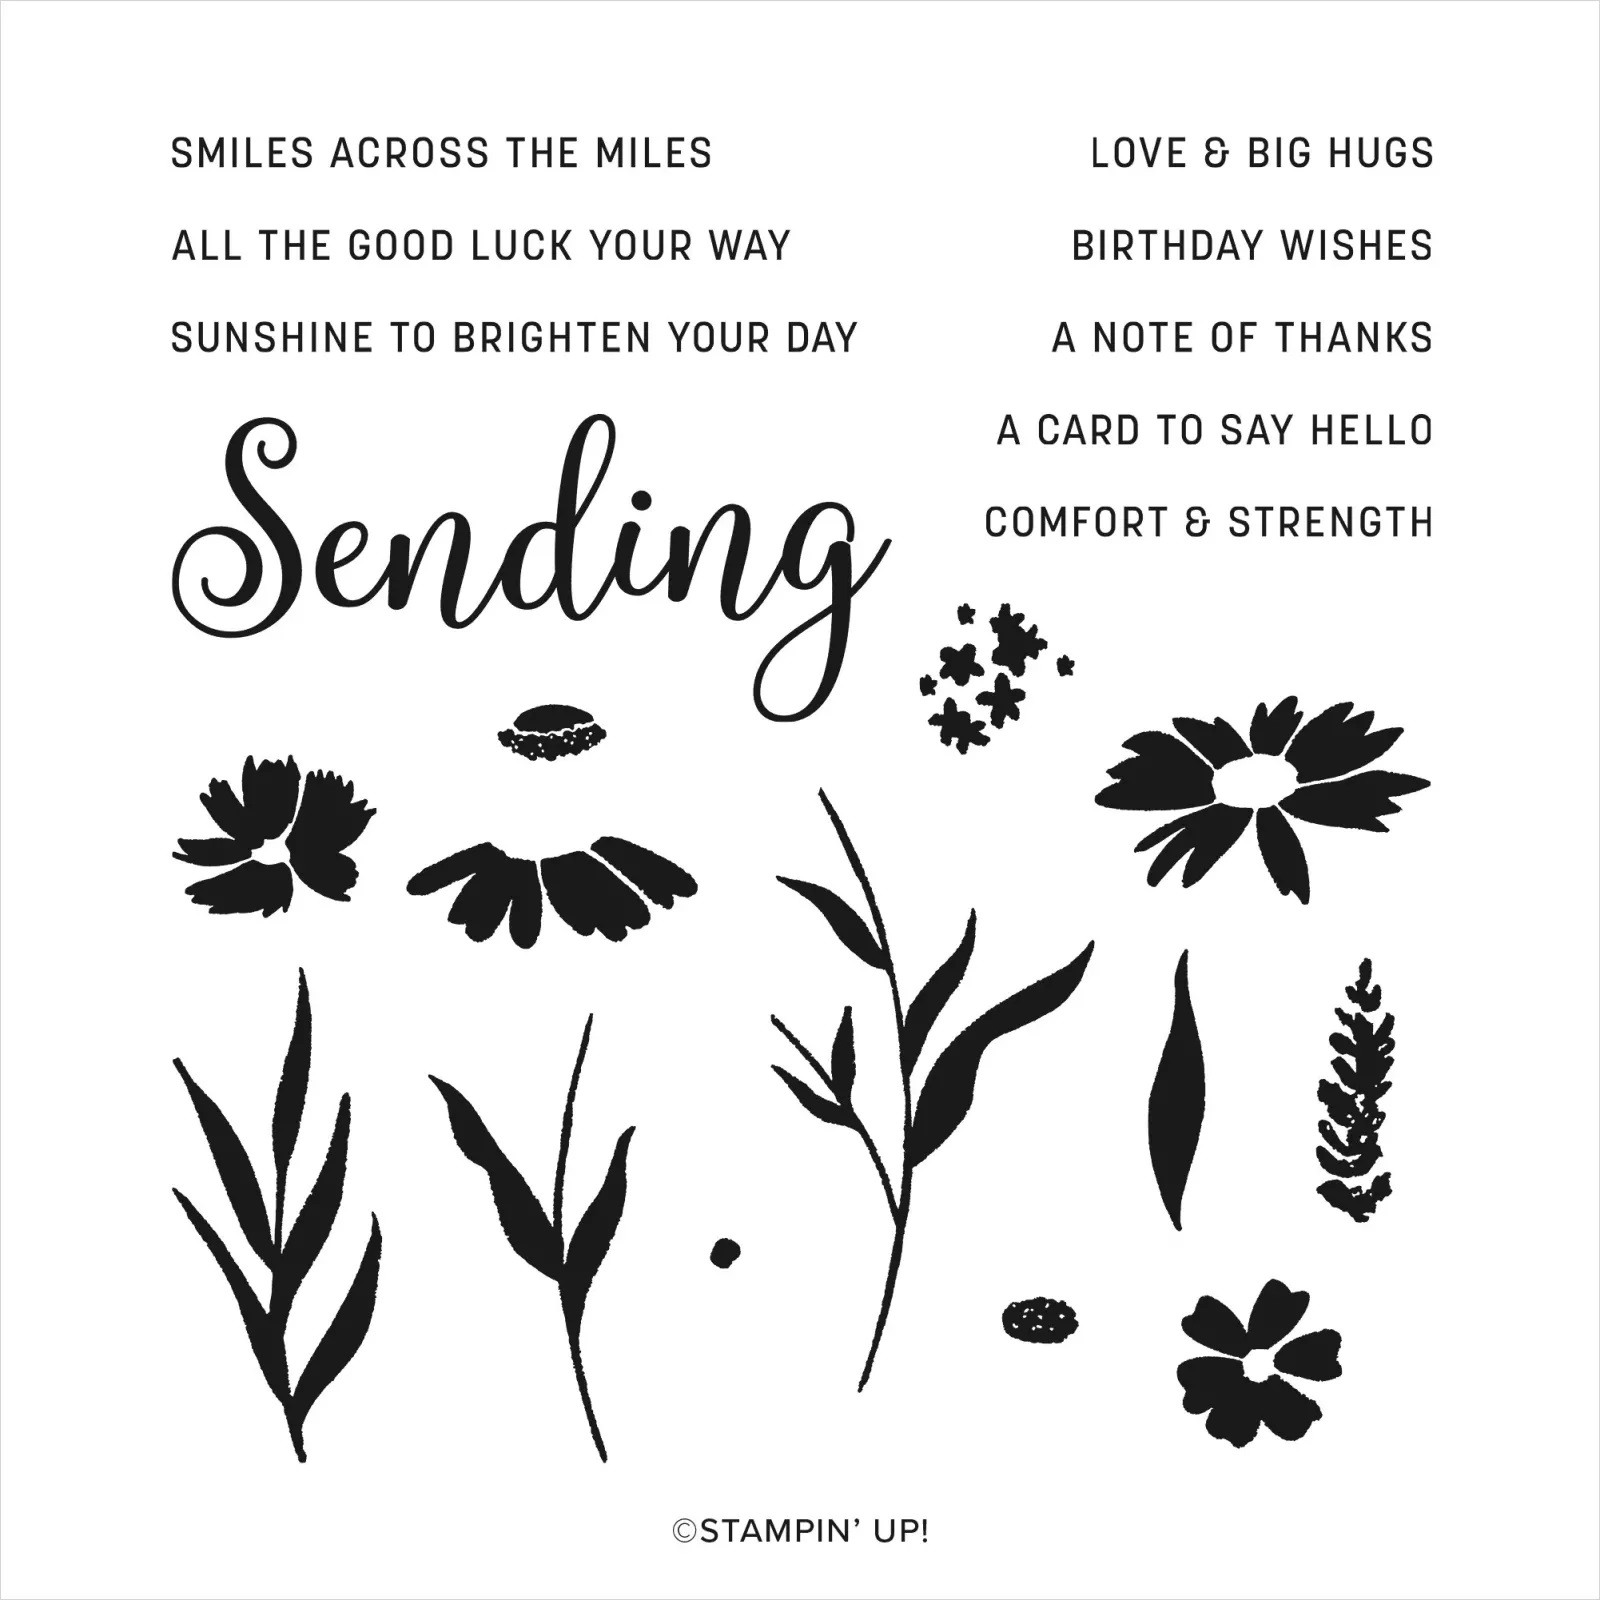
- On the Basic White scrap stamp:
- 2 large flowers in Highland Heather ink with Crushed Curry centers.
- 3 stems and leaves with Parakeet Party ink
- Tall flowers in Fresh Freesia and Gorgeous Grape added to the stamp with a sponge dauber before you stamp the image.
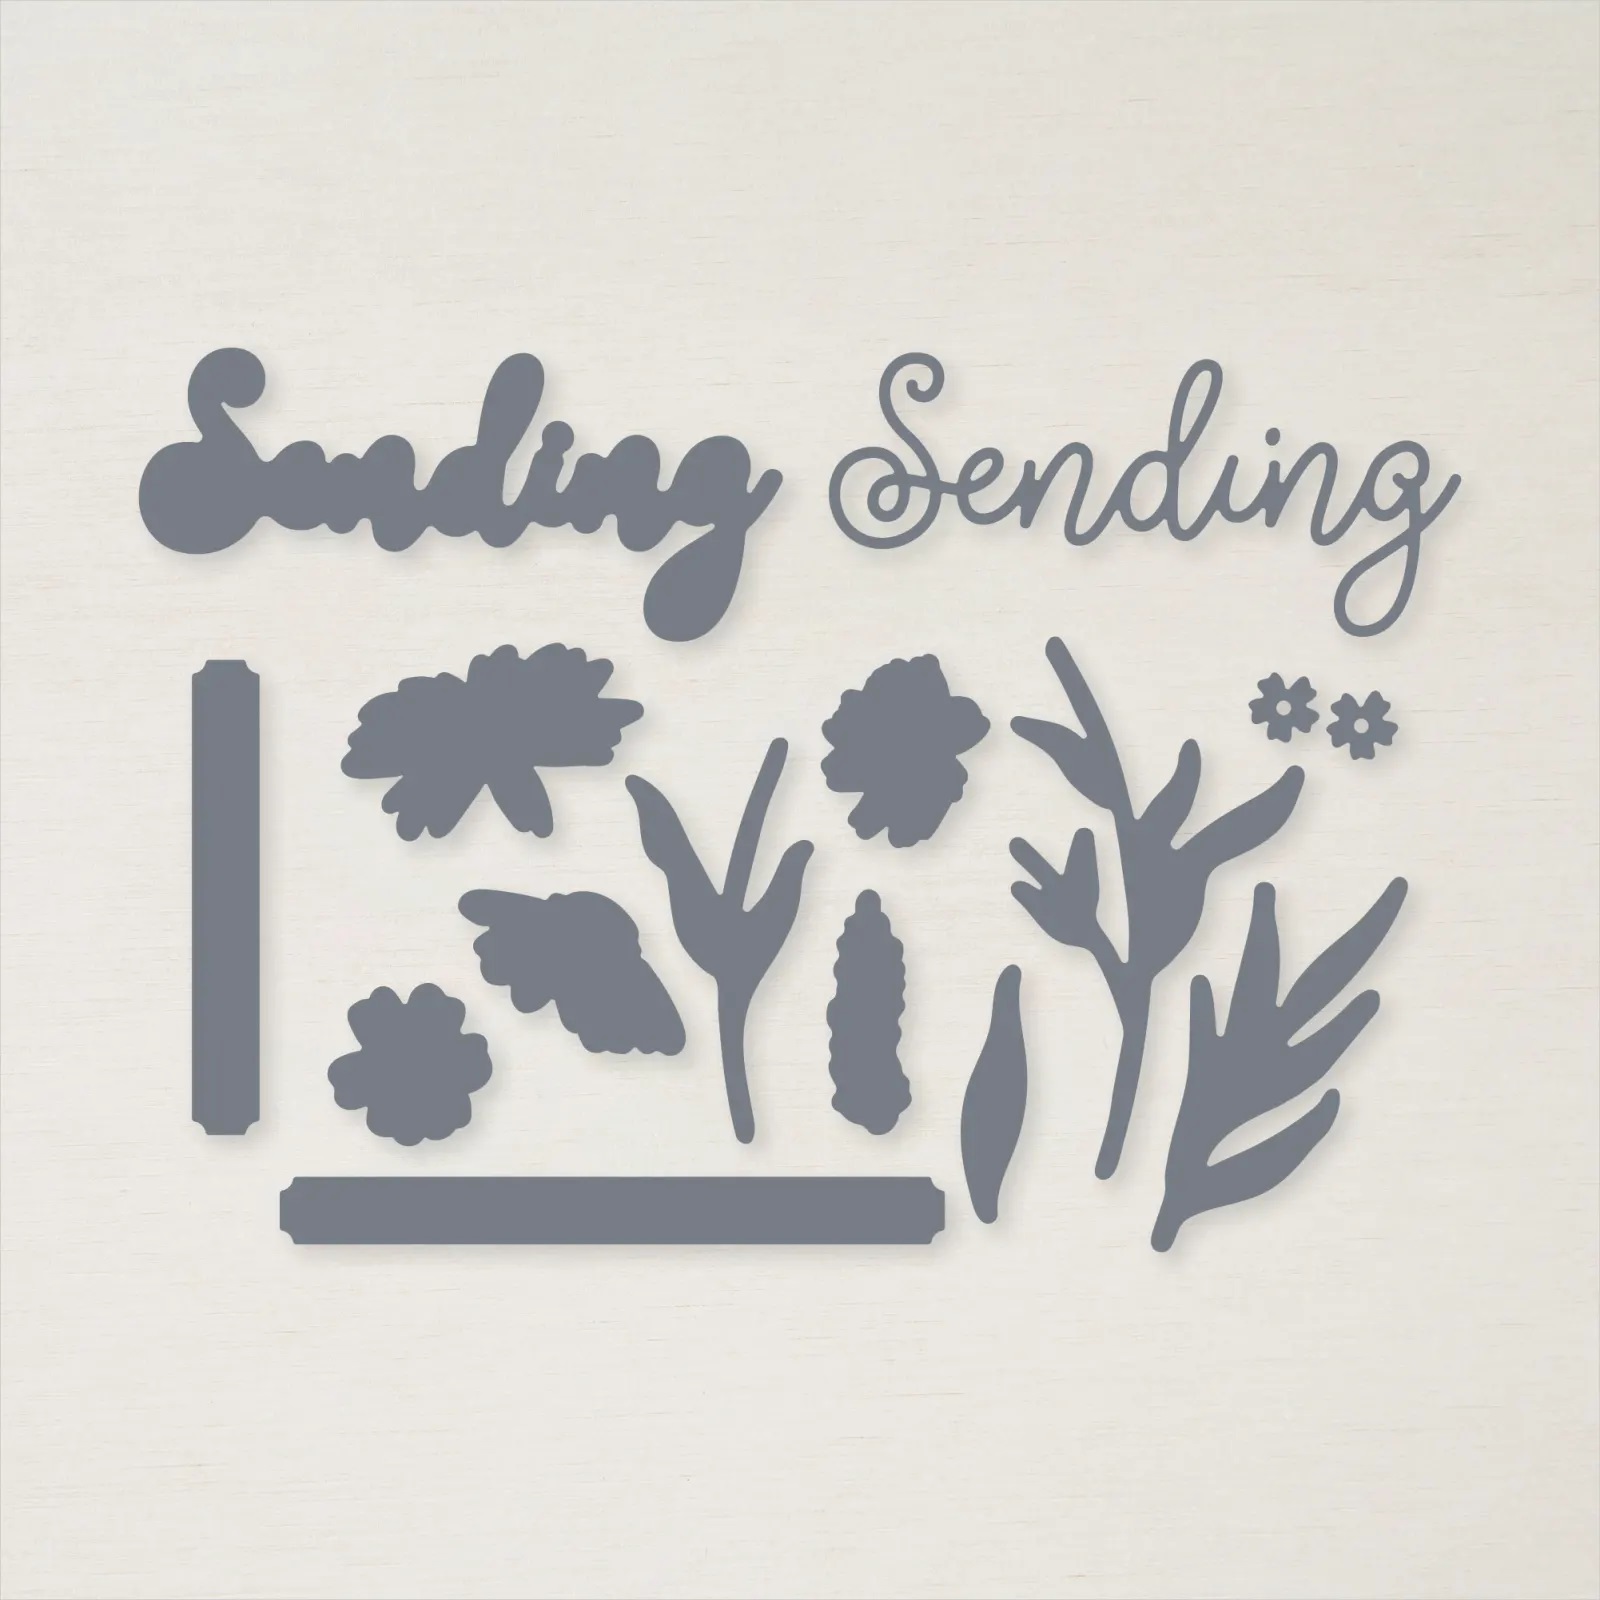
- Die cut all the stamped pieces.
- Add Adhesive Sheet to the back of a scrap of Basic Black Cardstock and die cut “Sending”.
- On another scrap of Basic Black, stamp the sentiment in Versamark ink. Sprinkle with white embossing powder and emboss with the Heat Tool.
- Die cut the Basic Black sentiment and attach to the Fresh Freesia strip with Stampin’ Seal.
- Die cut 4 tiny flowers in Highland Heather cardstock.
- Attach the Basic White panel to the Card Base with Stampin’ Seal.
- Lay the DSP square on the Basic White panel as a diamond. Use a pencil to lightly mark the top and bottom edges of the DSP diamond. Remove the DSP square.
- Stamp the cluster of small flowers in Gorgeous Grape ink on both sides of the pencil mark.
- Use the Take Your Pick Tool to curl the edges of the DSP a bit and attach the DSP square with Stampin’ Seal.
- Arrange the flowers and stems behind the sentiment tag and attach with a variety of Multipurpose Glue, Stampin’ Dimensions and Mini Glue Dots.
- Attach the sentiment with Stampin’ Dimensionals.
- Remove the backing from the “Sending” die cut and attach over the flowers, stems and sentiment tag.
- Attach the Highland Heather tiny flowers with Mini Glue dots.
- Tie a double bow with white Baker’s Twine and attach with a Mini Glue Dot.
- Add some Rhinestones Basic Jewels to the center of the tiny Highland Heather flowers.
- Stamp and decorate the inside.
- Decorate your envelope.
- Love it!! Who needs a pick me up? Put it in the mail.
")
")
$33.00


$9.50


 Designer Series Paper")

$18.00
")
$31.00

$11.50

$6.00


$5.50

$11.00
Recommended Stamper’s Toolkit ❤
Product List
$12.00

$7.00

$4.25

$5.75

$5.50

$11.00

$26.00

$7.00

$6.50
$11.00

$20.00

$11.00

$80.75

$128.00


$16.00

$13.00


