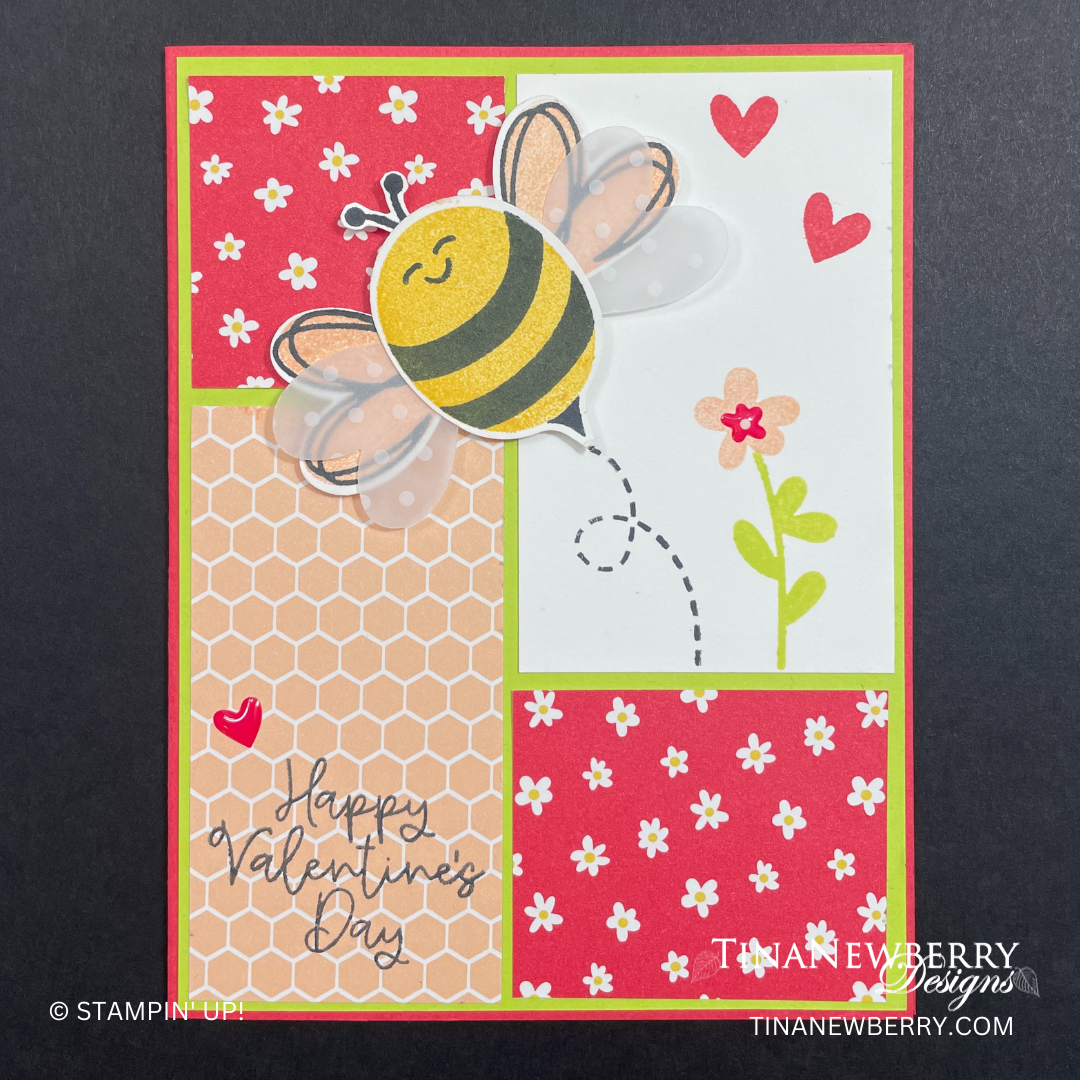
How adorable is this little bee from the Bee Mine Suite Collection in the new mini catalog? And I love the cheery color combination that shows off your designer series paper.
Measurements
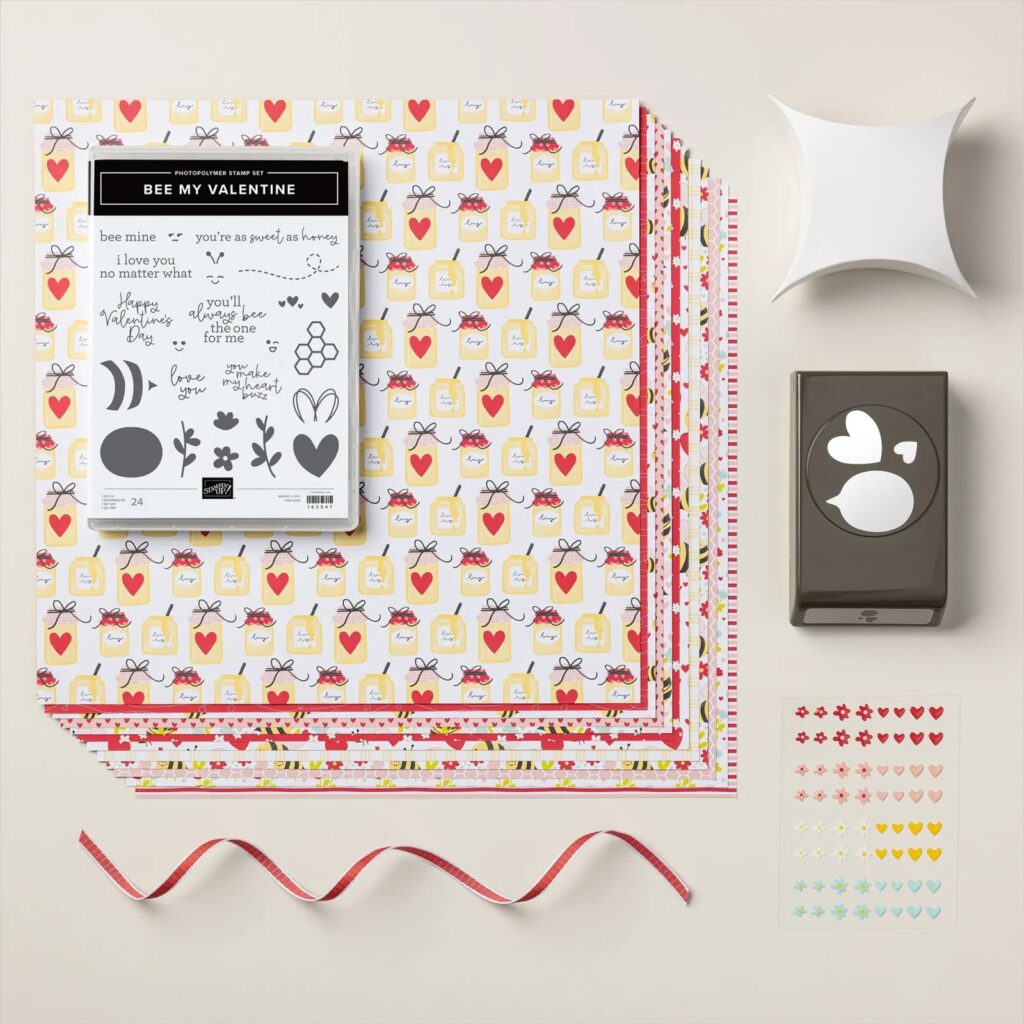
Full list of supplies needed, listed below. A die cutting machine is needed for this card.
Sweet Sorbet
- 5 ½” x 8 ½” scored and folded in half on the long side
Lemon Lime Twist
- 5 ⅜” x 4 ⅛” (cut 2 – one for the inside of card)
Basic White
- 5 ⅜” x 4 ⅛” (for inside of card)
- 3 ⅜” x 2 ⅛”
- 2 ¾” x 5” (for stamping & punching bees and wings)
Bee Mine Designer Series Paper
- 2 ⅛” x 2 ¾” sweet sorbet with small white flowers print
- 1 ¾” x 1 ¾” sweet sorbet with small white flowers print
- 3 ⅜” x 1 ¾” petal pink honeycomb print
Vellum Basics
- 2 ½” x 1 ½” polka dot for punch 2 (heart shapes) wings
Let’s Create
- Affix all stamps to Acrylic Blocks.
- Fold the Card Base on score line using a Bone Folder to sharpen the crease.
- On 5” x 2 ¾” Basic White cardstock, stamp the Bee using Black Memento and Daffodil Delight ink pads. I found that stamping the black strips first made it easier to line up the Daffodil Delight Body. Stamp the face in Black Memento ink. Stamp the antennae also in Black Memento ink. Stamp 2 sets of wings. Again, stamping the Black first makes it easier to line up the Petal Pink inside of wings (heart). The antennae are fussy cut, the other pieces are all punched out using the Bee Builder Punch.
- Punch 2 hearts (wings) using the Polka Dot Vellum.
- Assemble the bee. Adhere the wings to each side with the Vellum wings on the top of the Petal Pink wings.
- Stamp the “Happy Valentine’s Day” sentiment using Black memento ink, onto the lower part of the Petal Pink Honeycomb print of Designer Series Paper.
- Using Black Memento Ink Pad, stamp the bee trail toward the lower left of the 3 ⅜” x 2 ⅛” Basic White. Using Lemon Lime Twist, stamp the flower stem. Stamp the flower using Petal Pink Ink. Using Sweet Sorbet In, stamp 2 hearts towards the upper right corner.
- Assembling the card: Adhere the 1 ¾” x 1 ¾” Designer Series Paper to the upper left corner of the 5 ⅜” x 4 ⅛” Lemon Lime Twist panel leaving a small border along the top and the left edge. Adhere the Petal Pink Honeycomb Designer Series Paper below the 1 ¾” x 1 ¾” piece, keeping the borders about the same.
- Adhere the stamped white pane to the upper right of the Lemon Lime Twist panel, once again, be sure to keep the borders consistent. Adhere the 2 ¾” x 2 ⅛” Designer Series Paper below the stamped white panel.
- Using Stampin’ Dimensionals, adhere the bee. Be sure the trail lines up with the stinger on the bee.
- Finish the card by placing a sweet sorbet flower from the Adhesive-backed Hearts & Flowers to the center of the Petal Pink Flower. Place a Sweet Sorbet Heart above the sentiment.
- Be sure to decorate the inside of your card and the envelope before sending it off to wish someone a “Happy Valentine’s Day”!
")
$38.50

$10.00

$10.00

$10.50
 Specialty Designer Series Paper")
$10.00
 Designer Series Paper")
$12.50

$6.50

$9.00

$9.00

$9.00

$9.00

$8.00

$4.25
Recommended Stamper’s Toolkit ❤

$12.00

$7.00
$4.25

$5.75

$5.50

$11.00

$26.00

$7.00

$6.50

$11.00

$20.00

$11.00

$80.75

$128.00

$16.00

$13.00


")


 Designer Series Paper")


")


 Designer Series Paper")