Creative Challenges

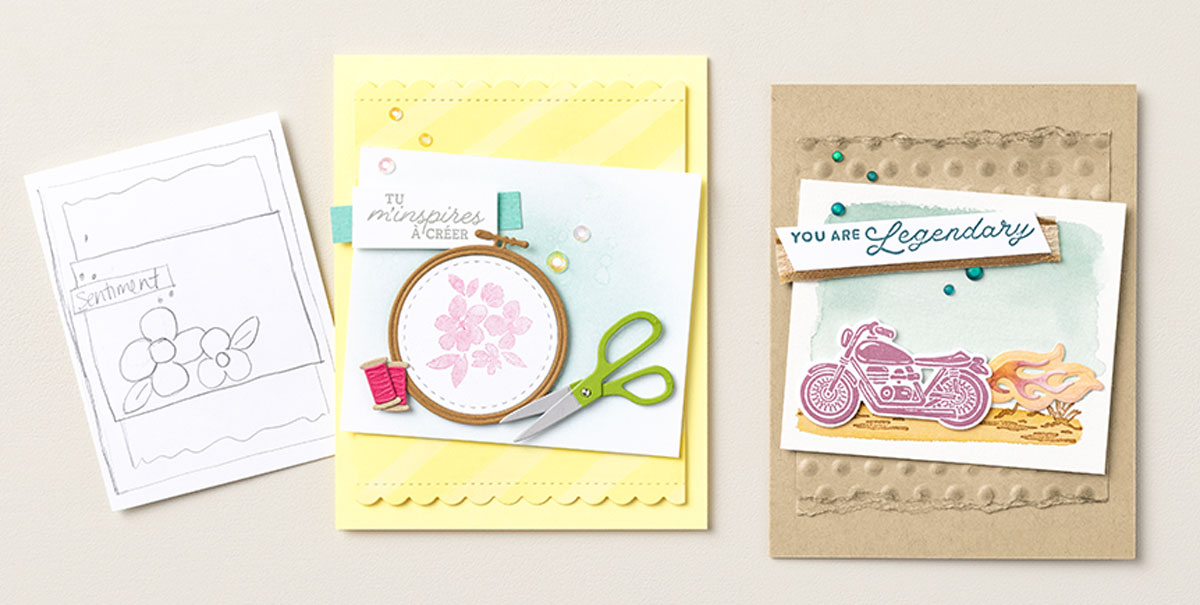
If you’re looking for a fun, creative challenge, look no further—we have one ready to go! This challenge involves creating a card from a hand-drawn card sketch.

To complete this challenge, we took the In Color 6″ x 6″ (15.2 x 15.2 cm) Designer Series Paper Assortments and cut each pattern into the correct size according to the sketch. We adhered those pieces to a Boho Blue card panel with Stampin’ SEAL, then adhered the card panel to the card base with Stampin’ Dimensionals. Using the Wanted to Say Dies, we die cut the sentiment from Wild Wheat Cardstock and the sentiment shadow from Basic White Cardstock. We used Multipurpose Liquid Glue to adhere the sentiment pieces together, and then we adhered it to the card front with Stampin’ Dimensionals. We finished the card with a few 2023–2025 In Color Dots.

Try out this challenge next time you need some crafting inspiration!

Shopping List

Recommended Stamper’s Toolkit

Product List
Order online from the convenience of your own home or send me your order and I’ll take care of you. ❤ Either way, please use the host code ANTD9UHS. Order online AND, if your order is $50 or more using host code ANTD9UHS between now and the end of the month you’ll receive a free pack of embellishment as a THANK YOU gift from me. ❤ If your order is over $150, skip the host code, earn Stampin’ Rewards for free stuff yourself and I’ll still send you a free pack of embellishment as a THANK YOU gift from me. ❤

Step It Up: Bee Mine

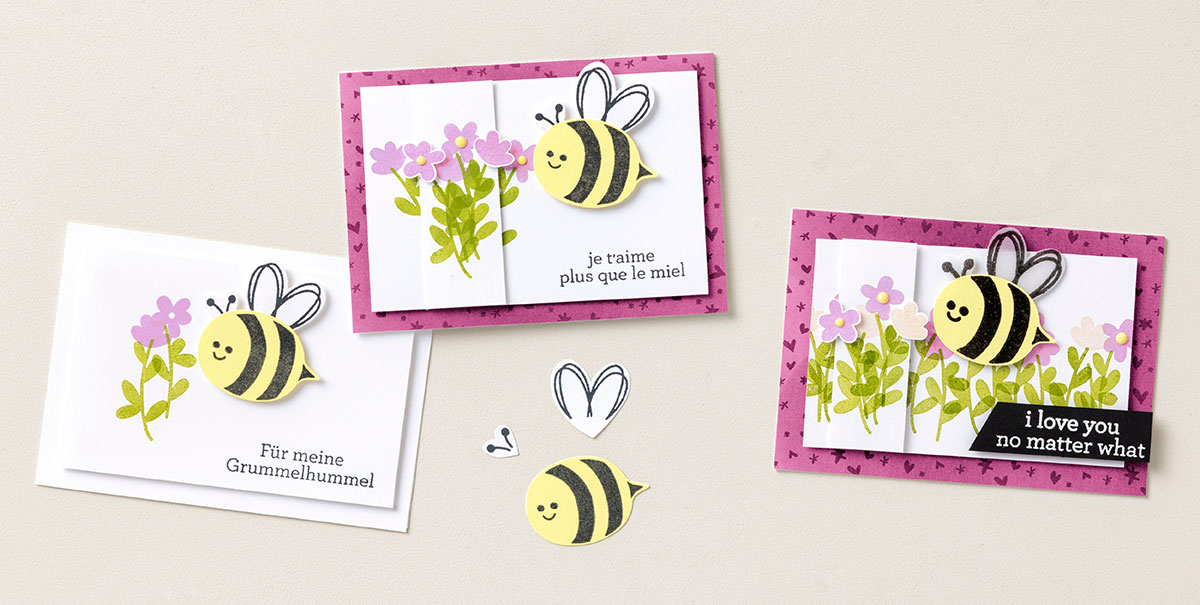
Need fun ideas for your project? Try making these cards using the Bee My Valentine Bundle. Keep your card simple with the Beginner design or “step it up” by making the Avid card!

BEGINNER

To make this card, we stamped the flower images using Fresh Freesia and Granny Apple Green. Then we stamped the bee body image on Lemon Lolly Cardstock and the wings and antennae on Basic White Cardstock. We punched out all the bee parts using the Bee Builder Punch and adhered them together using Multipurpose Liquid Glue. We adhered the bee to the card front using Stampin’ Dimensionals and finished the card with our sentiment.

CASUAL

To step up this card, we created a card base made of Just Kiddin’ Designer Series Paper. We added an extra panel of Basic White Cardstock, where we stamped a few more flowers and adhered extra flower pieces that we stamped and fussy cut. We finished the card with a few Lemon Lolly Adhesive-Backed Solid Gems.

AVID

We stepped up this card by stamping a few more flowers to the card base using Petal Pink ink. We also used black Stampin’ Emboss Powder to add some shine and dimension to our bee. We stamped the bee wings on Vellum Cardstock and finished the card with a sentiment that we heat embossed with white Stampin’ Emboss Powder onto Basic Black Cardstock.

Shopping List

Recommended Stamper’s Toolkit

Product List
Order online from the convenience of your own home or send me your order and I’ll take care of you. ❤ Either way, please use the host code ANTD9UHS. Order online AND, if your order is $50 or more using host code ANTD9UHS between now and the end of the month you’ll receive a free pack of embellishment as a THANK YOU gift from me. ❤ If your order is over $150, skip the host code, earn Stampin’ Rewards for free stuff yourself and I’ll still send you a free pack of embellishment as a THANK YOU gift from me. ❤

Technique Tuesday: Layout CASEing

Time for another CASEing session (Copy and Share Everything) courtesy of the amazing StampinUp! Concept Art team! Today we’re “on the case” of a lovely layout we admired from the ’23-’24 annual catalog (pg. 89).The how-to is as follows:

  1. Add a scallop border to the top and bottom of the Lemon Lolly Subtles Designer Series Paper layer using the Basic Borders Dies.Blend Lemon Lolly ink over the entire surface of the Lemon Lolly Designer Series Paper, then adhere it to the Lemon Lolly Cardstock card base.Blend Pool Party ink over the Thick Basic White Cardstock layer, then splatter it with water using a Stampin’ Spritzer. Once the piece is dry, adhere it to the card front along with the die-cut pieces.Stamp the texture image in Coastal Cabana ink on the Coastal Cabana Cardstock strip, then add the sentiment. Adhere this piece to the card front using Stampin’ Dimensionals.Finish with a few Iridescent Rhinestone Basic Jewels to add some shine and pick up the project’s color.

Crafting With You Bundle (English)
$54.00
Lemon Lolly Classic Stampin' Pad
$9.00
Pool Party Classic Stampin' Pad
$9.00
Coastal Cabana Classic Stampin' Pad
$9.00
Basic White 8 1/2" X 11" Thick Cardstock
$9.00
Lemon Lolly 8 1/2" X 11" Cardstock
$10.00
Coastal Cabana 8-1/2" X 11" Cardstock
$10.00
Subtles 6" X 6" (15.2 X 15.2 Cm) Designer Series Paper
$12.50
Iridescent Rhinestones Basic Jewels
$7.50
Stampin' Spritzer
$4.00
Basic Borders Dies
$29.00

Technique Tuesday: Coloring Vellum

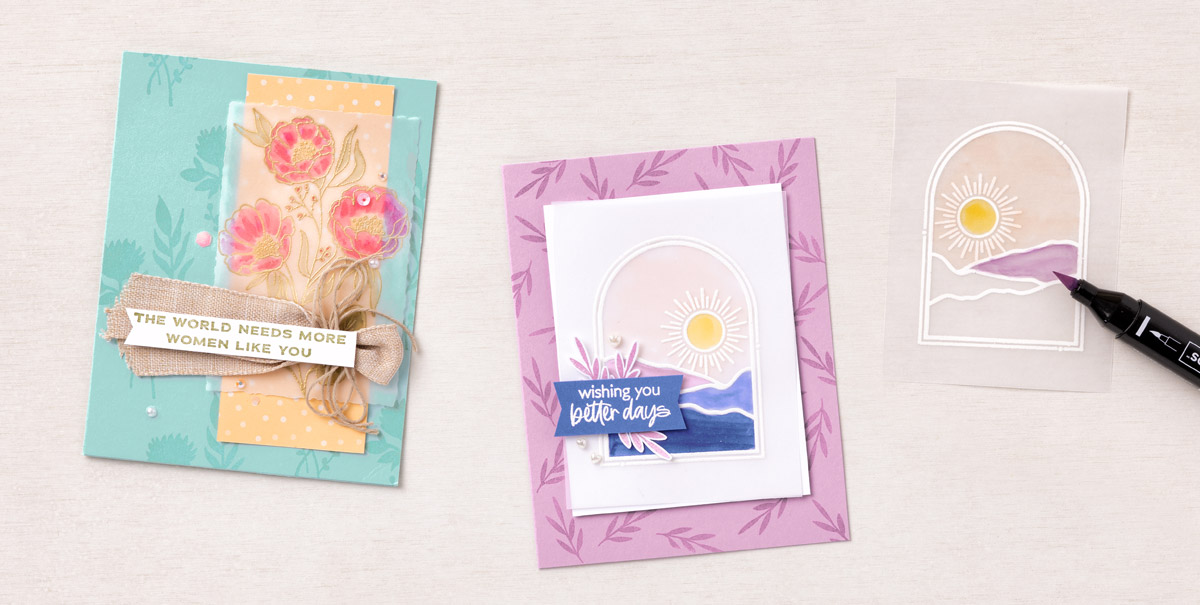
Did you know you can color vellum? You can! What a great way to customize your favorite stamp sets. Take a look at our tips and then try this technique yourself.

We started by stamping our image in VersaMark ink on Vellum paper and heat embossing it with white Stampin’ Emboss Powder. We then turned the paper over to color on the back of the Vellum with the dark shade of Stampin’ Blends—we used Daffodil Delight for the sun, Petal Pink for the sky, and Fresh Freesia, Orchid Oasis, and Starry Sky for the hills. We loved how this coloring gave the paper a stained-glass look.

We didn’t want the adhesive to show through the Vellum when we adhered it to the card base, so we put some Mini Glue Dots under the space where we knew we would put our sentiment banner. Then we rolled up a few more glue dots and placed them around the top arch under the embossed parts so they wouldn’t be visible. Finally, we fussy cut the leaves, heat embossed our sentiment, and finished the card off with a few Heart Pearls.

If you’re looking for a way to shake things up, try your hand at copying and sharing everything!

Shopping List

Recommended Stamper’s Toolkit

Product List
Order online from the convenience of your own home or send me your order and I’ll take care of you. ❤ Either way, please use the host code ANTD9UHS. Order online AND, if your order is $50 or more using host code ANTD9UHS between now and the end of the month you’ll receive a free pack of embellishment as a THANK YOU gift from me. ❤ If your order is over $150, skip the host code, earn Stampin’ Rewards for free stuff yourself and I’ll still send you a free pack of embellishment as a THANK YOU gift from me. ❤

Technique Tuesday: Take Your Pick

If you’re looking for a new technique to use on your next project, look no further than the small but powerful Take Your Pick™ tool. It’s incredibly versatile, and the different attachments make it the perfect crafting partner. We used the Take Your Pick tool to make our cards this week, and we love how they turned out!

Take Your Pick
$11.00
Take Your Pick Die Brush Tip
$12.00
Take Your Pick Crafter Tips
$21.00
Take Your Pick Putty Refill
$4.00

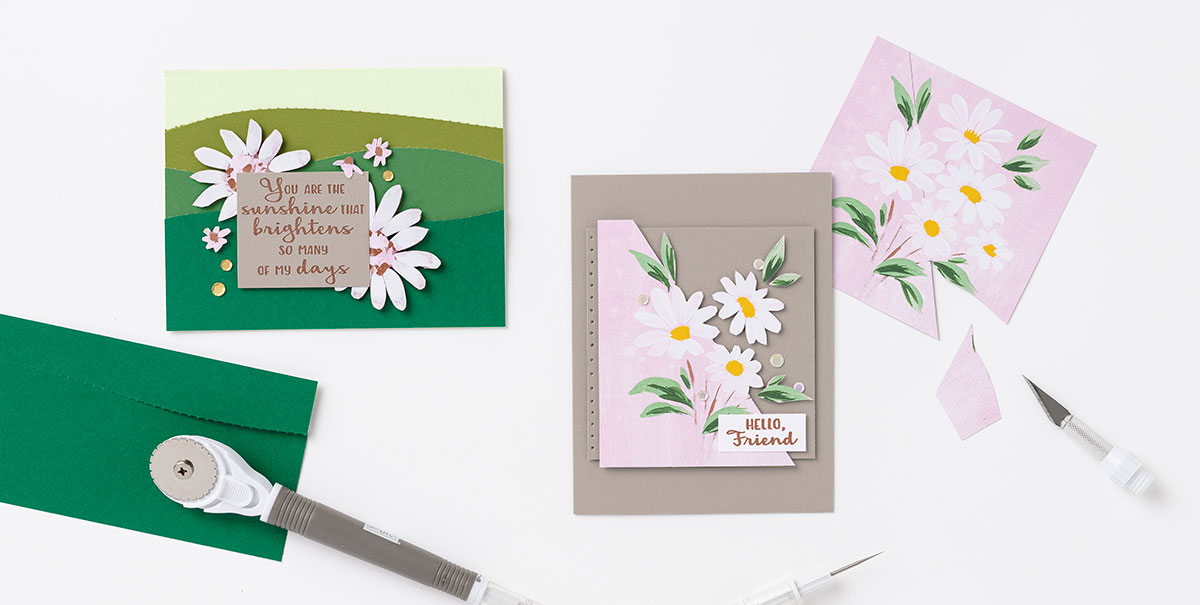
To make the You Are the Sunshine card, we cut Old Olive, Garden Green, and Shaded Spruce Cardstock using the rotary attachment on the Take Your Pick tool. Note: if you use this attachment, be sure to cut on a mat or a glass surface. We adhered the cardstock to our Soft Sea Foam card base and added a few flowers that we cut from the Fresh as a Daisy Designer Series Paper using the knife blade attachment.

To make the Hello, Friend card, we drew a line in pencil diagonally across a square of Fresh as a Daisy Designer Series Paper to outline where we wanted to cut. We used the knife blade attachment to cut across the paper, then we cut out a daisy and a few extra leaves. We adhered the Designer Series Paper and additional flowers and leaves to a panel of Gray Granite Cardstock. On the left side of the panel, we pierced holes into the cardstock using the paper piercer attachment.

We had so much fun using the Take Your Pick tool in our card making. Try out the tool this week and see how many fun projects you can make!

Shopping List

Hope You Know Cling Stamp Set (English)
$24.00
Pecan Pie Classic Stampin' Pad
$9.00
Old Olive 8-1/2" X 11" Cardstock
$10.00
Garden Green 8-1/2" X 11" Cardstock
$10.00
Shaded Spruce 8-1/2" X 11" Cardstock
$10.00
Soft Sea Foam 8-1/2" X 11" Cardstock
$10.00
Gray Granite 8-1/2" X 11" Cardstock
$10.00
Fresh As A Daisy 12" X 12" (30.5 X 30.5 Cm) Designer Series Paper
$12.50
Take Your Pick
$11.00
Take Your Pick Die Brush Tip
$12.00
Take Your Pick Crafter Tips
$21.00
Take Your Pick Putty Refill
$4.00