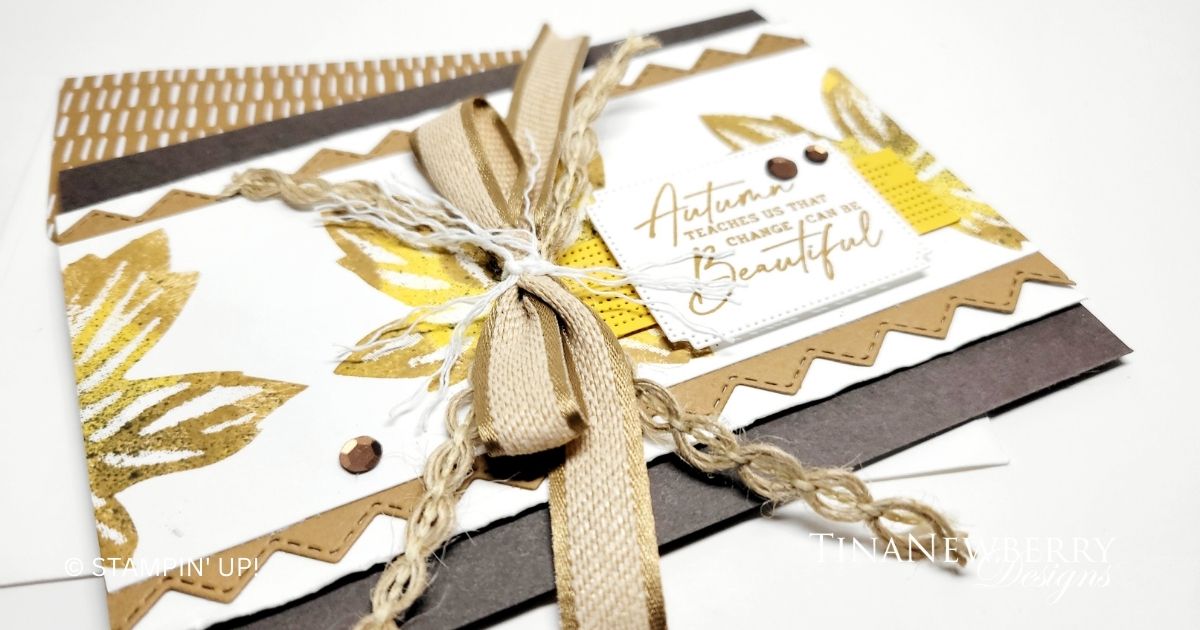
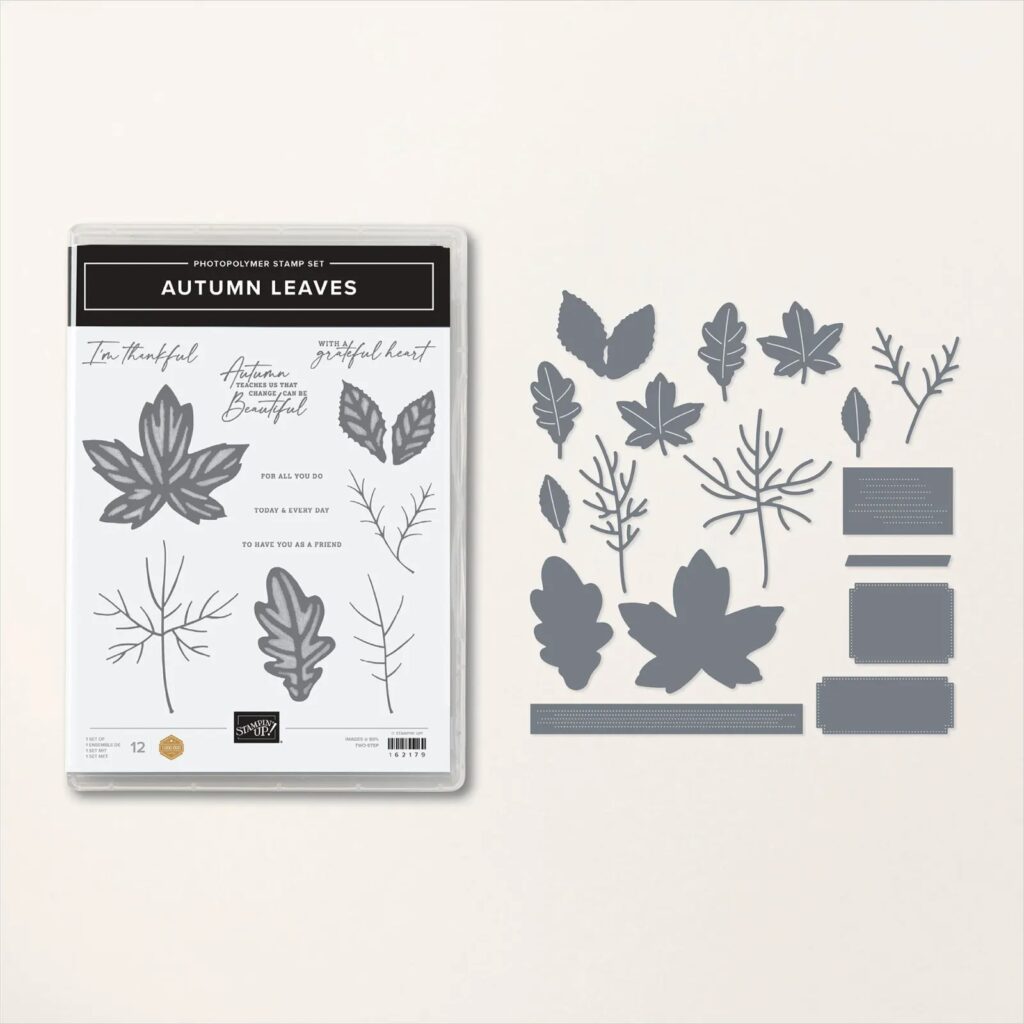
Every year Stampin’ Up! comes out with a pretty leaf bundle and every year I kick myself for not getting it. Not this year! Autumn Leaves is a versatil eDistinktive stamp set and die bundle. I had so much fun creating with this bundle. I suppose it would be nice with spring and summer colors too, but I went all in for hotumn here in FL.
Measurements
Full list of supplies needed, listed below. A die cutting machine is needed for this card.
Early Espresso cardstock: 5 1/2″ w x 8 1/2″ h folded to 5 1/2″ w x 4 1/4″ h
Basic White Cardstock:
- 3 1/4″ h x 5 1/2″ w
- 2 1/2″ h x 5 1/2″ w
- 5 1/4″ h x 4″ w
- scrap for sentiment
Pecan Pie Cardstock: 3 1/4″ h x 5 1/2″ w
Crushed Curry Cardstock: 3/4″ h x 3″ w
Let’s Create
- Affix all stamps to Acrylic Blocks.
- Fold the Card Base in half using a Bone Folder to sharpen the crease.
- Die cut the Pecan Pie panel with the zig zag border from the Basic Borders pack.
- Use a bone folder to smoosh and crinkle the two long edges of the 3 1/4″ h x 5 1/2″ w Basic White Panel.
- Stamp the large maple leaf on the 2 1/2″ h x 5 1/2″ w Basic White panel. To get the multi-colored look, stamp in Daffodil Delight ink, then add Pecan Pie to the stamp with a sponge dauber. Flick some Early Espresso ink from the Stampin’ Write marker onto the stamp and then press onto the center of the panel. Repeat until three images are on the panel.
- Use Stampin’ Seal+ to attach the stamped Basic White to the Zig Zag Pecan Pie and the Basic White with the smooshed edges. Attach these to the Card Base with Stampin’ Dimensionals.
- Run the Crushed Curry panel through the Stampin’ Cut & Emboss machine with the long dots die. Attach with Tear N’ Tape.
- Stamp the sentiments on scrap basic white and die cut.
- Attach the sentiment to the Crushed Curry panel with Stampin’ Dimensionals.
- Create a junk bow using.
- Sprinkle on the gems.
- Stamp and decorate the inside and attach with Stampin’ Seal.
- Decorate your envelope.
- Love it! Who will you send it to?
Shopping List
")


 Bordered Ribbon")
 Wavy Trim")

$29.00
Recommended Stamper’s Toolkit ❤
Product List
$12.00

$7.00

$4.25

$5.75

$5.50

$11.00

$26.00

$7.00

$6.50

$11.00

$20.00

$11.00

$80.75

$128.00


$16.00

$13.00


