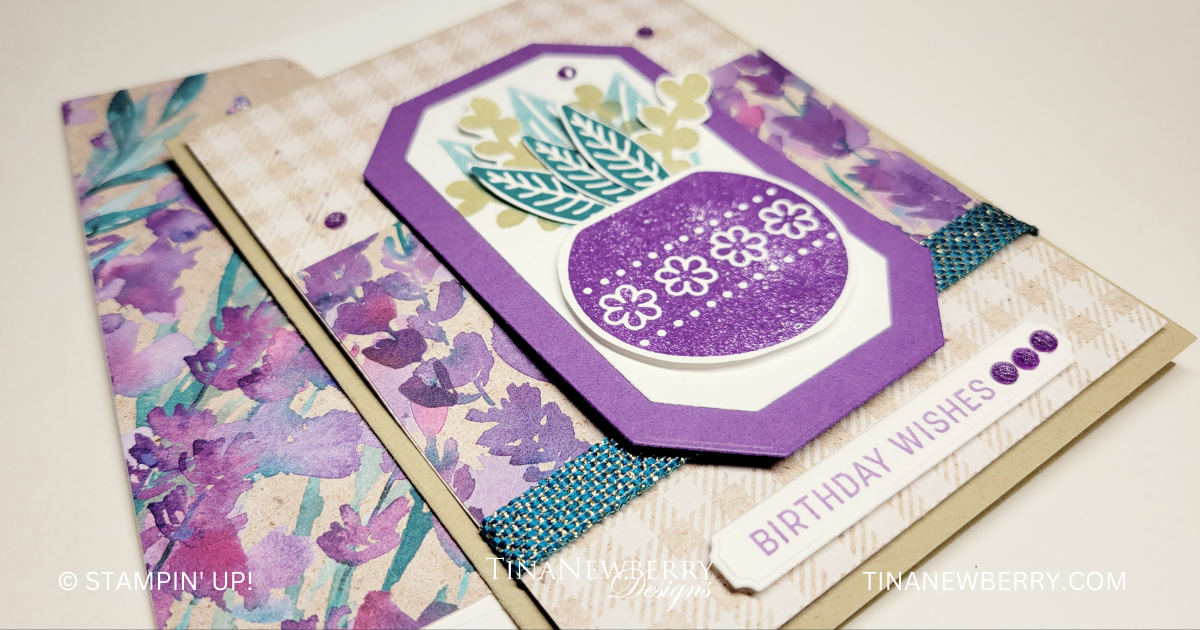
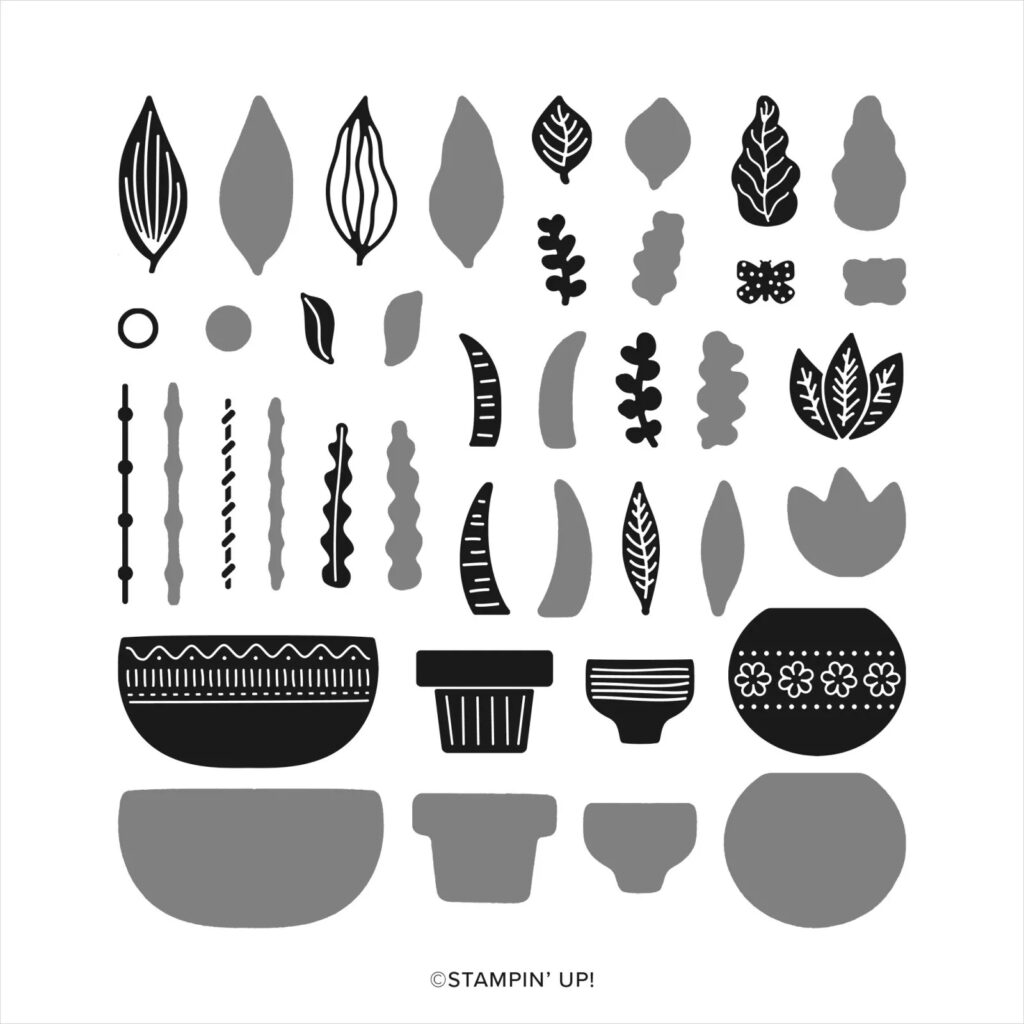
The Stampin’ Up! creative team is SO talented! Check out the stunning color combination used in the Perennial Lavender paper on this fun card eaturing the new Planted Paradise Stamp Set. This is a Reversibles™ set, giving you not only detailed stamps, but also stamps to fill in or to use to create shadows.
Measurements
Full list of supplies needed, listed below. A die cutting machine is needed for this card.
Crumb Cake Cardstock: 5 ½” h x 8 ½” w scored and folded at 4 ¼”
Gorgeous Grape Cardstock: scrap for die cut mat 4 ¼” h x 2 ¾” w
Basic White Cardstock:
- 5 ¼” x 4” (for inside)
- 3 ¾” h x 2 ¼” w scrap for die cut
- Scraps for sentiment die cut, plants, and pot
Perennial Lavender Designer Series Paper (DSP):
- 5 1/4:” h x 4” w (gingham pattern)
- 2 ½” h x 4” w (flower pattern)
Let’s Create
- Affix all stamps to Acrylic Blocks.
- Fold the Card Base in half using a Bone Folder to sharpen the crease.
- Attach the 2 ½” h x 4” w (flower pattern) to the 5 1/4:” h x 4” w (gingham pattern) with Stampin’ Seal.
- Wrap Pretty Peacock and Gold ribbon around the bottom of the flower pattern paper and secure in the back with Tear N’ Tape.
- Attach the DSP layers to the Card Base with Stampin’ Dimensionals.
- On scrap Basic White cardstock, stamp:
- The pot in Gorgeous Grape ink
- Three thin leaves in Pretty Peacock ink
- Two bulb stems in Crumb Cake.
- The sentiment in Highland Heather ink.
- Fussy cut the pot, leaves and stems and die cut the sentiment with the tag from the Sending Dies.
- Die cut the Gorgeous Grape and Basic White panels from Countryside Corners Dies.
- Create the potted arrangement:
- On the Basic White die cut, arrange the pot, leaves, and stems.
- Use a pencil to make a faint mark on the Basic White panel at the top of the pot.
- Remove the pot, leaves, and stems.
- Stamp off Pretty Peacock ink and stamp the three leaves on the panel.
- Stamp two Crumb Cake bulb stems.
- Use Mini Glue dots to attach the die cut leaves and stems.
- Use Stampin’ Dimensionals to attach the pot.
- Use Stampin’ Seal to attach the Basic White die cut panel to the Gorgeous Grape panel, then attach to the front with Stampin’ Dimensionals.
- Use Stampin’ Dimensionals to attach the sentiment.
- Sprinkle on some Purple Fine Shimmer Gems.
- Stamp and decorate the remaining 5 ¼” x 4” Basic White cardstock and attach to the inside with Stampin’ Seal.
- Decorate your envelope.
- Stunning! Who will you send this birthday wish to?

")


 Designer Series Paper")

$8.00
 Metallic Ribbon")
Recommended Stamper’s Toolkit ❤
Product List
$12.00

$7.00

$4.25

$5.75

$5.50

$11.00

$26.00

$7.00

$6.50

$11.00

$20.00

$11.00

$80.75

$128.00


$16.00

$13.00


