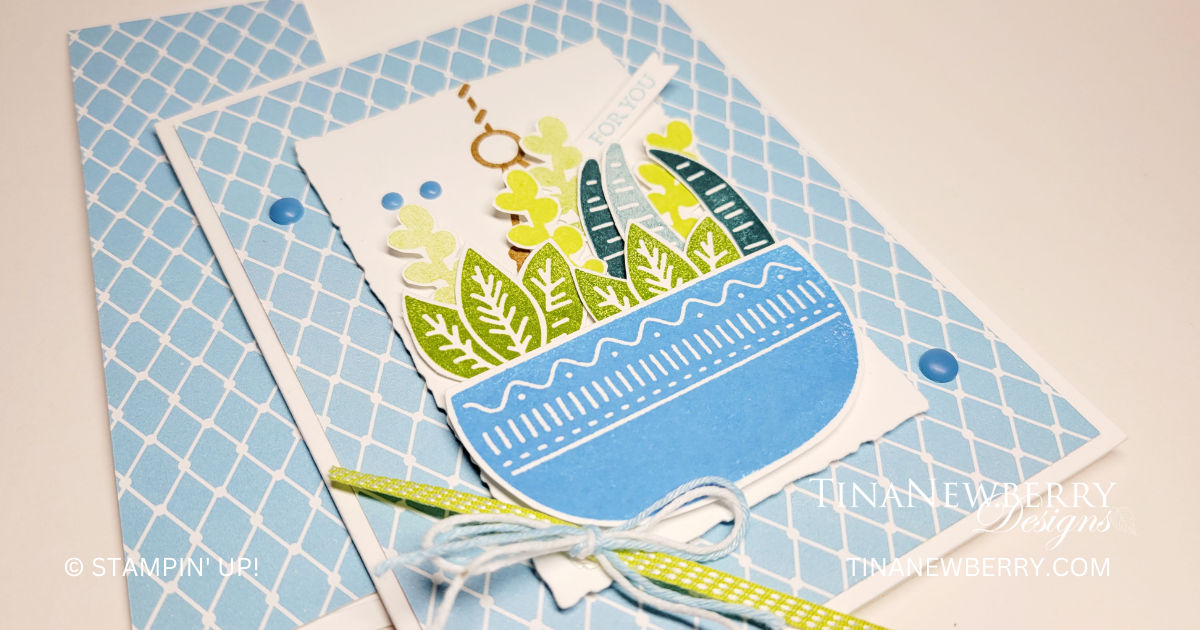
Azure Afternoon blue pairs nicely with the pretty Balmy Blue piece from the Lighter Than Air Designer Series Paper pack and sets a nice background for the vibrant images from the Planted Paradise Reversibles™ stamp set to really pop off the this #simplestamping card.
Measurements
Full list of supplies needed, listed below. A die cutting machine is needed for this card.
Basic White Thick Cardstock: 5 ½” h x 8 ½” w scored and folded at 4 ¼”
Basic White Cardstock:
- 5 ¼” h x 4” w (for inside)
- 4 ¼” h x 3” w for Deckled Rectangles Die
- Scrap for sentiment tag
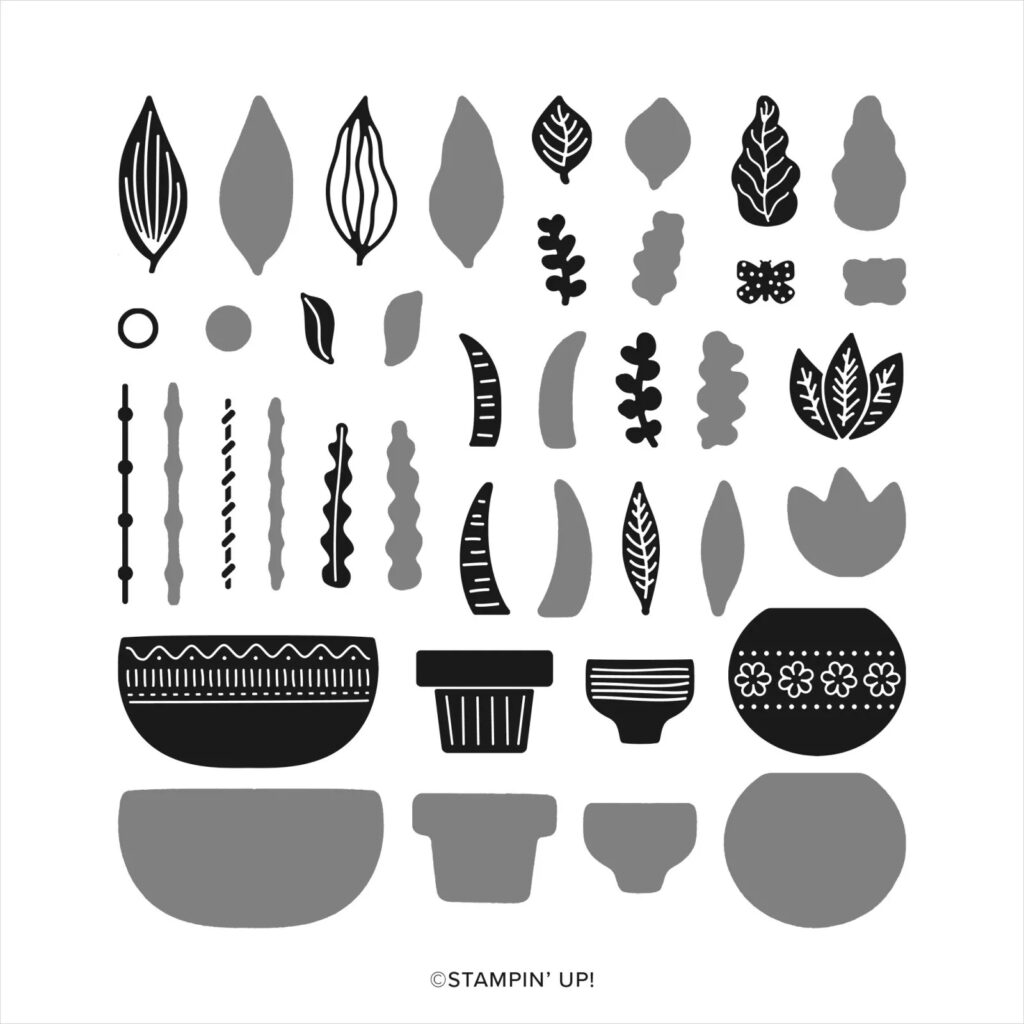
- Scrap for pot, stems, and leaves.
Lighter Than Air Designer Series Paper (DSP): 5 ¼” h x 4” w
Let’s Create
- Affix all stamps to Acrylic Blocks.
- Fold the Card Base in half using a Bone Folder to sharpen the crease.
- Attach the DSP to the Card Base with Stampin’ Seal.
- On Basic White scrap stamp
- the leaves and stems in Lemon Lolly, Granny Apple Green, and Pretty Peacock ink. Stamp off for a lighter look.
- The pot in Azure Afternoon.
- The sentiment in Balmy Blue ink
- Fussy cut the pot, stems, and leaves.
- Die cut the
- Deckled Rectangle
- the sentiment with the tag from the Countryside Corners Dies
- On the Deckled Rectangle stamp the ring, chain, and rope in Pecan Pie ink.
- Arrange the pot, stems, and leaves on the Deckled Rectangle. Attached the stems and leaves with Mini Glue Dots and the pot with Stampin’ Dimensionals.
- Attach the sentiment with a Mini Glue Dot.
- Tie a junk bow with Stitched Lemon Lolly Ribbon, Balmy Blue and Basic White Baker’s Twine. Attach with a Mini Glue Dot.
- Sprinkle on some Rainbow Adhesive-Backed Dots
- Stamp and decorate the remaining 5 ¼” x 4” Basic White cardstock and attach to the inside with Stampin’ Seal.
- Decorate your envelope.
- So cheery!! Now put it in the mail and make someone’s day!

")


 Designer Series Paper")


$10.00

$28.00

$30.00
Recommended Stamper’s Toolkit ❤
Product List
$12.00

$7.00

$4.25

$5.75

$5.50

$11.00

$26.00

$7.00

$6.50

$11.00

$20.00

$11.00

$80.75

$128.00


$16.00

$13.00


