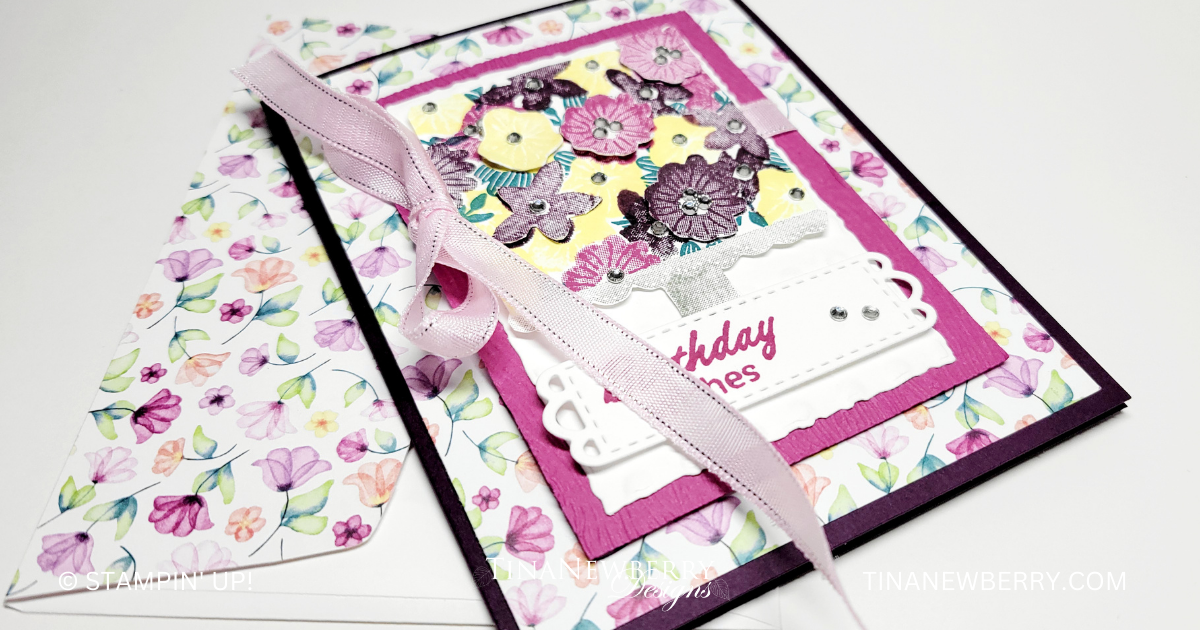
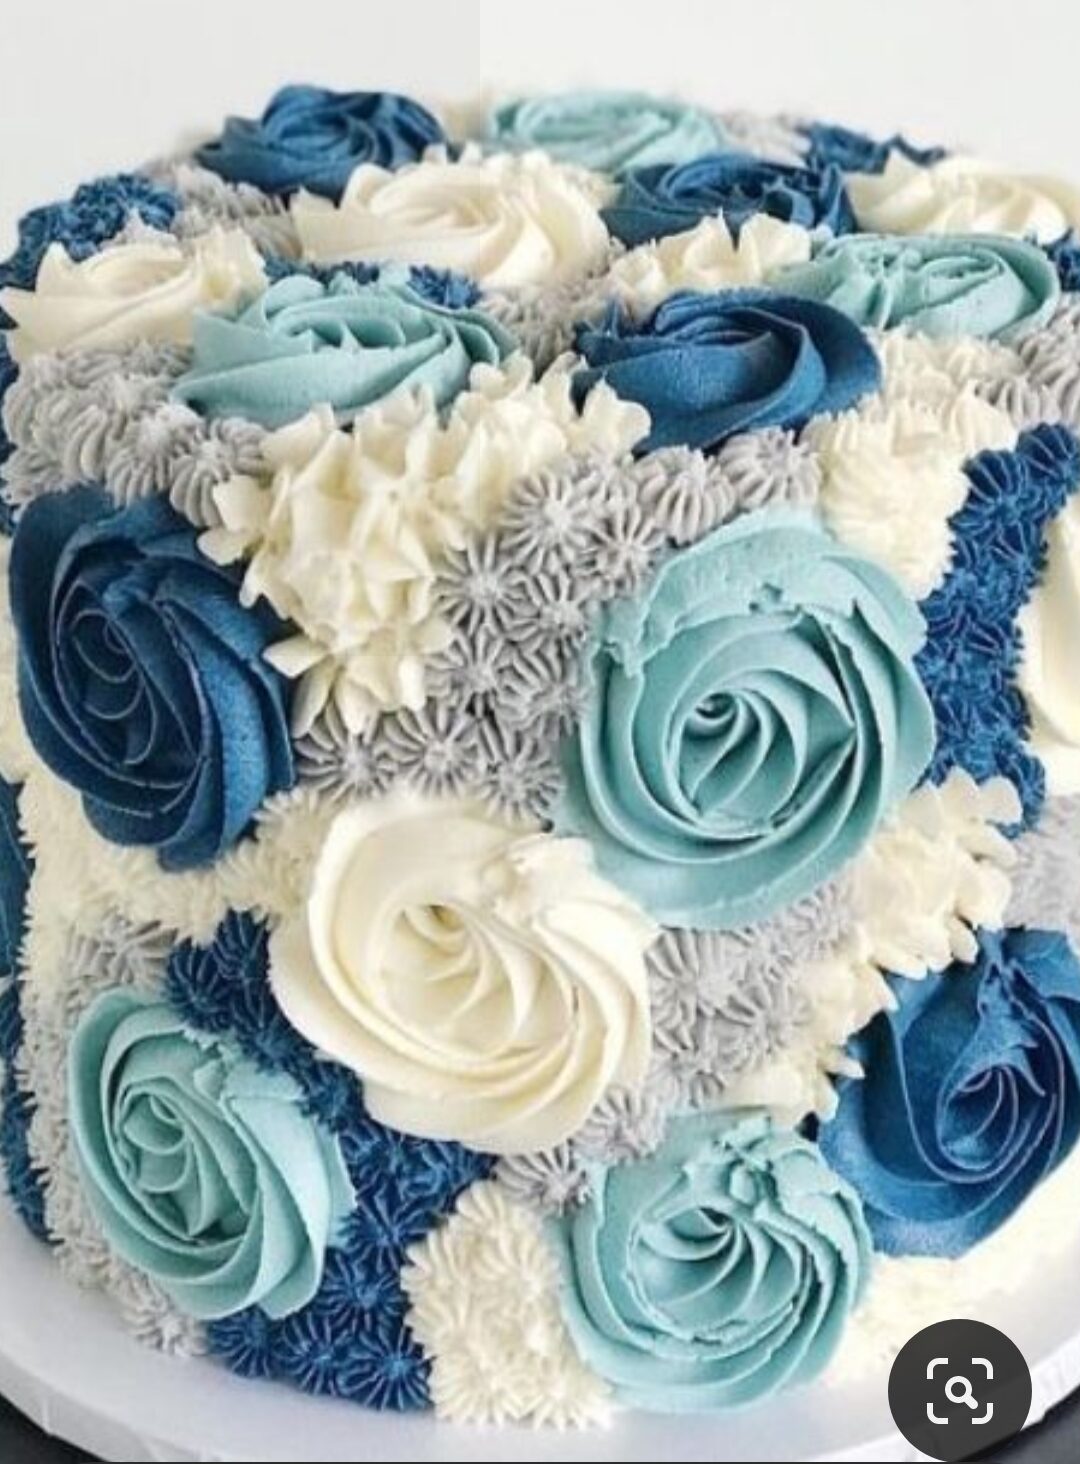
I’ve always been a bit of a ‘how its made’ junky and lately, I’ve been mesmerized by cake decorating videos! I had so much fun trying to re-create some cakes on my cards. I’ve added my inspiration cake. There are some things I would do differently on this one next time…like a shorter cake on this one, and I think I would like to copy the color palette of the real cake. It’s so pretty.
Measurements
Full list of supplies needed, listed below. A die cutting machine is needed for this card.
Blackberry Bliss Cardstock: 5 ½” h x 8 ½” w scored and folded at 4 ¼” w
Basic White Cardstock:
- 5 ½” h x 4 ¼” w (for inside)
- Scrap for 2 ½ x 4” h Deckled Rectangle
- Scrap for cake, flowers, stand, and sentiment
Berry Burst Cardstock: 4 ¼” h x 3”
Delightful Floral Designer Series Paper (DSP): 5 ½” h x 4 ¼” w
Let’s Create
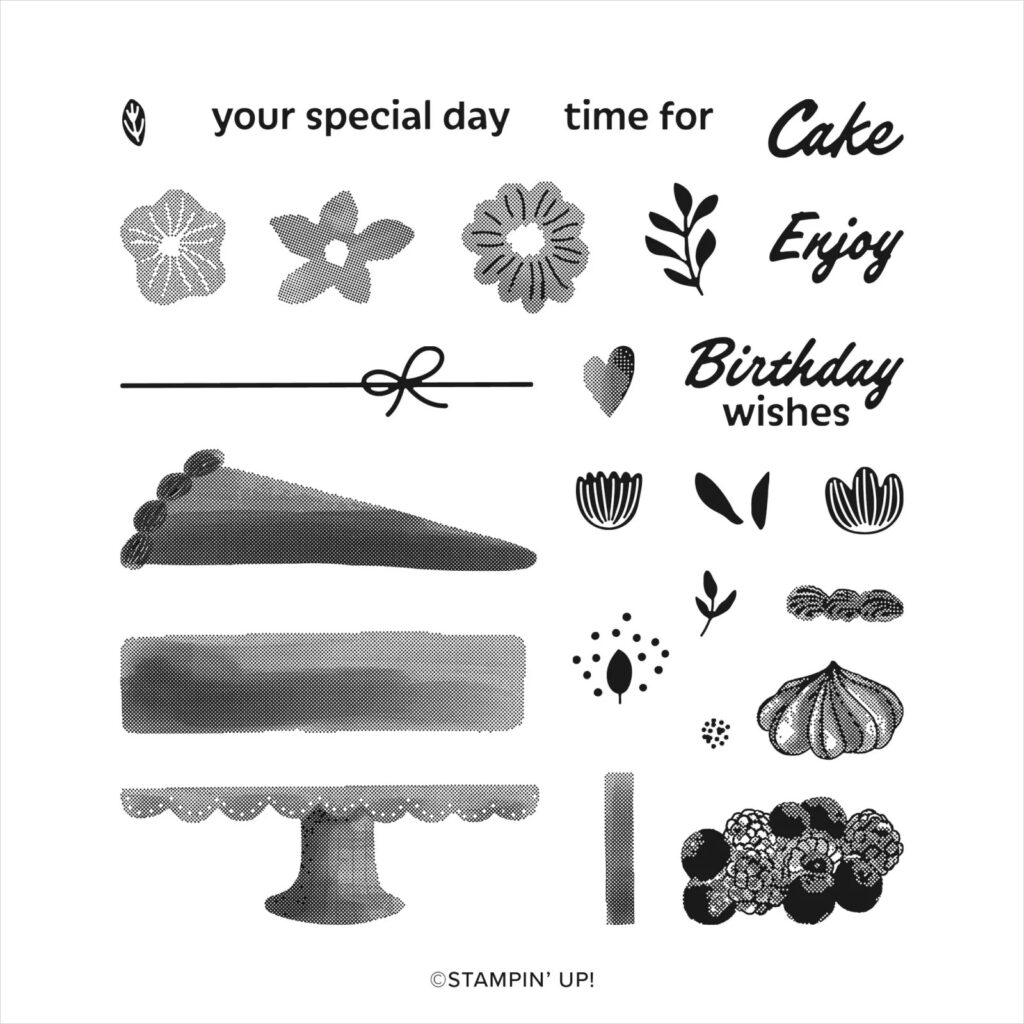
- Affix all stamps to Acrylic Blocks.
- Fold the Card Base in half using a Bone Folder to sharpen the crease.
- Attach the DSP panel using Stampin’ Seal.
- Run the Berry Burst panel through the Stampin’ Cut & Emboss Machine with the Timber 3D Embossing Folder
- Run a Basic White scrap through the Stampin’ Cut & Emboss Machine with the 2 ½ x 4” h Deckled Rectangle. And then run it through again with the dots pattern from the Basics 3D Embossing Folders. Attach to the Berry Burst panel with Stampin’ Seal.
- Wrap Bubble Bath Sheer Ribbon around the top ⅓ of the stacked Berry Burst and Basic White panels and tie a large bow. Shimmy the ribbon over to the left edge of the panels.
- On a larger piece of scrap Basic White Cardsock, stamp the Cake Stand in Gray Granite.
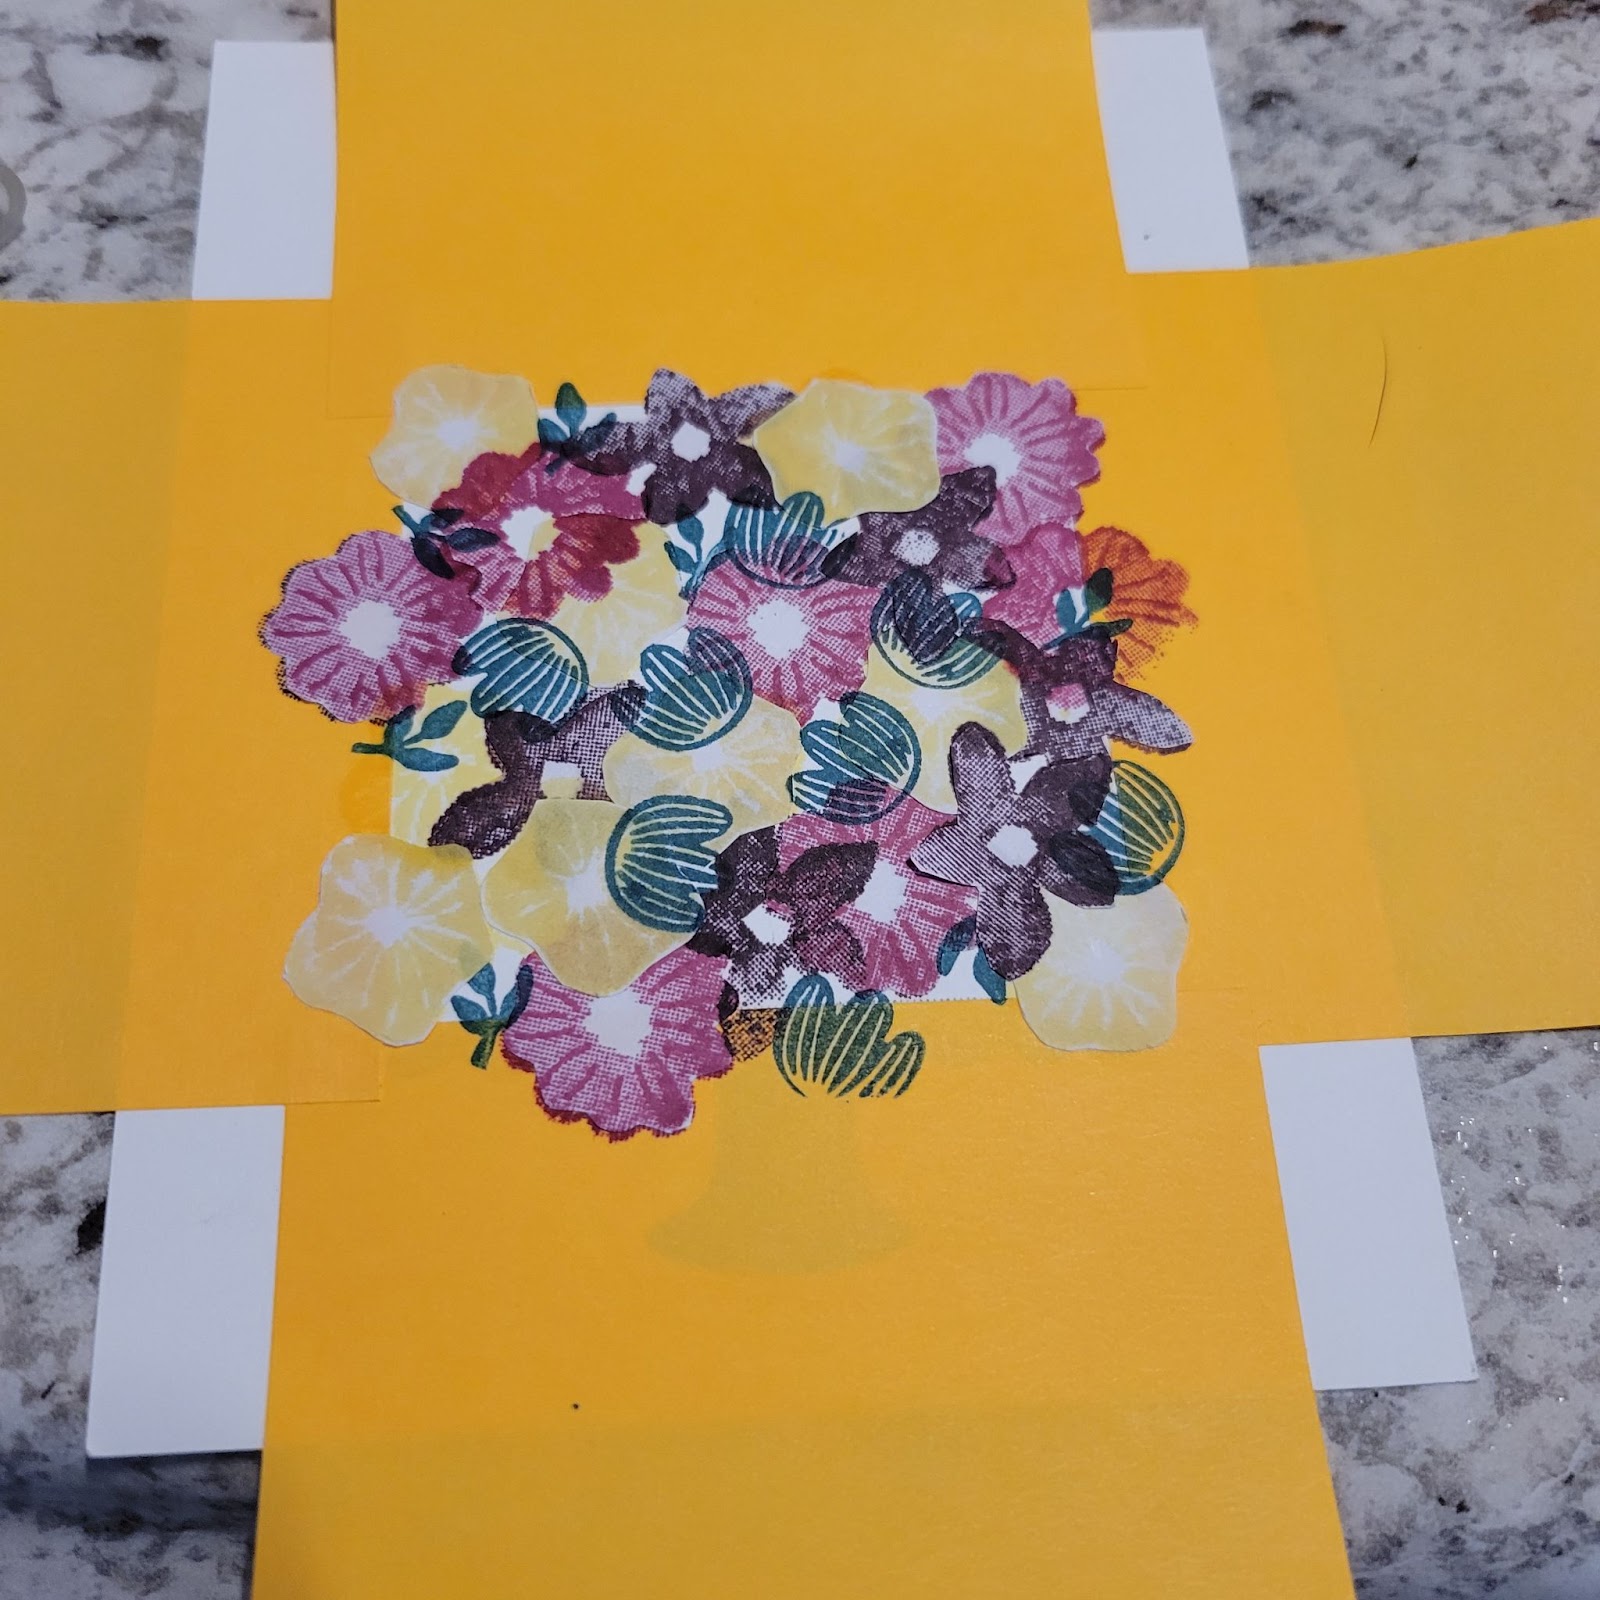
- In the center of a scrap of Basic White Cardstock, use sticky notes to mask off an area as wide as the Cake Stand and as tall as you want your cake. I made mine about 2 ¼ x 2 ¼.
- To make the cake you will use the masking technique and you will need Stampin’ Up! Masking Paper.
- Within the Basic White square you have masked off with sticky notes, stamp several flowers in Berry Burst and Blackberry Bliss that are not touching each other. Stamp some overlapping the sticky notes.
- On the Masking Paper, stamp the same amount of flowers. Note the Masking Paper has a shiny side. You will stamp on the non-shiny side.
- Use Paper Snips to fussy cut out all the Masking Paper Flowers.
- Peel off the Masking Paper backing and attach them over the flowers you stamped.
- Next use Lemon Lolly and Pretty Peacock to stamp filler flowers, leaves and sprigs between and overlapping the masked flowers.
- It’ll look like a hot mess during this phase. Lol
- Next, carefully peel off all the Masking Paper flowers.
- Use a trimmer to cut the excess cardstock off the sides and top of the cake, being careful not to cut the Cake Stand.
- Use Paper Snips to fussy cut around the Cake Stand.
- On scrap Basic White cardstock stamp several more flowers in Berry Burst, Blackberry Bliss and Lemon Lolly. Fussy cut them out and attach on top of stamped flowers on the cake with Mini Glue Dots.
- On Basic White cardstock scrap, stamp the sentiment in Berry Burst ink. Then die cut with the tag from the Meadows Dies.
- Attach the Cake and the sentiment with Stampin’ Dimensionals.
- Sprinkle on Basic Rhinestones.
- Stamp and decorate the remaining 5 ¼” w x 4” h for inside
- Decorate your envelope.
- How fun! Who will you send it to?

Shopping List
")


 Designer Series Paper")

$6.00
 Sheer Ribbon Combo Pack")


$38.00

$30.00

$30.00

$10.00
Recommended Stamper’s Toolkit ❤
Product List
$12.00

$7.00

$4.25

$5.75

$5.50

$11.00

$26.00

$7.00

$6.50

$11.00

$20.00

$11.00

$80.75

$128.00


$16.00

$13.00


