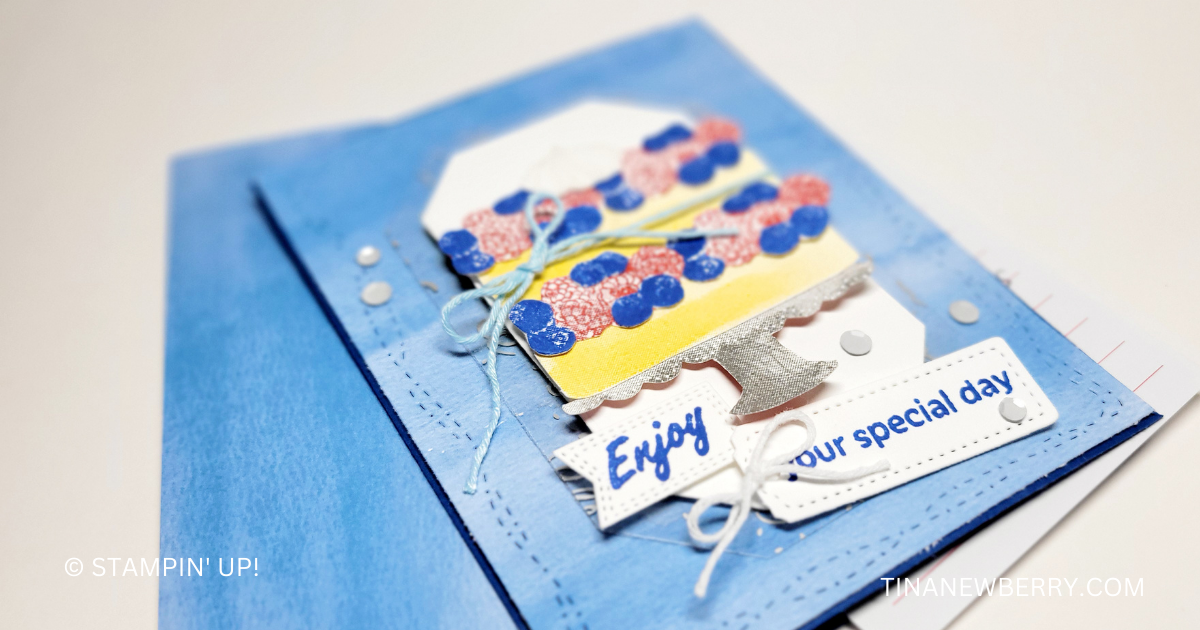
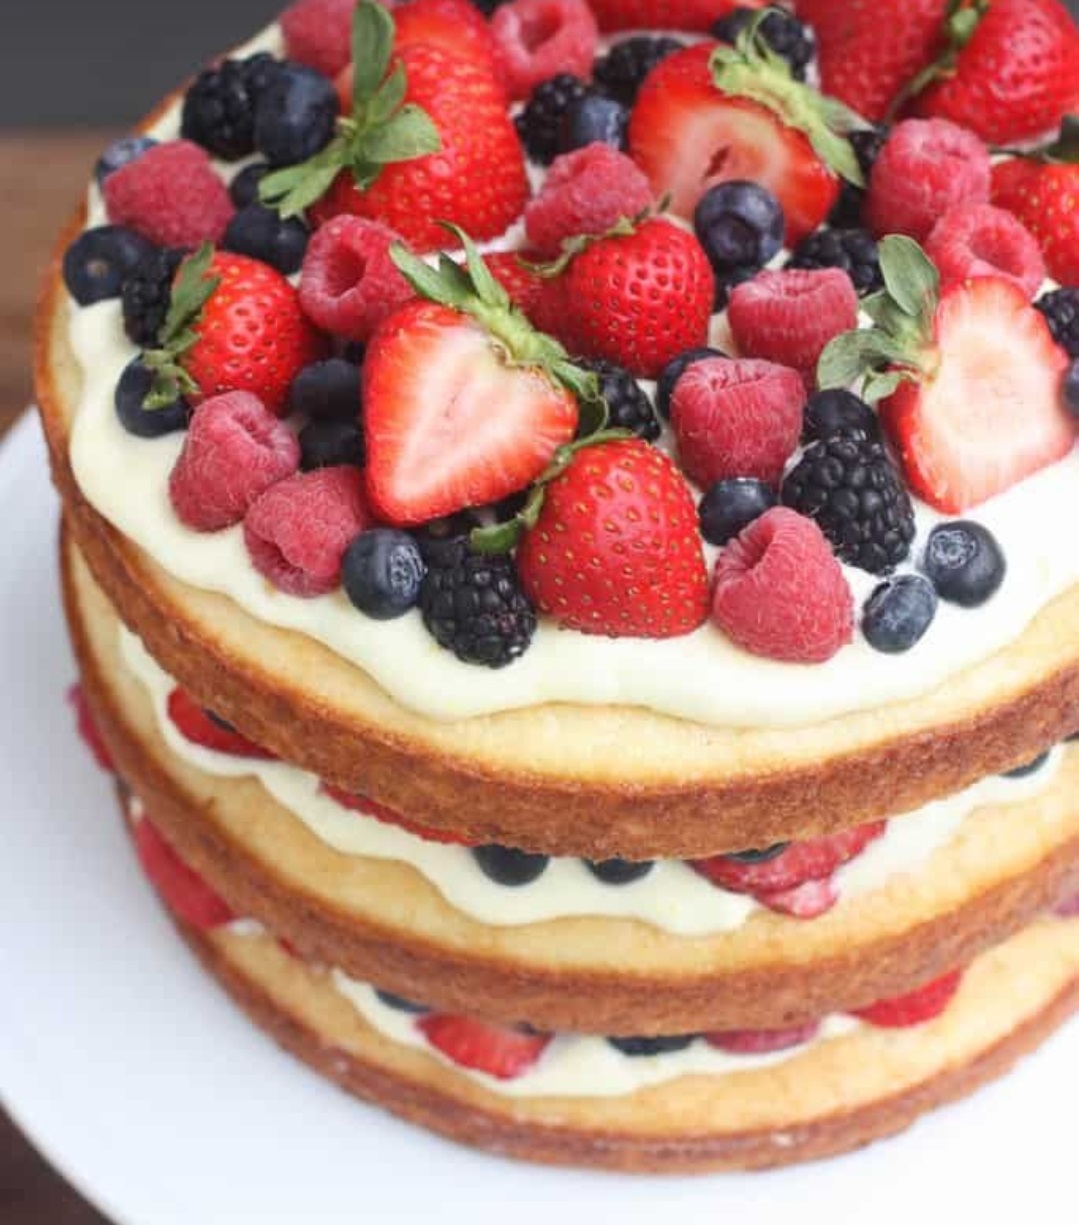
You know I love strawberry shortcake, so when I saw the Cake Fancy stamp set had berries and whip cream stamps, I was sold! Take a look at my inspiration for this card.
Measurements
Full list of supplies needed, listed below. A die cutting machine is needed for this card.
Blueberry Bushel Cardstock: 5 ½” h x 8 ½” w scored and folded at 4 ¼” w
Basic White Cardstock:
- 5 ½” h x 4 ¼” w (for inside)
- Scrap for 2 ½ x 4 1/4”h for Countryside Corners Die
- Scrap for cake, berries, whip cream, stand, and sentiment
Gold Celebrations Specialty Designer Series Paper (SDSP): 4 1/2” h x 3 1/4″ w scrap for Countryside Corners Die
Bright & Beautiful Designer Series Paper (DSP): 5 ½” h x 4 ¼” w
Let’s Create
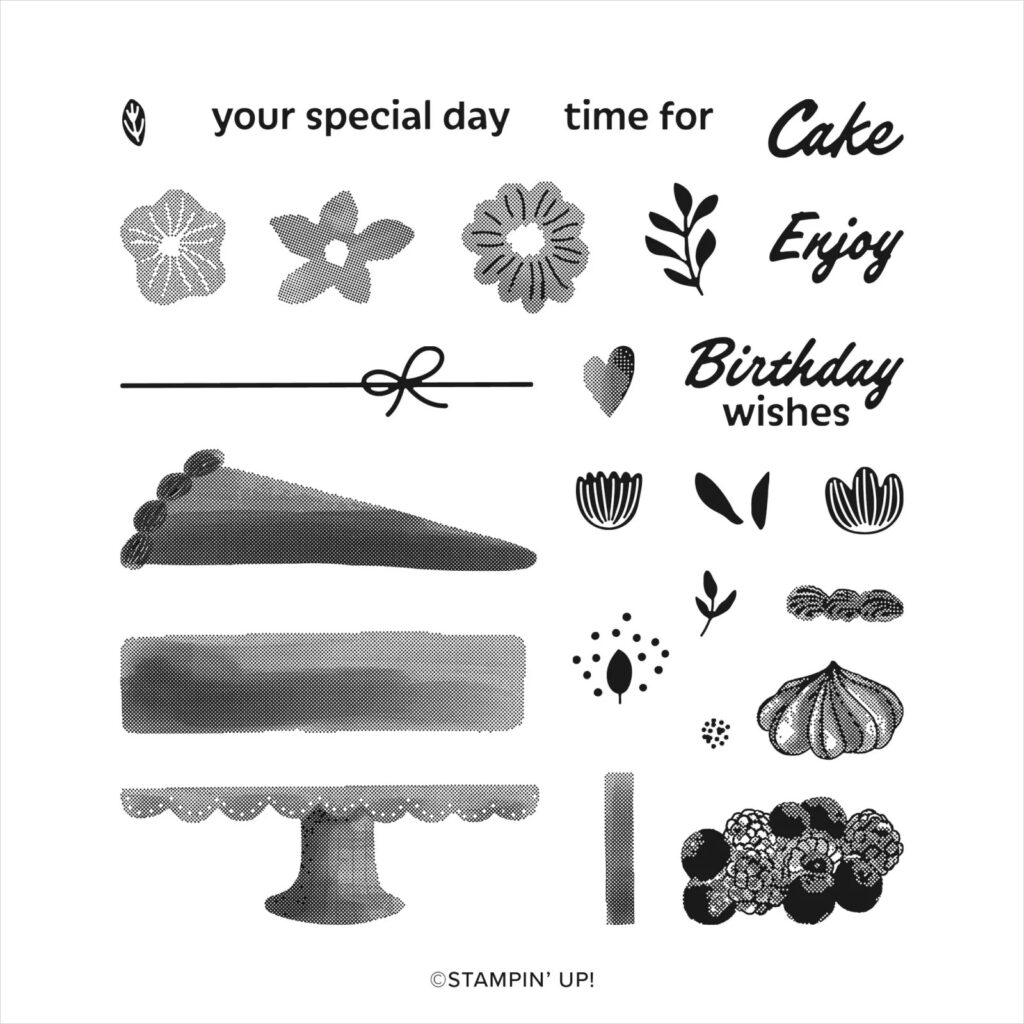
- Affix all stamps to Acrylic Blocks.
- Fold the Card Base in half using a Bone Folder to sharpen the crease.
- Run the DSP through the Stampin’ Cut & Emboss machine with Stitched with Whimsy Die.
- Attach the DSP panel using Stampin’ Seal.
- Run the SDSP through the Stampin’ Cut & Emboss Machine with the Countryside Corners Die.
- Attach SDSP with Tear N’ Tape.
- Run a piece of Basic White scrap through the Stampin’ Cut & Emboss Machine with a smaller Countryside Corners Die.
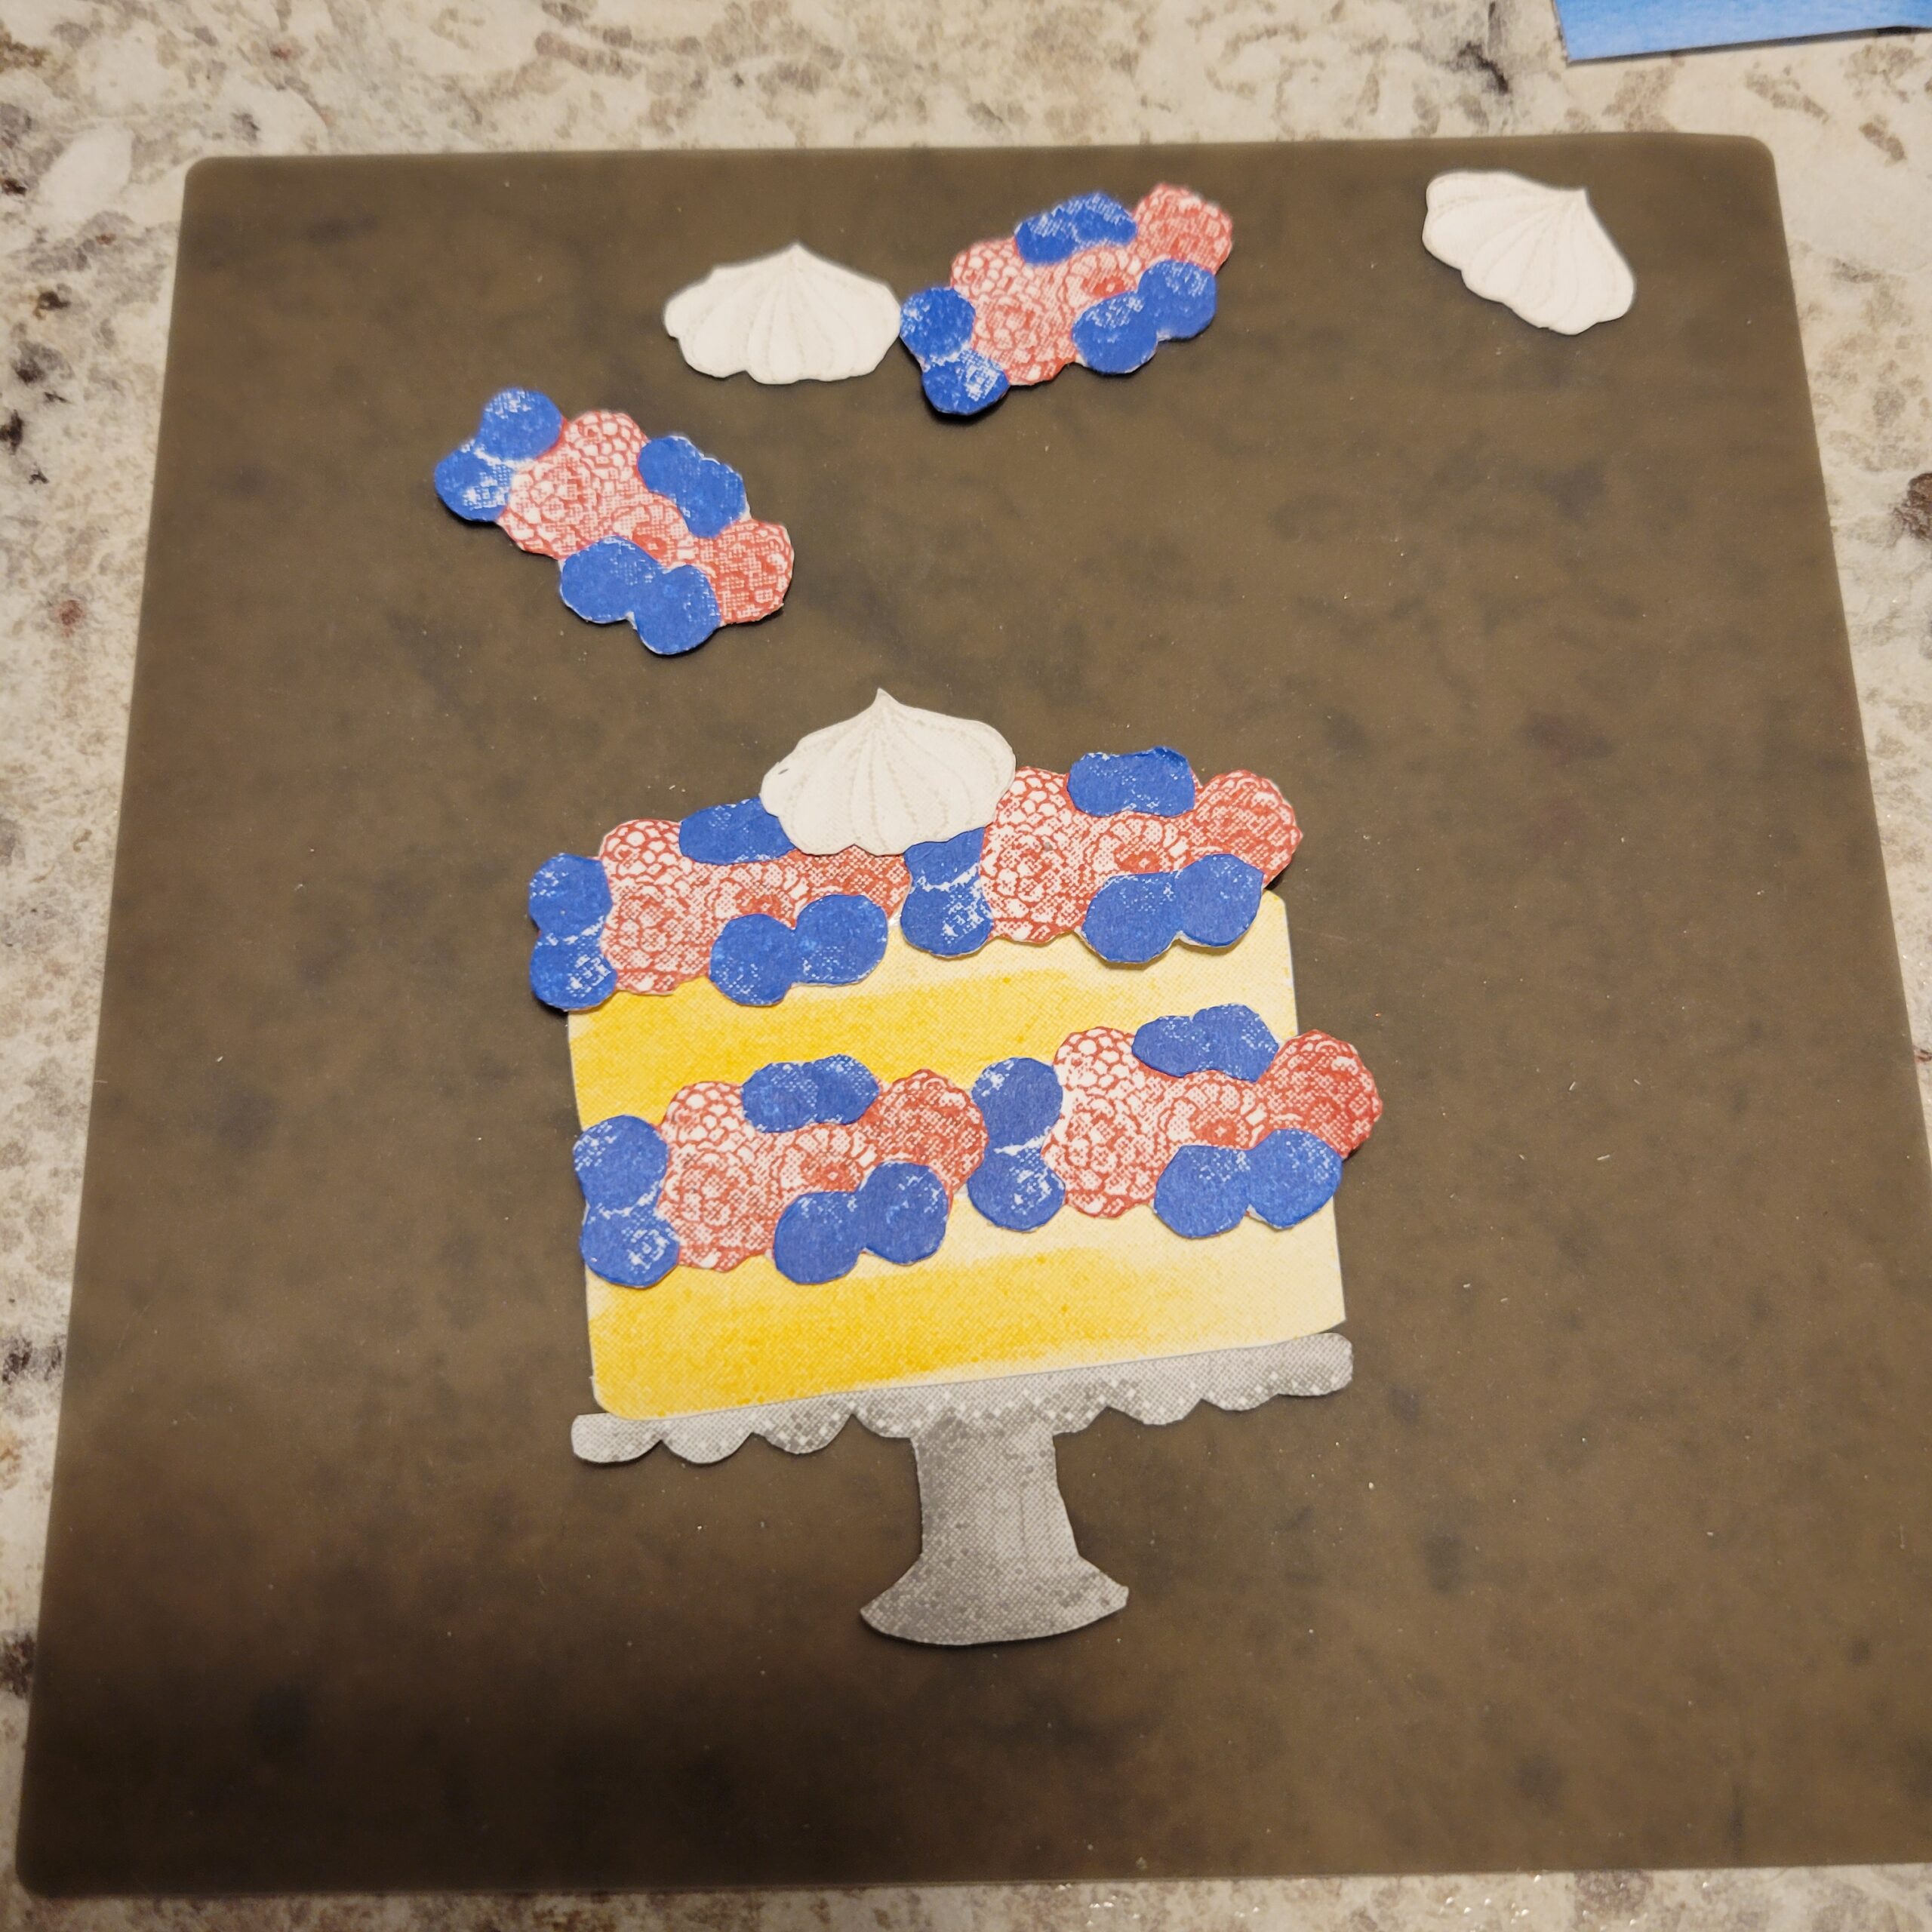
- To make the cake:
- On scrap Basic White
- Stamp two layers of cake in Daffodil Delight ink
- Stamp four berry sections in Real Red
- Stamp four berry sections in Blueberry Bushel.
- Stamp one whip cream in Grey Granite. You may like a ‘stamped off’ look better. To stamp-off simply ink your stamp, stamp on scrap paper to remove a bit of ink and then stamp on scrap cardstock.
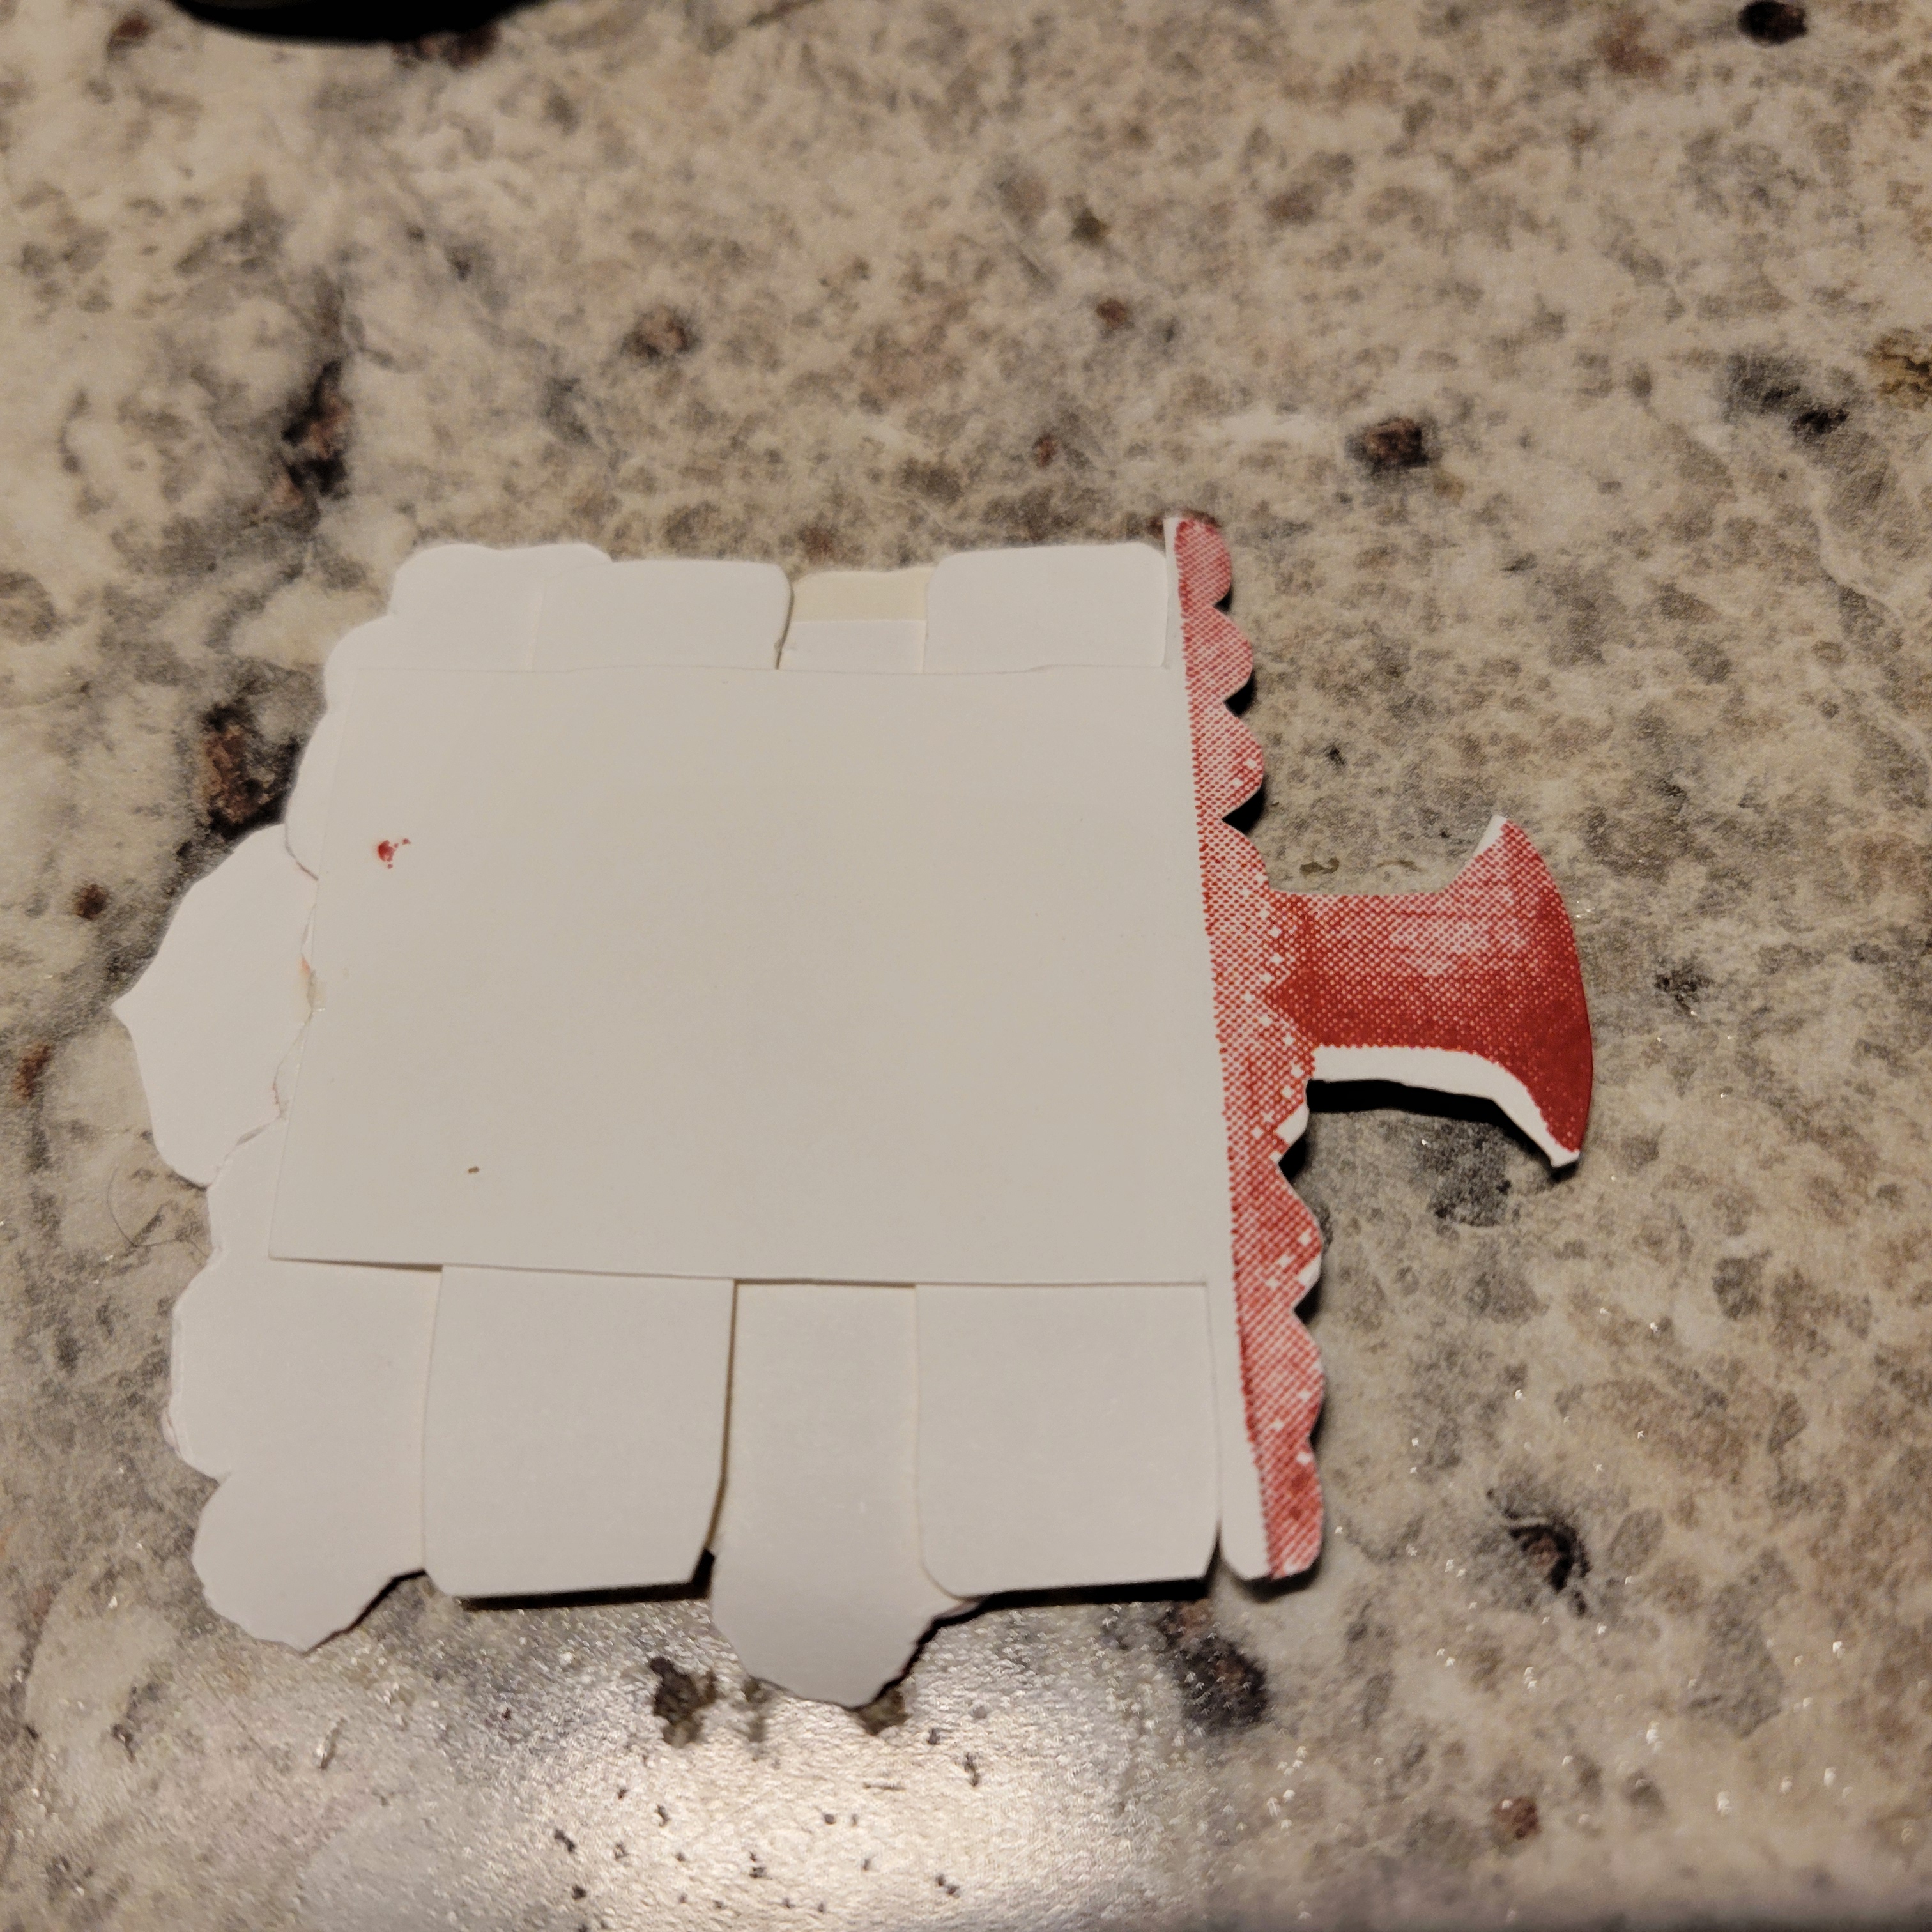
- On a 3” h x 2 ¾: w piece of Basic White scrap, stamp the cake stand pedestal in Grey Granite.
- Attach Adhesive Sheets to the back of the Blueberry berry sections.
- Use Paper Snips to cut out:
- Red berry sections
- Whip cream
- Cake layers
- Cake stand pedestal, instead of cutting across the top of the pedestal, leave a 1 ½” x 1 ½” section attached to the top of the pedestal so you can adhere your cake layers.
- 12 Blueberry sections, Affix to the red berry sections as you go, to more easily piece them together in the right spots.
- On scrap Basic White
- Assemble your cake on the cake stand pedestal
- Attach the cake layers with Stampin’s Seal
- Attach the berry layers and whip cream with Mini Glue Dots.
- Tie a piece of Baker’s Twine around the top cake layer.
- Stamp sentiments on Basic White scrap and die cut out with dies from Nested Essentials and Tailor Made Tags dies.
- Attach sentiments with Stampin’ Dimensionals.
- Attach a white Baker’s Twine bow to the sentiment tag with a Mini Glue Dot.
- Sprinkle on some Neutrals Sequins
- Stamp and decorate the remaining 5 ¼” w x 4” h for inside
- Decorate your envelope.
- Looks good enough to eat! Who will you send it to?
Shopping List
")


 Designer Series Paper")
 Specialty Designer Series Paper")


$29.00

$28.00

$34.00

$22.00

$11.50
Recommended Stamper’s Toolkit ❤
Product List
$12.00

$7.00

$4.25

$5.75

$5.50

$11.00

$26.00

$7.00

$6.50

$11.00

$20.00

$11.00

$80.75

$128.00


$16.00

$13.00


