The Colder Weather Brings Us Together

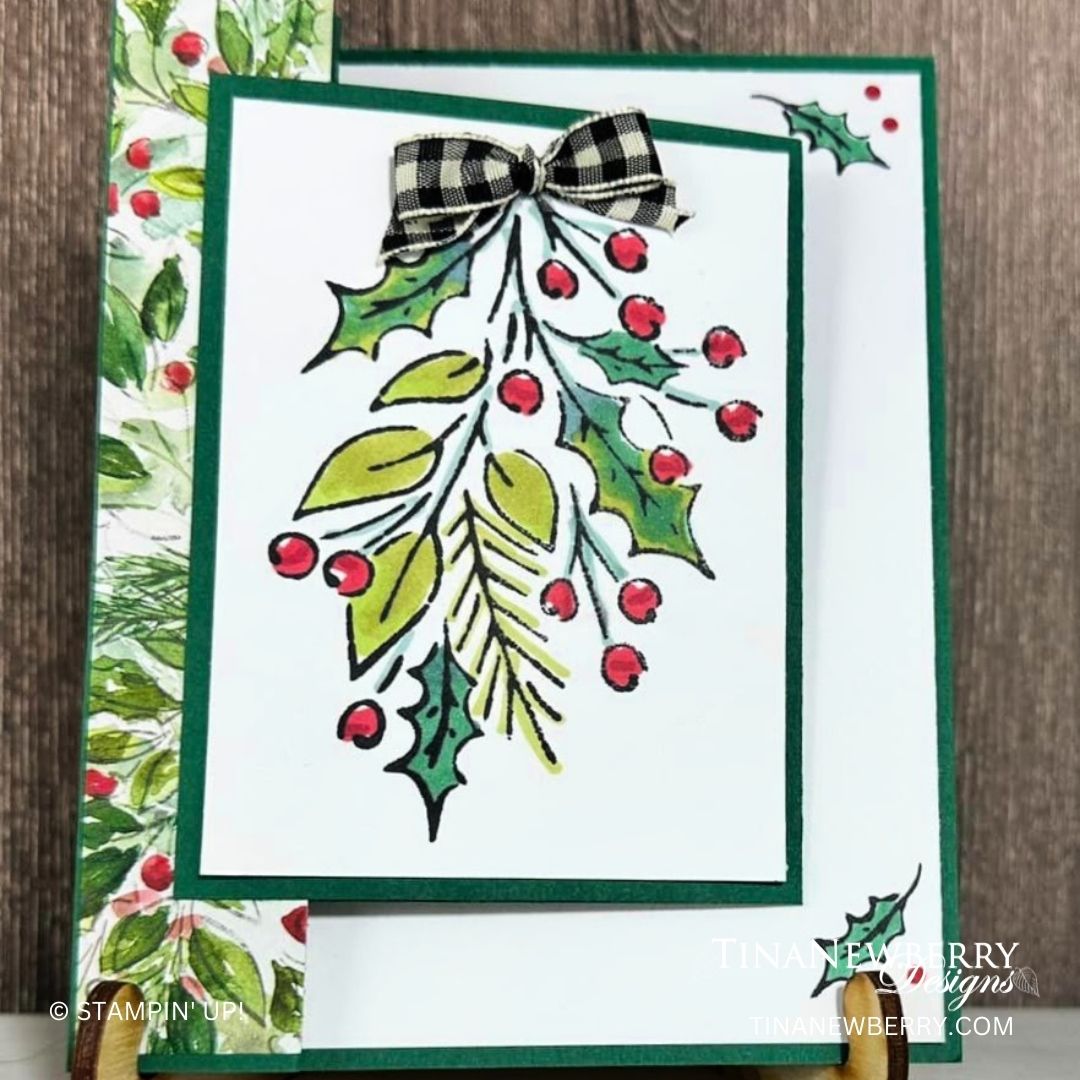
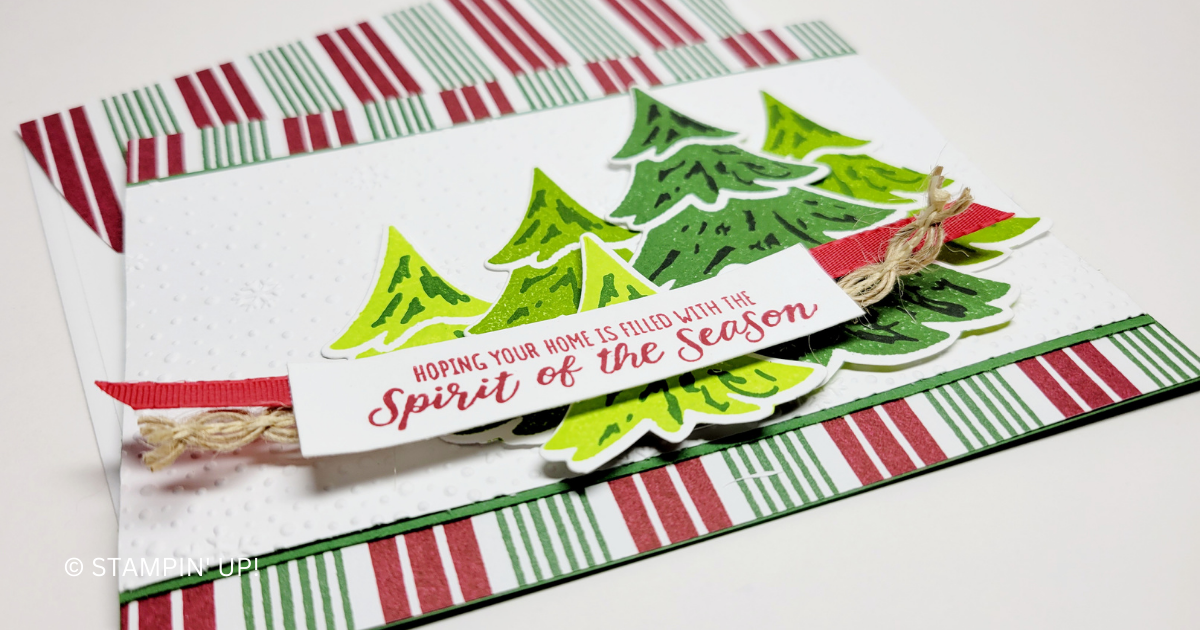
The colder weather brings me inside to my studio to craft the day away (and yes it DOES cool of in north FL)! 🤣 How about you? Add a few branches and a sentiment to pull this card together. The patterned Designer Series Paper does all the work.

Add a little winter magic to your cards and other paper crafts with the Magical Meadow Bundle. The stamps and dies coordinate: stamp, then die cut the images to use on cards, scrapbook pages, gift tags, and more.

Measurements

Full list of supplies needed, listed below. A die cutting machine is needed for this card.

  • Smoky Slate Cardstock:
    • 8 ½” w x 5 ½” h scored and folded on the long side at 4 ¼”
  • Basic White Cardstock:
    • 4 ¼” w x 5 ¼” h (1) for inside
    • 2” square for sentiment
    • 3” w x 2 ½” h 
    • Scrap for branches
  • Winter Meadow Designer Series Paper (DSP):
    • 3 ¾” w x 5 ¼” h pine trees
    • 3” w x 2 ½” h 
  • Pretty Peacock:
    • 1 ¼” w x 5 ¼” h


Let’s Create

  1. Affix all stamps to Acrylic Blocks.
  2. Fold the Card Base in half using a Bone Folder to sharpen the crease.
  3. Unfold the Card Base and trim 1 ¼” w x 5 ½” h piece off the front (section to the right of the fold line).
  4. Refold the Card Base.
  5. Trim 1” off the right side of the 3 ¾” w x 5 ¼” h pine tree DSP and attach both pieces to the Card Base with Stampin’ Seal. 
  6. Run the Pretty Peacock strip through the Stampin’ Cut & Emboss machine with the snowflake die to add snowflake pattern in the top and bottom of the strip then attach with Stampin’ Seal. 
  7. Use Smoky Slate ink to stamp the pine tree forest image on the 3” w x 2 ½” h Basic White piece.
  8. Die cut the coordinating die for the pine tree forest image out of the center of the 3” w x 2 ½” h DSP. 
  9. Align the DSP cutout over the stamped pine tree forest image. Trim any excess Basic White from the edge and attach the two layers together with Stampin’ Dimensionals. Then attach to the card with Stampin’ Dimensionals. 
  10. Stamp the sentiment in Pretty Peacock ink onto edge of the 2” square Basic White and then punch with the Lasting Label Punch- you want the bottom edge to be square. 
  11. Attach the Sentiment with a combination of Stampin’ Seal and Stampin’ Dimensionals. 
  12. Die cut some branches in Basic Gray and Basic White Cardstock. Trim as needed and then use Mini Glue Dots to tuck them in behind the pine tree forest. 
  13. Sprinkle on some Faceted Gems Trio Pack. 
  14. Stamp and decorate the 5 ¼” w x 4” h for inside.
  15. Decorate your envelope.
  16. Love! Put it in the mail!
Shopping List

Recommended Stamper’s Toolkit ❤


Classic Christmas Wreath

More of that beautiful Joy of Christmas Designer Series Paper and Joyful Specialty Designer Series Pare are featured on this beautiful card along with a beautiful wreath added as a focal image in a jiffy with the Country Wreath Dies.

Add the Joy of Noel Bundle to your paper crafting collection and create all sorts of elegant paper crafts! Mix and match the stamp and die set greetings and designs to make wonderful Christmas wreaths and winter floral arrangements. From tags to cards to home decor elements, share the joy of Christmas with simple or sophisticated projects! https://www.stampinup.com/products/joy-of-noel-bundle-english?demoid=2220001

Measurements

Full list of supplies needed, listed below. A die cutting machine is needed for this card.

Card Base Basic Shaded Spruce 8 ½” x 5 ½”, score at 4 ¼” and 2 ⅛”
Cut Joy of Christmas Designer Series Paper at 2” x 5 ¼”
Cut Basic White at 4” x 5 ¼”
Cut Shaded Spruce square at 3 ¼”
Cut Joyful Specialty Paper Shaded Spruce Grid Pattern at 3”
Die-Cut Basic White Deckled Circle ~ 2 ⅞”
Die-Cut Country Wreath wreath in Shaded Spruce
Die-Cut Country Wreath wreath in Old Olive

Let’s Create

  1. Affix all stamps to Acrylic Blocks.
  2. Cut Card Base Basic Shaded Spruce 8 ½” x 5 ½”, score at 4 ¼” and 2 ⅛” 
  3. Fold the Card Base on the score lines using a Bone Folder to sharpen the creases.
  4. Cut Designer Series Paper at 2” x 5 ¼”. Adhere to left side of front panel.
  5. Cut Basic White at 4” x 5 ¼”, Stamp sentiment and adhere to inside of card.
  6. Cut Shaded Spruce square at 3 ¼”
  7. Cut Specialty Paper Shaded Spruce Grid Pattern at 3”. Adhere to Shaded Spruce square. Adhere this panel to front card flap.
  8. Die-Cut Basic White Deckle Circle ~ 2 ⅞”. Adhere with Stampin’ Dimensionals to square.
  9. Die-Cut Cottage Wreath wreath in Shaded Spruce. Adhere to circle.
  10. Die-Cut Cottage Wreath wreath in Old Olive, Adhere to wreath.
  11. Decorate wreath by adding gems and beautiful bow with mini-glue dots.

Shopping List

Recommended Stamper’s Toolkit ❤


Spirit of the Season

Stamp the trees in any color and then with the dies, cut it to the size you want. All five trees on the front of this card used the same large tree stamp and then were cut to size with the appropriate tree die to make this pretty forest.

Create elegant, mesmerizing winter or Christmas scenes by combining stamped images and die-cut shapes from the Merriest Trees Bundle. From different tree sizes to more detailed designs, you’ll love the creative options this bundle offers—it will keep you crafting all winter long!

Measurements

Full list of supplies needed, listed below. A die cutting machine is needed for this card.

Garden Green Cardstock: 5 ½” w x 8 ½” h scored and folded at 4 ¼” h

Basic White Cardstock:

  • 4” h x 5 ¼” w
  • 3 ⅛” h x 5 ½” w
  • Scrap for trees and sentiment

Garden Green Cardstock: 5 ½” w x 3 ¼” h

A Walk in the Forest Designer Series Paper (DSP): 4 ¼” h x 5 ½” w


Let’s Create

  1. Affix all stamps to Acrylic Blocks.
  2. Fold the Card Base in half using a Bone Folder to sharpen the crease.
  3. Use Stampin’ Seal+ to adhere the DSP to the Card Base.
  4. Run the 3 ⅛” h x 5 ½” w Basic White Cardstock through the Stampin’ Cut & Emboss Machine with the Snowflake Sky 3D embossing folder and then adhere to the Garden Green cardstock with Stampin’ Seal, then attach to the Card Base with Stampin’ Seal. 
  5. On scrap Basic White Cardstock Stamp five Christmas trees – one Garden Green w/Basic Black, two Granny Apple Green with Garden Green, and two Lemon Lime Twist with Granny Apple Green.
  6. Die cut the trees – one with four boughs, two with three boughs, two with two boughs and attach to the Snowflake Sky 3D Embossed panel with Stampin’ Dimensionals and Stampin’ Seal. 
  7. Stamp the sentiment in Cherry Cobbler ink on Basic White scrap and then trim to size. 
  8. Use Tear ‘n Tape to attach a stip of Natural Wavy Trim and Real Red Trim behind the Sentiment tag.
  9. Stamp and decorate the remaining 4” h x 5 ¼” w for inside
  10. Decorate your envelope.
  11. Fun! Who will you send it to?

Shopping List

Recommended Stamper’s Toolkit ❤