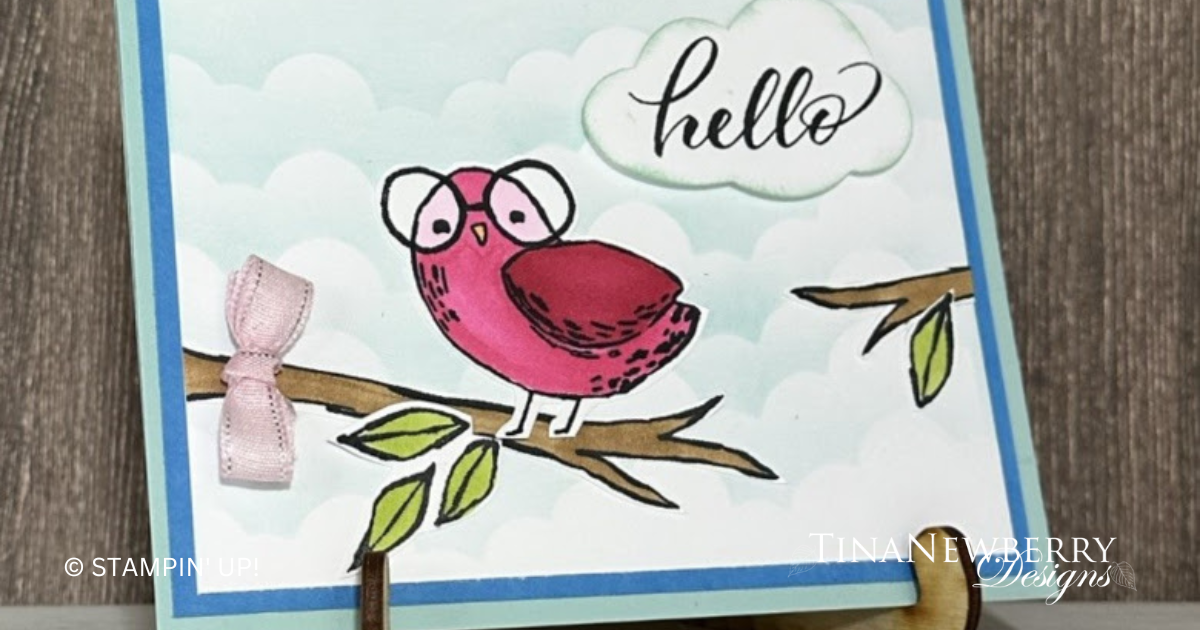
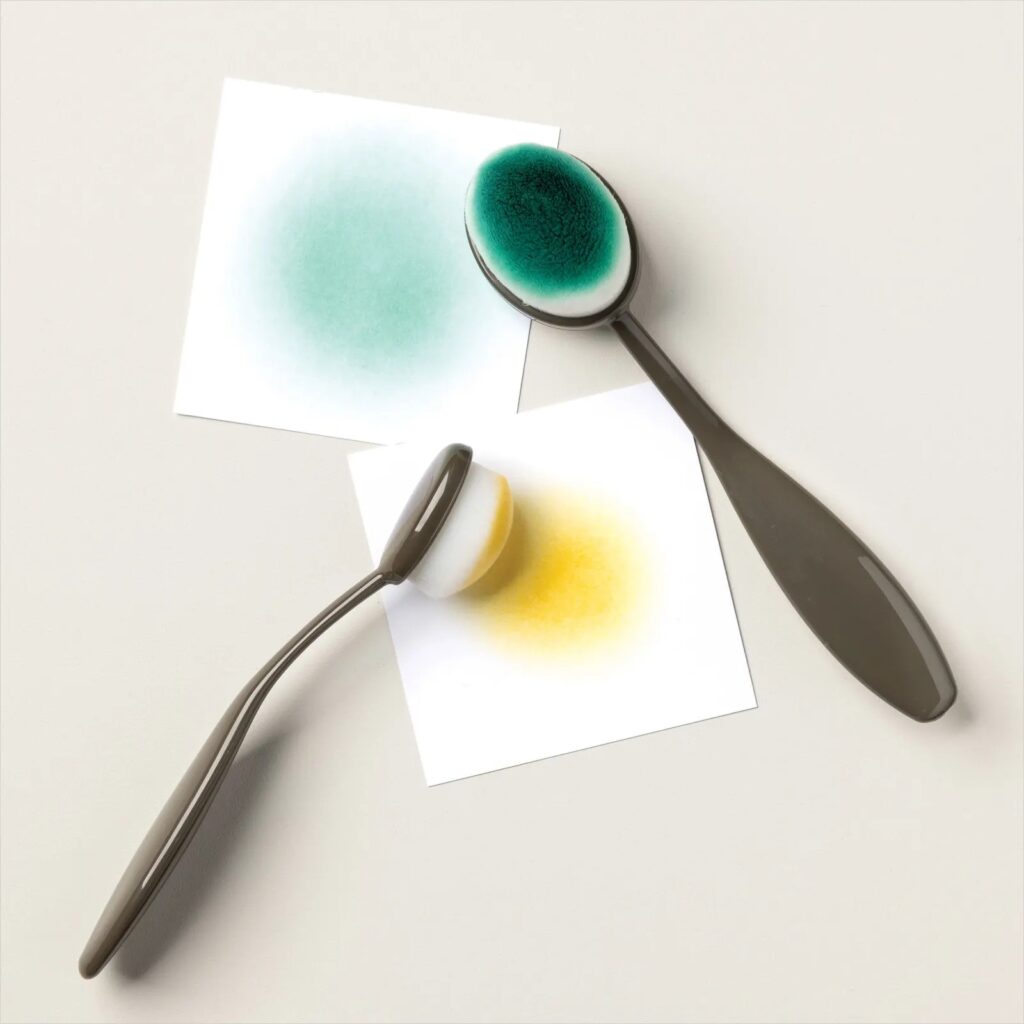
Isn’t this bird from the Bird’s Eye View stamp set SO CUTE? Use your blending brushes and a stencil to make a background of clouds to set off this little cutie.
Measurements
Full list of supplies needed, listed below. A die cutting machine is needed for this card.
Card Base Pool Party cardstock 8 ½” h x 5 ½” w, scored at 4 ¼”
Layer 1 Azure Afternoon cardstock – 4” h x 5 ¼” w
Layer 2 Basic White cardstock – 3 ¾” h x 5” w
Inside Layer Basic White cardstock – 4” h x 5 ¼” w
Punch cloud from Basic White cardstock scrap4” h x 5 ¼” w4” h x 5 ¼” w
Stamp and fussy cut bird and branches and leaves from Basic White scrap
Create a stencil from Thick Basic White cardstock using the Basic Borders die
Let’s Create
- Affix all stamps to Acrylic Blocks.
- Fold the Card Base in half using a Bone Folder to sharpen the crease.
- Adhere Azure Afternoon layer to card front with Stampin’ Seal.
- Create cloud-patterned stencil from Basic Borders Dies.
- Using the stencil, very lightly brush Pool Party to create your first row of clouds across the top of the layer. Shift the position of the stencil, move down the page ½” or so, and very lightly brush another row of clouds. Repeat until you reach the bottom of the layer.
- Adhere Cloud layer to card front with Stampin’ Seal.
- Punch Basic White cloud. Use sponge dauber to add color to the edges of the Cloud, in Pool Party ink.
- Adhere cloud to front of card with Stampin’ DImensionals.
- Use Tuxedo Black Memento Ink Pad to stamp the bird and leaves on a Basic White scrap. And the branches on the Cloud layer.
- Color as desired with Blends or Stampin’ Write Markers.
- For this card, I used Stampin’ Blends. I colored the branches in Pecan Pie, the leaves in Granny Apple Green, and the bird using Melon Mambo Dark on the wing. I used Melon Mambo Light on the body of the bird. And I used Bubble Bath behind the glasses.
- Fussy cut leaves and bird.
- Arrange in a pleasing manner on the card front and attach with preferred adhesive.
- Add sweet little pink bow with Mini Glue Dots on the branch.
- Stamp and decorate the inside 4” h x 5 ¼” w Basic White cardstock and attach with Stampin’ Seal.
- Decorate your envelope.
- So cute! Now send it to someone special.
Shopping List

")


 Sheer Ribbon Combo Pack")

$5.50

$22.00

$29.00
Recommended Stamper’s Toolkit ❤
Product List
$12.00

$7.00

$4.25

$5.75

$5.50

$11.00

$26.00

$7.00

$6.50

$11.00

$20.00

$11.00

$80.75

$128.00

$16.00

$13.00


