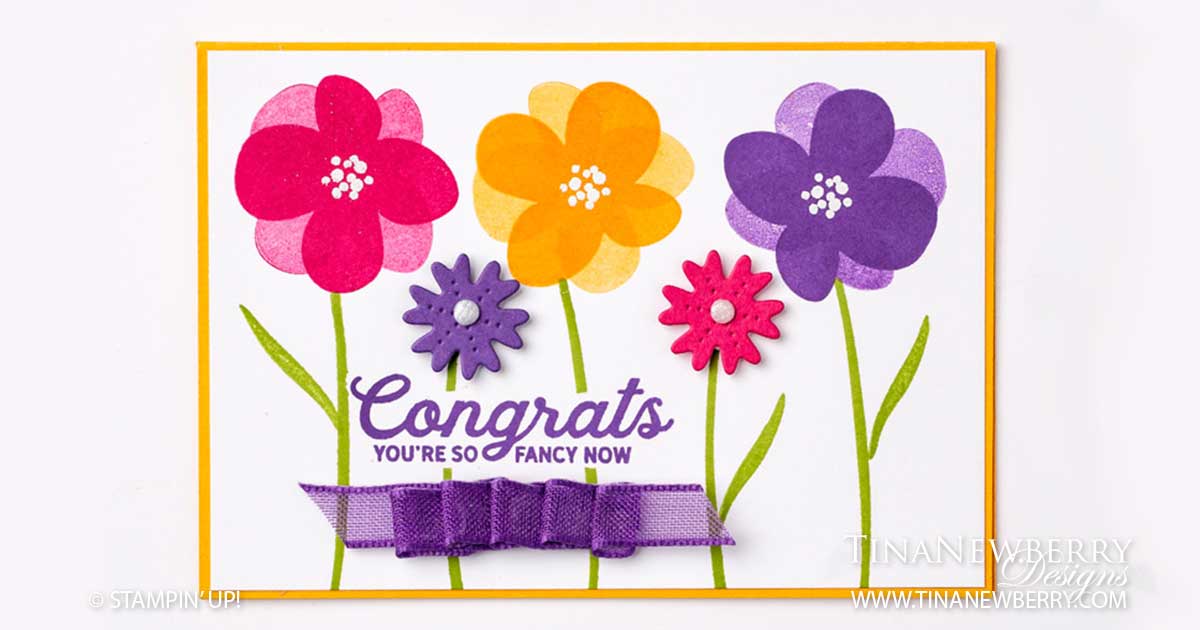
Big bold flowers, bright colors and fun fonts bring the summer party together on this Congratulations card, that’s mostly stamps, ink and paper, with a few techniques thrown in with the In Bloom Bundle.
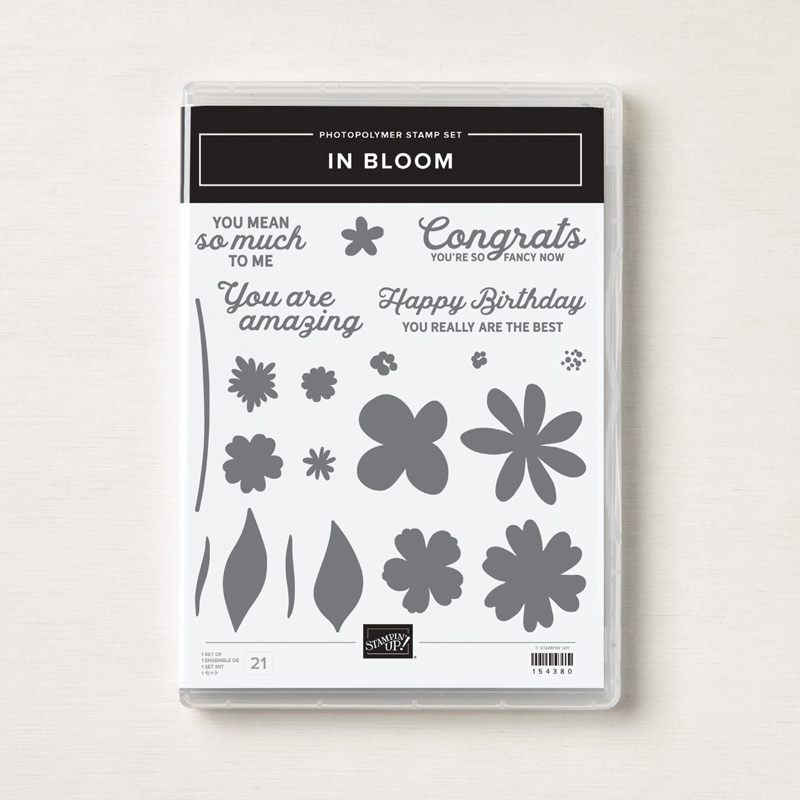
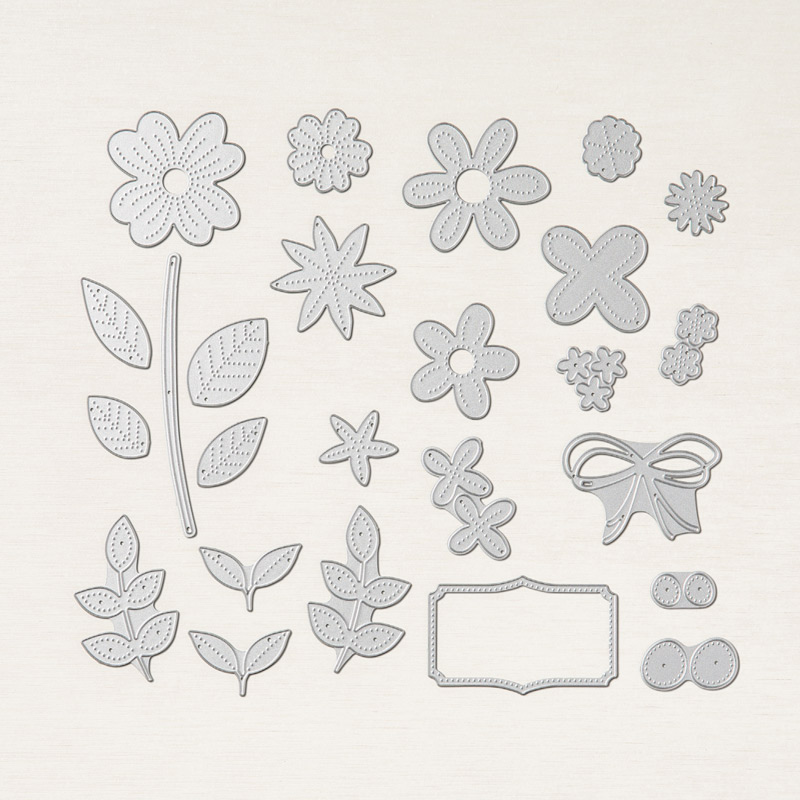
Save 10% when you buy the bundle.
Measurements
Full list of supplies needed, listed below. A die cutting machine is needed for this card.
Card Base: Mango Melody Cardstock 5 1/2″ h x 8 1/2″ w folded to 5 1/2″ h x 4 1/4″ w
Background: Basic White Cardstock 5 1/4″ h x 4″ w
Flowers: Gorgeous Grape and Mango Melody Cardstock scraps
Inside Layer: Basic White Cardstock 5 1/4″ h x 4″ w
Let’s Create
- Affix all stamps to Acrylic Blocks.
- Fold the Card Base in half using a Bone Folder to sharpen the crease.
- First stamp your sentiment with Gorgeous Grape ink on the Background. Next, stamp it again on a sticky note (on the front of the sticky back section) and trim closely to the sentiment with Paper Snips. Stick over the top of the the sentiment you stamped on the Background. This is called a Mask and it will allow you to now stamp flowers around the sentiment, without ink getting on your pretty sentiment.
- Next start with the flower in the middle. Ink up the Blossom and stamp it, then before you re-ink, turn your stamp and stamp again. This is called Stamping Off. Repeat with the two large flowers to the left and the right.
- Stamp the Flower Centers in Versamark ink, sprinkle with White Embossing Powder and Heat set with the Heat Tool. This is called Heat Embossing.
- Next stamp all five of the Stems in Granny Apple Green ink.
- Die cut the small flower in Gorgeous Grape and Melon Mambo and attach with Stampin’ Dimensionals.
- Add an Elegant Faceted Gem to the center of each of the small flowers.
- Cut about 6-7″ of Gorgeous Grape Sheer Ribbon. Set down some adhesive – either Tear & Tape, Mini Glue Dots or Stampin’ Seal. Adhere the ribbon hanging off the left of the adhesive and slowly gather and stick down the ribbon across the adhesive. Trim any excess.
- Stamp your inside sentiment and attach with the adhesive of your choice.
- Decorate your envelope!
- Ta Da!! Get this in the mail today :-).
Shopping List

$48.50


$9.50


 Gorgeous Grape Sheer Ribbon")

$7.50

$18.00
Stamper’s Toolkit
You will also need adhesive, acrylic blocks, scissors and other basic PaperCrafting items from the Stamper’s Toolkit

$8.00

$12.00

$4.00


$5.25

$7.00

$4.00

$7.00

$10.00

$8.00

$8.00

$10.00

$25.00

$7.00

$6.00

$10.00

$8.00

$5.00

$5.00

$6.00

$71.50

$8.00

$11.75
")
$30.00
$9.50


$120.00