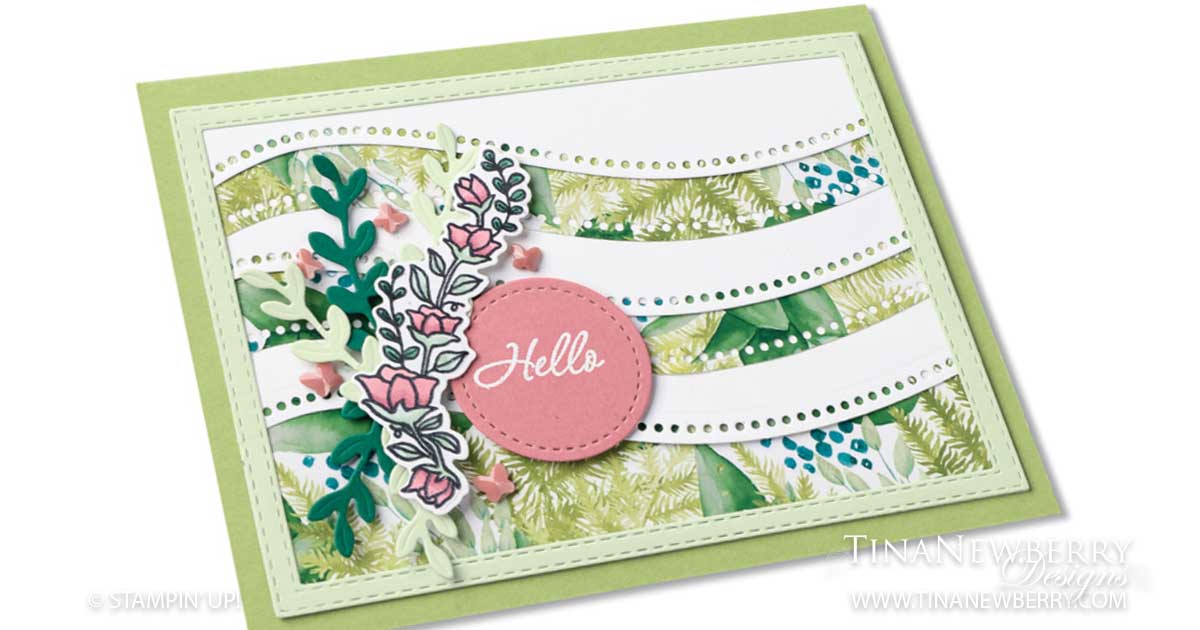
The Quite Curvy Bundle, hit the market in the fall and made a big bang through the holiday season, but we haven’t seen the last of this pretty Bundle. It translates quite nicely to All-Occasion cards as well. I thought we could all use some bright spring colors this winter. Enjoy!
Full list of supplies needed, listed below. A die cutting machine is needed for this card.
Card Base: Granny Apple Green Cardstock 8 1/2 h” x 5 1/2″ 4 1/4″ h folded to h x 5 1/2″ h.
Background: Forever Greenery DSP 3-7/8″ h x 5 1/4″ w
Decorative Frame: Soft Seafoam Cardstock trimmed with the two largest Stitched Rectangles Dies
Decorative Curves: Whisper White Cardstock trimmed with the Quite Curvy Dies
Sentiment Layer: Rococo Rose Cardstock – Stamp first (see below) then trim with the Stitched Shapes Dies
Inside Layer: Whisper White Cardstock 4″ h x 5 1/4″ w
- Affix all stamps to Acrylic Blocks.
- Fold the Card Base in half using a Bone Folder to sharpen the crease.
- Attach the Decorative Curves to the Background Layer using Stampin’ Seal and Fine-Tip Glue.
- Attach the Decorative Frame with Stampin’ Seal.
- Die cut Sprigs out out Shaded Spruce and Soft Seafoam Cardstock.
- Stamp the Floral Image on Whisper White Cardstock and color with Rococo Rose and Soft Seafoam Stampin’ Blends markers. Then die cut the image.
- Use Mini Glue Dots to attach the sprigs to the Floral Image. Set aside.
- Stamp the Sentiment on Rococo Rose Cardstock with Versamark ink and heat emboss with white embossing powder. Die cute with the Stitched Shapes Circle Die.
- Attach the Sentiment and Floral Image using Stampin’ Dimensionals.
- Add Butterfly Gems
- Decorate the Inside Layer and attach.
- Decorate the envelope.
- Beautiful! Put it in the mail!
Shopping List
Recommended Stamper’s Toolkit ❤
Product List
Design by Stampin’ Up!


