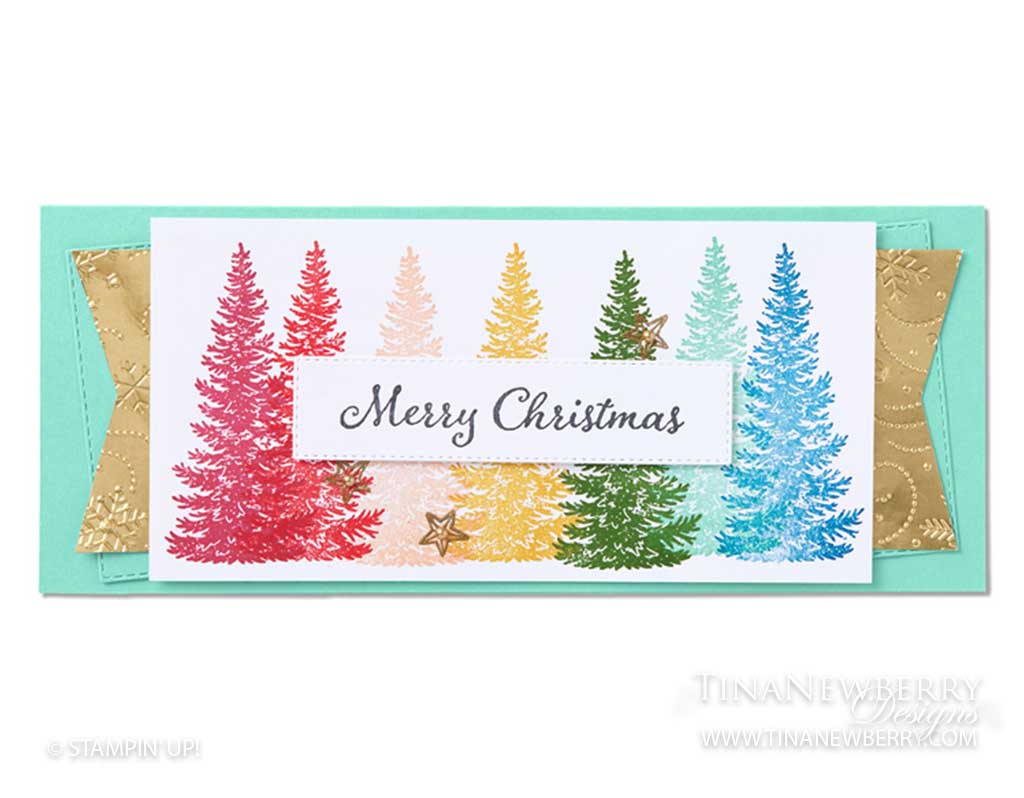
Such a pretty card in non-traditional colors! I love the caribbean vibe the colors provide for these traditional Christmas tree images. So fun! Make this one yourself in minutes.
Measurements
- Coastal Cabana Cardstock
- 7″ h x 8 1/2″ w scored and folder on the short side to 3 1/2″ h x 8 1/2″ w
- 3 1/2″ h x 3 1/2″ w scrap
- Gold Foil
- 2 1/2″ h x 8″ w
- Basic White Cardstock
- 3 1/4″ h x 6 1/2″ w
- 3 1/2″ w x 1″ h scrap
- 3 1/4″ h x 8 1/4″ w (inside layer)
Let’s Create
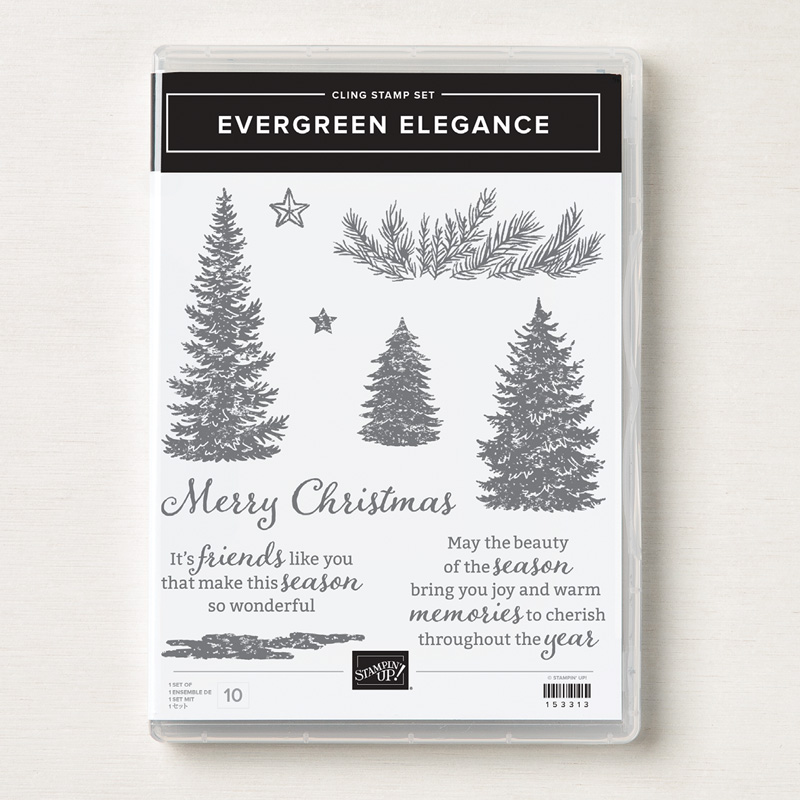
- Affix Tall Pine Tree and Merry Christmas Stamps to Acrylic Blocks.
- On the 3 1/4″ h x 6 1/2″ w Basic White Cardstock, stamp the Pine Trees. Start with the Bumble Bee tree in the center and work your way out to the edge stampin 7 Trees in all. Finished colors (from left to right) Melon Mambo, Poppy Parade, Petal Pink, Bumble Bee, Garden Green. Coastal Cabana, Pacific Point.
- Stamp three Stars in Versamark ink and heat emboss with Gold Embossing Powder.
- Stamp the Sentiment in Versamark ink on the 3 1/2″ w x 1″ h scrap and heat emboss with Gold Embossing Powder. Trim as desired.
- Run the 2 1/2″ h x 8″ w Gold Foil layer through the Stampin’ Emboss Machine with the Snowflake Embossing Folder, then use Paper Snips to banner tip the ends.
- Run the 3 1/2″ h x 3 1/2″ w Coastal Cabana scrap through the Stampin’ Cut & Emboss Machine with the 3″ h x 1″ w Stitched Rectangle Die. Repeat for a total of 2 Stitched Rectangles.
- Fold the Card Base and use a Bone Folder to sharpen the crease.
- Use Stampin’ Seal to attach the 2 Stitched Rectangles and the Gold Foil.
- Use Stampin’ Dimensionals to attach the Pine Tree layer and Sentiment.
- Sprinkle with Metallic Pearls.
- Stamp and decorate the 3 1/4″ h x 8 1/4″ w (inside layer).
- Decorate your envelope.
- Pretty! Now put it in the mail.
Shopping List


Stamper’s Toolkit
You will also need adhesive, acrylic blocks, scissors and other basic PaperCrafting items from the Stamper’s Toolkit

$8.00

$12.00

$4.00


$5.25

$7.00

$4.00

$7.00

$10.00

$8.00

$8.00

$10.00

$25.00

$7.00

$6.00

$10.00

$8.00

$5.00

$5.00

$6.00

$71.50

$8.00

$11.75
")
$30.00

$9.50


$120.00