Add a stenciled background to your tag on this festive card.
Measurements
Full list of supplies needed, listed below. A die cutting machine is needed for this card.
Real Red Cardstock: 5 1/2″ h x 8 1/2″ w scored and folded at 4 1/4″
Basic White Cardstock:
- 5 1/4″ h x 4″ w
- 5″ h x 3 3/4″ w scrap
- 1 1/2″ h x 2 1/4″ w
2022-2023 Brights Designer Series Paper: 3 1/4″ h x 1″ w
Black & White Designer Series Paper 3 1/4″ h x 1″ w
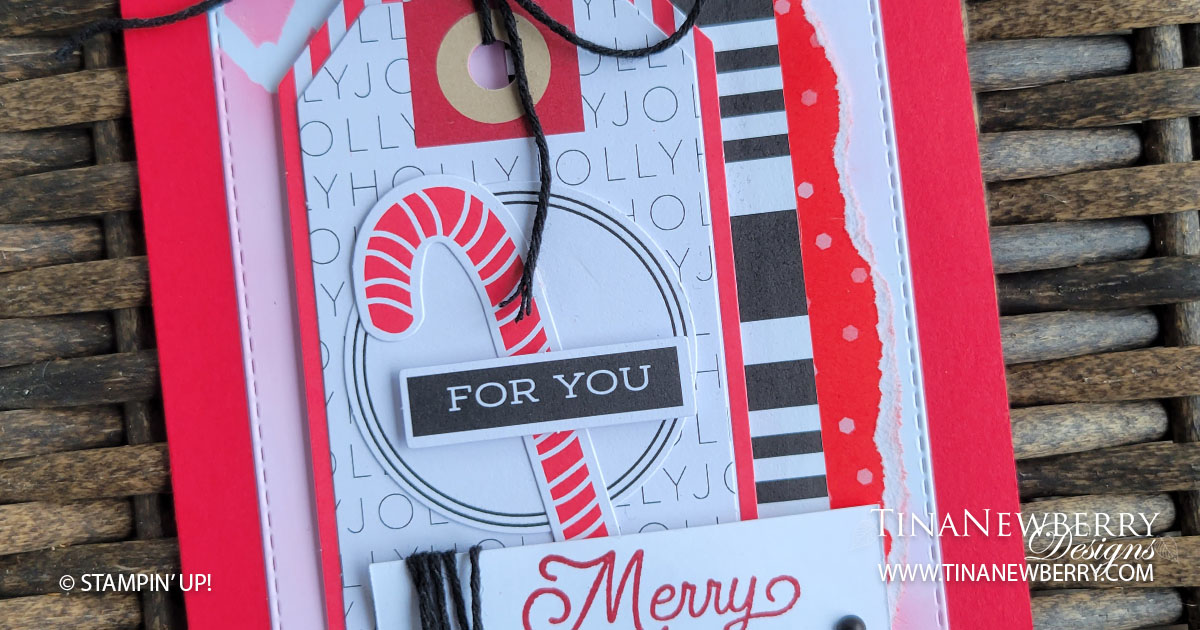
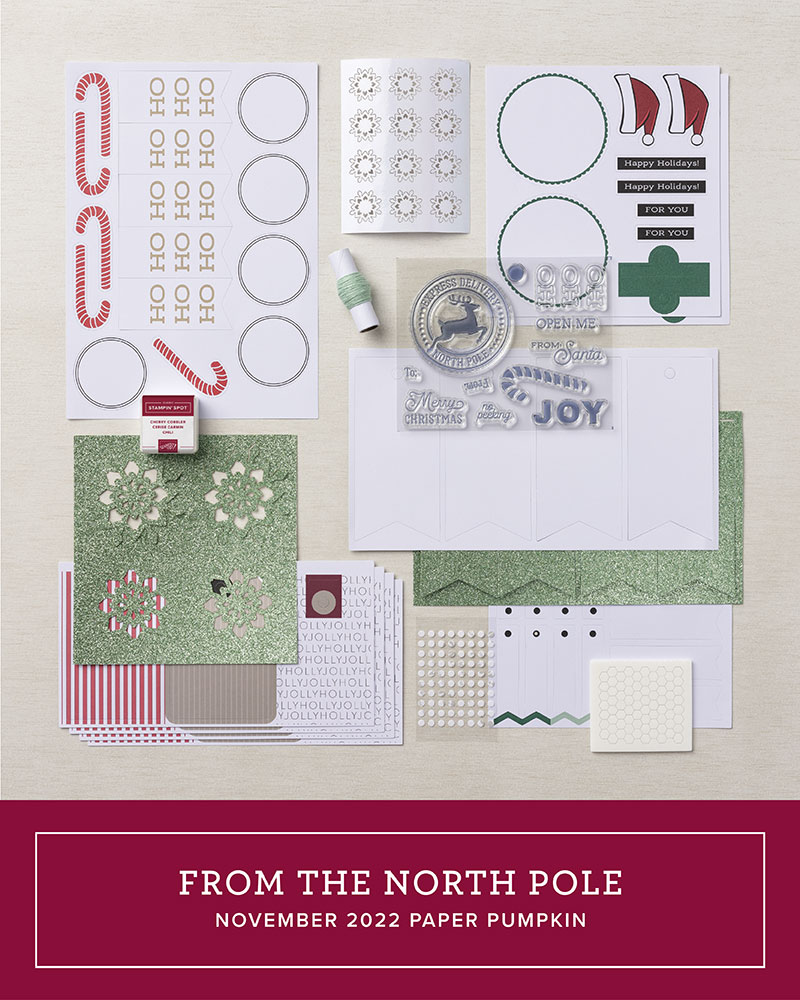
From The North Pole Kit: Candy Cane tag assembled according to instructions- except I left off the Open Me Tag and swapped Basic Black Baker’s Twine for the Mint Macaron Baker’s Twine
Let’s Create
- Affix all stamps to Acrylic Blocks.
- Fold the Card Base in half using a Bone Folder to sharpen the crease.
- Run the 5″ h x 3 3/4″ w Basic White scrap through the Stampin’ Cut & Emboss machine with the 4 3/4″h x 3 1/2″ w Stitched Rectangle die.
- Press an acrylic block onto the Real Red Stamp Pad to lift off some ink. Then using one of the sparkle snowflakes – white side up- for a stencil, apply Real Red ink with a Blending Brush to the die cut Basic White. Press down hard on the snowflake so it doesn’t move (ask me how I know!) to get a crisp stenciled image.
- Attach the stenciled die cut white panel to the card base with Stampin’ Seal.
- Carefully tear a little bit (like 1/4″) of the Real Red DSP from the right side toward you to achieve a white edge on the right side of the left over piece.
- Layer and attach the two pieces of DSP to the back of the assembled Candy Cane tag with Stampin’ Seal.
- Attach the tag with Stampin’ Dimensionals.
- Stamp the sentiment on the right side of the small Basic White panel in Real Red Ink. Wrap some Black Baker’s Twine around the left edge of the sentiment tag and secure in the back with a Mini Glue Dot. Attach the sentiment with a combination of Stampin’ Seal – where it overlaps the tag and Stampin’ Dimensionals where it overlaps the stenciled layer.
- Sprinkle on the Black Matte Dots.
- Stamp and decorate the 5 1/4″ h x 4″ w Basic White for the inside and attach with Stampin’ Seal.
- Decorate your envelope.
- How fun!! Who will you send it to?


 Designer Series Paper")
 Designer Series Paper")

$12.50


$7.00
Recommended Stamper’s Toolkit ❤
Product List
$12.00

$7.00

$4.25

$5.75

$5.50

$11.00

$26.00

$7.00

$6.50

$11.00

$20.00

$11.00

$80.75

$128.00


$16.00

$13.00


