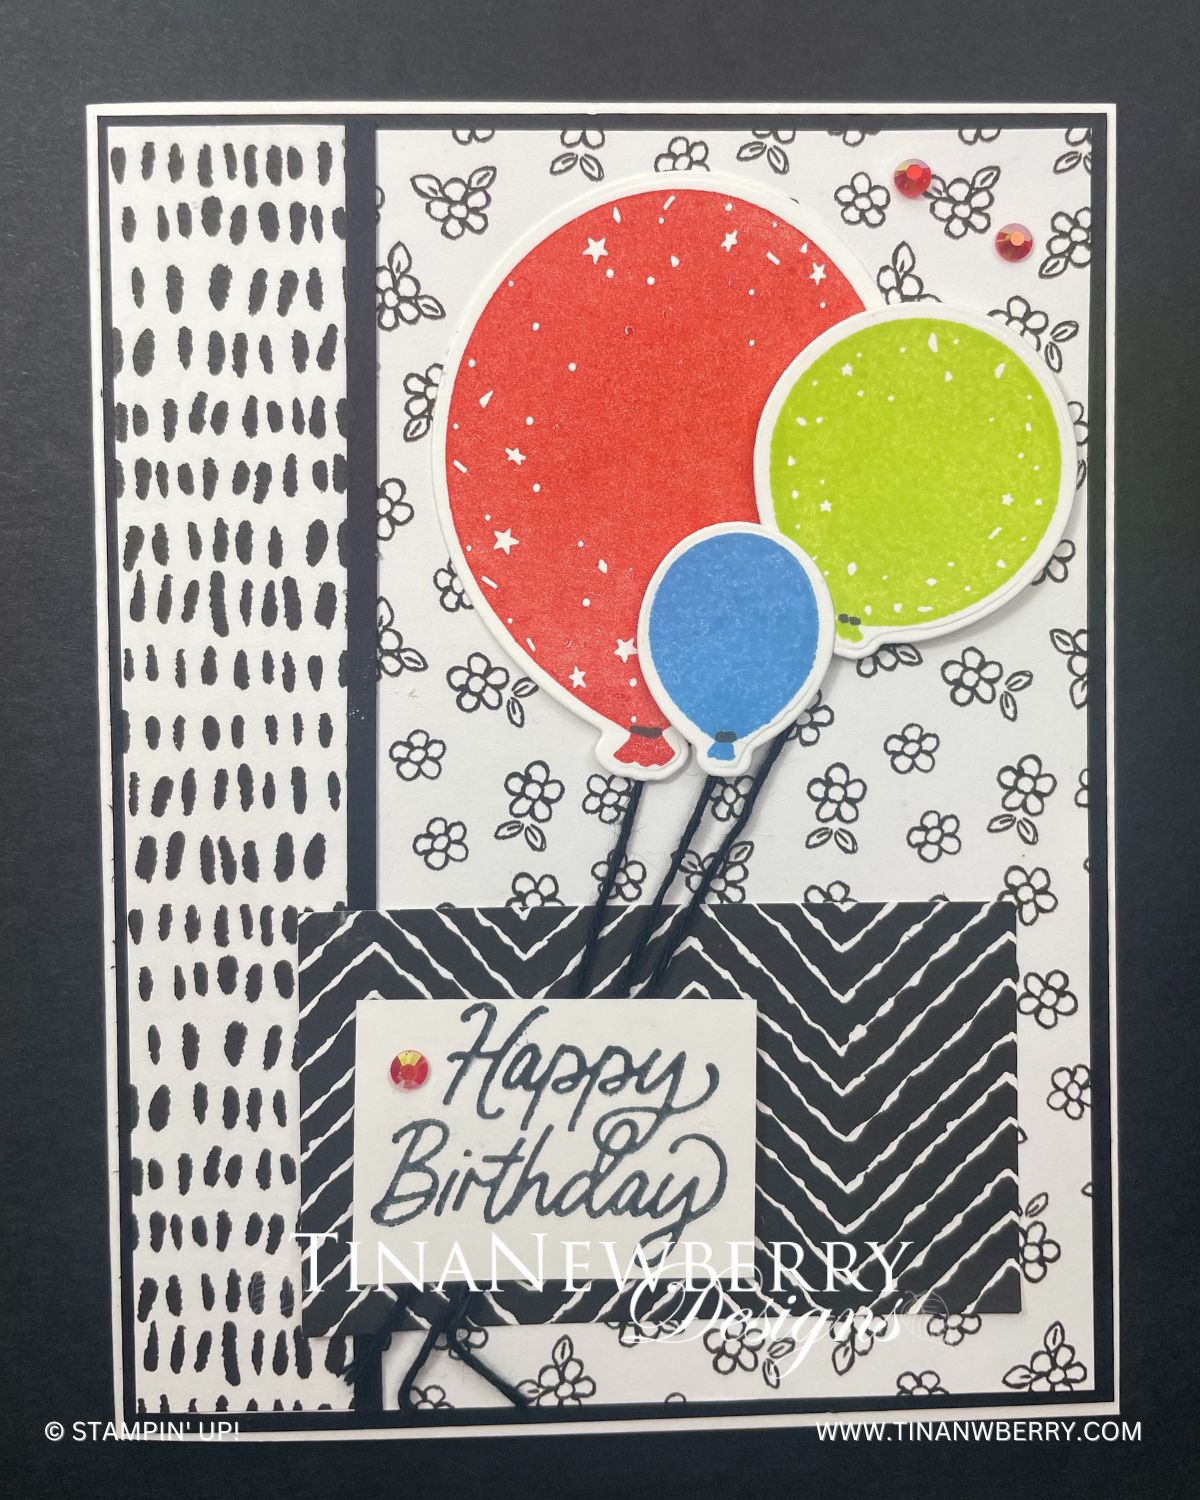
Balloons are so festive and fun! I enjoy them on paper so much more than in person. LOL! Change up the patterned paper and stamp die-cut balloons to match for your own custom card.

Measurements
Full list of supplies needed, listed below. A die cutting machine is needed for this card.
Basic White
- 5 ½” x 8 ½” (scored and folded at 4 ¼”)
- 1 ¾” x 1 ⅛”
- 5” x 2” (for stamping and die cutting balloons)
Basic Black
- 5 ⅜” x 4 ⅛”
- 5 ¼” x ⅛”
Zoo Crew Designer Series Paper
- 5 ¼” x 3” (black & white flowers)
- 5 ¼” x 1” (white with black lines)
- 3” x 1 ¾” (black with white zig zag)
Let’s Create
- Affix all stamps to Acrylic Blocks.
- Fold the card base along the score lines with a Bone Folder to sharpen the crease.
- Using Poppy Parade Ink Pad, stamp the largest balloon onto the 5” x 2” Basic White cardstock. Using the Parakeet Party Ink Pad, stamp the middle sized balloon onto the same piece of Basic White cardstock. Using the Azure Afternoon Ink Pad, stamp the smallest balloon onto the Basic White cardstock. Die cut each of these balloons using their coordinating dies from the Beautiful Balloon Die set.
- Using Black Memento ink, stamp the Happy Birthday sentiment onto the 1 ¾” x 1 ⅛” Basic White cardstock.
- Adhere the Designer Series Papers to the 5 ⅜” x 4 ⅛” Basic Black panel. The flowers print goes along the right edge and the 1” narrow piece goes along the left edge. Adhere the skinny Basic Black strip to cover the seam of these papers. Adhere the 3” x 1 ¾” piece of Designer Series Paper towards the lower part of the card. Adhere these panels to the Basic White card front.
- Cut 3 pieces of Black Twine approximately 4” each. Using a mini glue dot on the back lower part of each balloon, attach a piece of twine to each balloon. Bring these together and secure with a glue dot towards to center left of the small Designer Series Paper.
- Using Stampin’ Dimensionals, adhere the sentiment, covering the glue dot that holds the pieces of twine together.
- Place three Iridescent Pastel Gems randomly onto your card.
- Be sure to decorate the inside of your card and your envelope.
- Send this festive card off to wish someone a Happy Birthday!
Shopping List
")


 Designer Series Paper")


$8.00
Recommended Stamper’s Toolkit ❤
Product List
$12.00

$7.00

$4.25

$5.75

$5.50

$11.00

$26.00

$7.00

$6.50

$11.00

$20.00

$11.00

$80.75

$128.00

$16.00

$13.00


