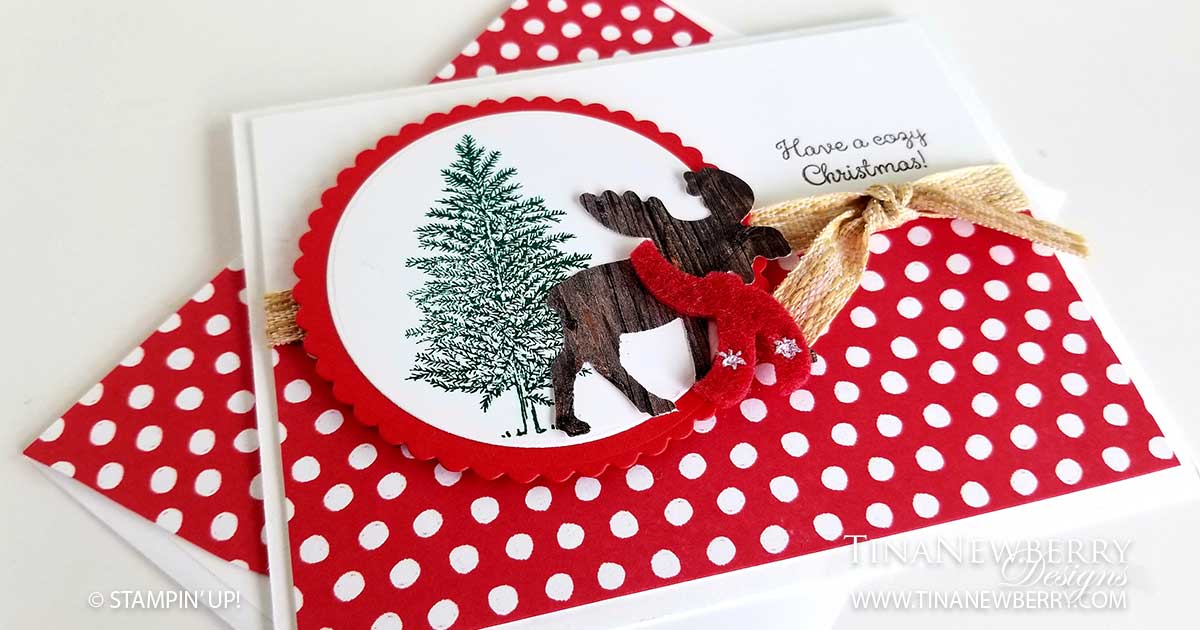
Isn’t this red polka dot paper adorable? At first I didn’t really like the Trimming the Town Designer Series Paper. It was too busy with all the houses and things, but when I paid a close look at the back side I realized there are some REALLY cute patterns – dots, stripes, snowflakes, curly-ques. All perfect for my simple Mr. Moose card using the Merry Moose Bundle.
Full list of supplies needed, listed below. A die cutting machine is needed for this card.
Card Base: Whisper White Thick Cardstock 8 1/2 h” x 5 1/2″ w folded to 5 1/2″ w x 4 1/4″ h.
Sentiment Layer: Whisper White Cardstock 4″ h x 5 1/4″ w
Background: Trimming the Town DSP 2 1/2″ h x 5 1/4″ w
Circle Matte: 3″ Layering Circle Die
Circle Layer: Whisper White Cardstock 2 5/8″ Layering Circle Die
Ribbon: 12″ 3/8″ Embroidered Ribbon
Moose: In Good Taste Designer Series Paper with the Moose Punch
- Affix all stamps to Acrylic Blocks.
- Fold the Card Base in half using a Bone Folder to sharpen the crease.
- Stamp the Tree on the Circle in Shaded Spruce Ink.
- Attach the Circle to the Circle Matte with Stampin’ Seal. Add the Moose. (My Moose is wearing a felt scarf left over from the 2019 Snowman Season Suite.)
- Stack the Background on the Sentiment Layer and approximate where the ribbon will be. Then stamp the Sentiment in Soft Suede ink.
- Attach the Background to the Sentiment Layer using Stampin’ Seal.
- Wrap Ribbon around and tie a bow. Use a glue dot if needed to hold Ribbon in place.
- Decorate the Inside.
- Decorate the envelope.
- So cute! Now send it to someone special.
Shopping List
Recommended Stamper’s Toolkit ❤
Product List
Design inspired by Jean Addis.


