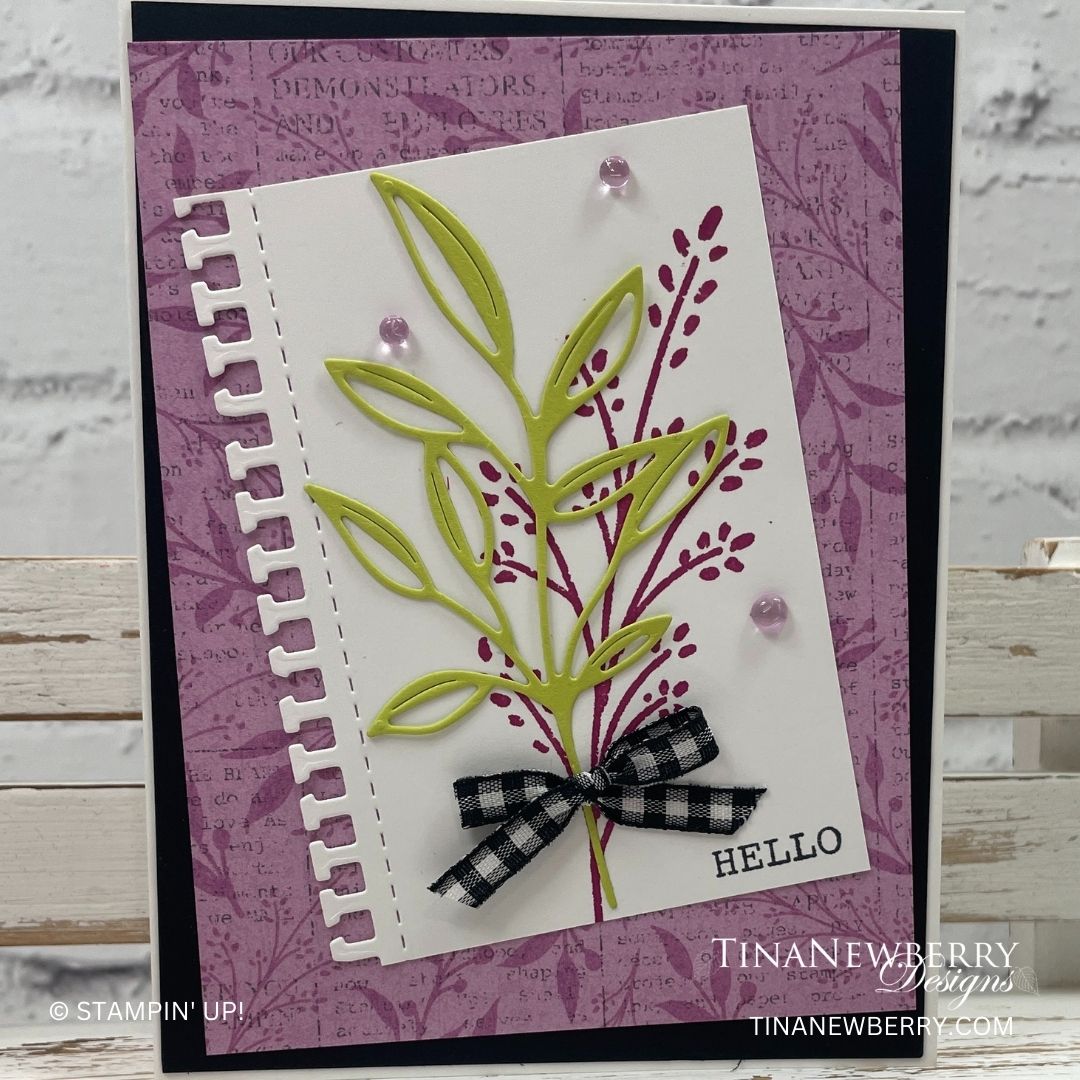
The notebook paper-edge die in this bundle is so fun! Make this layout with the Gorgeously Made bundle or products from your stash. What pretty paper will you show off?
Measurements
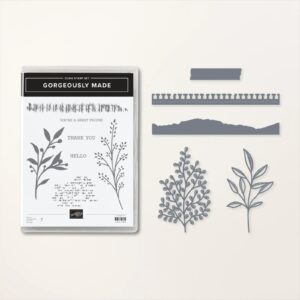
Full list of supplies needed, listed below. A die cutting machine is needed for this card.
Basic White
- 5 ½” x 8 ½” scored and folded on the long-side at 4 ¼”
- 4” x 3”
Basic Black
- 4 ⅛” x 5 ⅜”
Lemon Lime Twist
- 4 ½” x 3” (for die cutting stem of leaves)
Masterfully Made Designer Series Paper
- 5 ⅛” x 3 ⅞” (Fresh Freesia leaf print)
Let’s Create
- Affix all stamps to Acrylic Blocks.
- Fold the Card Base in half using a Bone Folder to sharpen the crease.
- Using the 4 ½” x 3” Lemon Lime Twist cardstock, and the sprig of leaves die from the Gorgeously Made die set, cut 1 sprig.
- using the 4” x 3” Basic White cardstock and the long “paper” border die from the Gorgeously Made die set, die cut the left edge.
- Using Fresh Freesia ink pad and the sprig stamp from the Gorgeously Made Stamp Set, stamp on the die cut Basic White cardstock.
- Using Black memento ink, stamp the “hello” in the lower left corner of the die cut basic white cardstock.
- Attaching the card layers: Attach the 5 ⅜” x 4 ⅛” Basic Black cardstock to the folded Card base. Attach the Fresh Freesia Designer Series Paper at a bit of an angle to the Basic Black layer. Attach the stamped, die cut Basic White piece to the Designer Series Paper at more of an angle.
- Tie a small bow using the black and white gingham ribbon and attach it to the card using a Mini Glue Dot.
- Finish your card by randomly placing 3 gems from the Tinsel Gems 3 – pack to the card.
- Be sure to decorate the inside of your card and the envelope.
- Send your card off to wish someone a cheery hello!
Shopping List
")


 Designer Series Paper")


 Gingham Ribbon")

$7.50
Recommended Stamper’s Toolkit ❤
Product List
$12.00

$7.00

$4.25

$5.75

$5.50

$11.00

$26.00

$7.00

$6.50

$11.00

$20.00

$11.00

$80.75

$128.00

$16.00

$13.00


