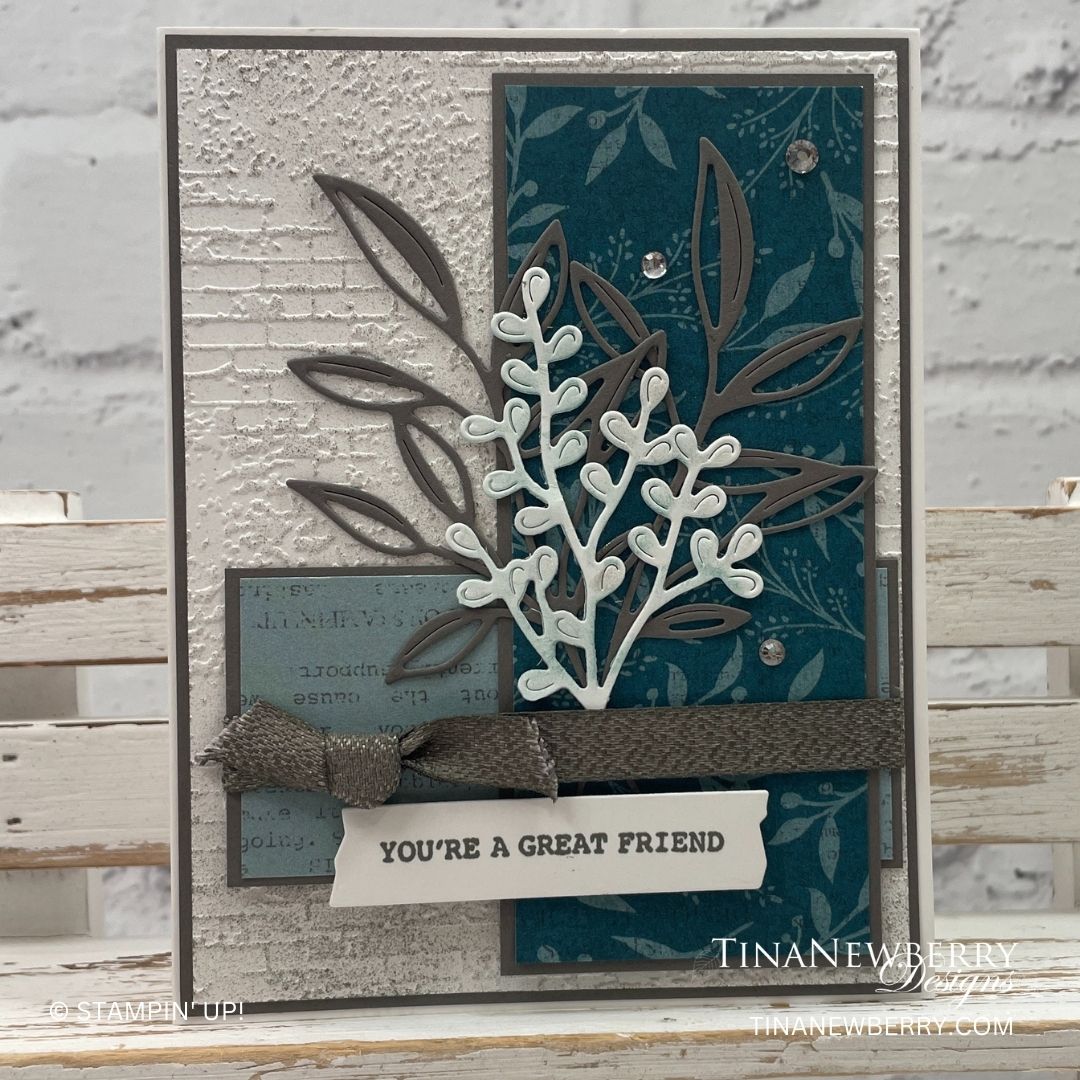
Such a beautiful color combination on this card for a friend. Make this card or CASE (copy and share everything) the layout with supplies from your stash.
Measurements
Full list of supplies needed, listed below. A die cutting machine is needed for this card.
Basic White
- 5 ½” x 8 ½” scored and folded on the long-side at 4 ¼”
- 5 ¼” x 4”
- 4” x 3” (for die cutting sprig)
- 2 3/4” x ¾” (for stamping and die cutting sentiment)
Pebbled Path
- 4 ⅛” x 5 ⅜”
- 5” x 2 ⅛”
- 3 ¾” x 1 ¾”
- 4” x 4” (for die cutting 2 sets of leaves)
Masterfully Made Designer Series Paper
- 4 ⅞” x 2 (Lost Lagoon Leaf print)
- 3 ⅝” x 1 ⅝” (Piece taken from the center of the print with bold flowers)
Let’s Create
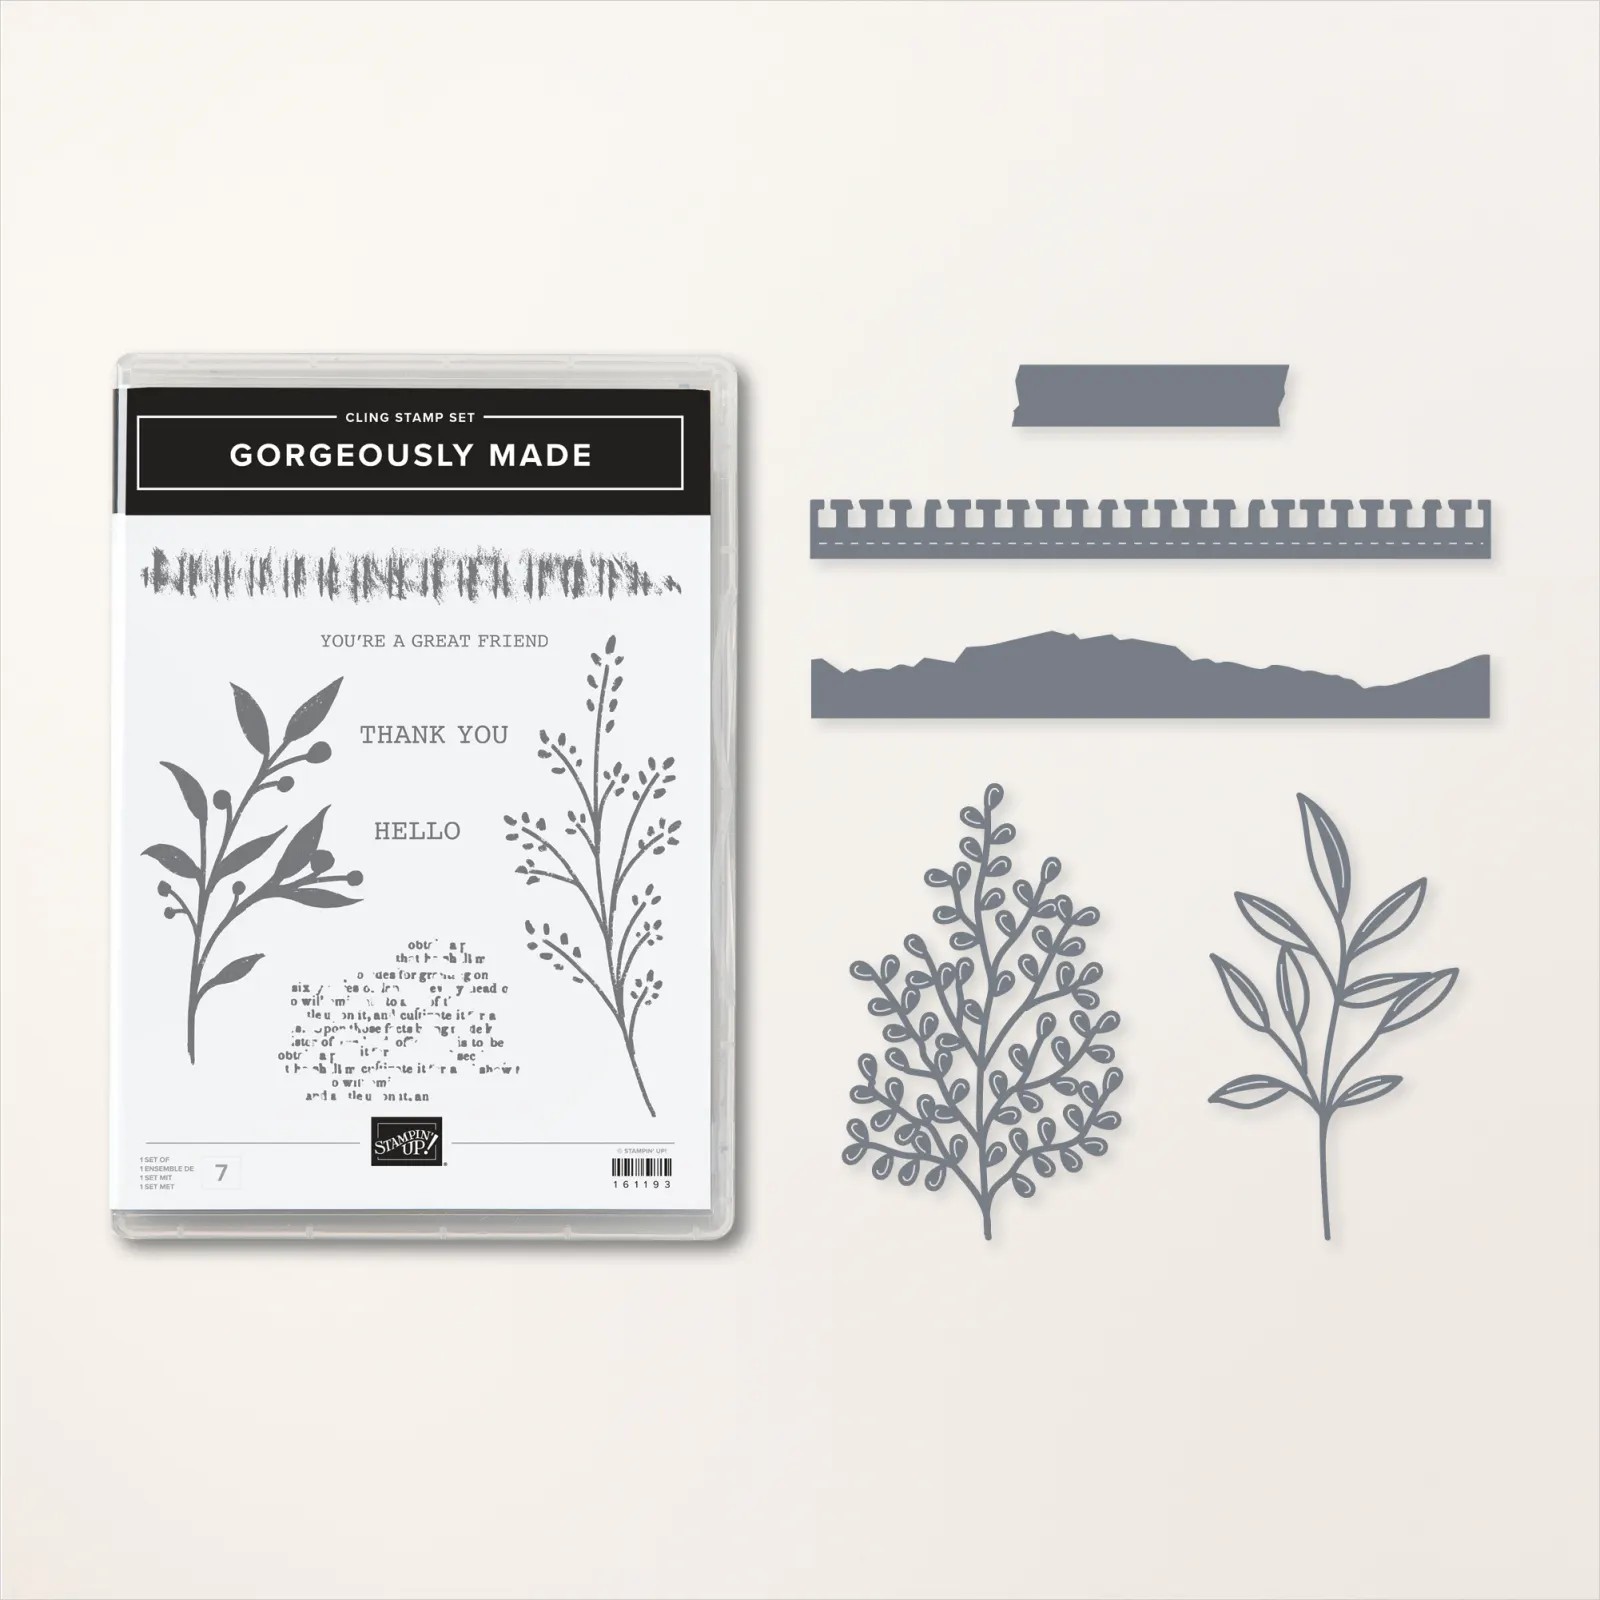
- Affix all stamps to Acrylic Blocks.
- Fold the Card Base in half using a Bone Folder to sharpen the crease.
- Using the Exposed Brick 3D Embossing Folder, emboss the 5 ¼” x 4” Basic White Cardstock.
- Using a blending brush with the Pebbled Path Ink Pad, lightly brush ink on the rougher side of the cardstock.
- Using the smaller leaf sprig die from the Gorgeously Made die set, die cut 2 of the Leaf sprigs from the 4” x 4” Pebbled Path cardstock.
- Using the larger sprig from the Gorgeously Made die set, die cut 1 from the 4” x 3” Basic White cardstock. Using a blending brush lightly brush Lost Lagoon ink onto the sprig.
- Using Pebbled Path ink pad, stamp the sentiment onto Basic White 2 ¾” x ¾” scrap. Die cut this piece using the label from the Gorgeously Made die set.
- Assembling your card: Attach the 5 ⅜” x 4 ⅛” Pebbled Path cardstock to the folded card base. Attach the embossed 5 ¼” x 4” embossed Basic White to the card layers.
- Attach the Designer Series Papers to their coordinating Pebbled Path layers.
- Tie a piece of textured Pebbled Path Ribbon around the layered piece of Designer Series Paper that measures 3 ⅝” x 1 ⅝” into a knot towards the left side.
- Position these layers to the Basic White embossed panel about ¾” from the lower left edge.
- Place adhesive on the back of the other Designer Series layered pane and slip it under the ribbon and adhere to the card.
- I did a little trimming on the die cut sprigs so they weren’t quite so full and bulky and adhered them to the card.
- Adhere the sentiment using Stampin’ Dimensionals.
- Finish your card by randomly placing 3 Rhinestones Basic Jewels onto your card.
- Be sure to decorate the inside of the card and the envelope.
- Send it off to a special friend.
Shopping List
")


 Designer Series Paper")


 Textured Ribbon")

$6.00
Recommended Stamper’s Toolkit ❤
Product List
$12.00

$7.00

$4.25

$5.75

$5.50

$11.00

$26.00

$7.00

$6.50

$11.00

$20.00

$11.00

$80.75

$128.00


$16.00

$13.00


