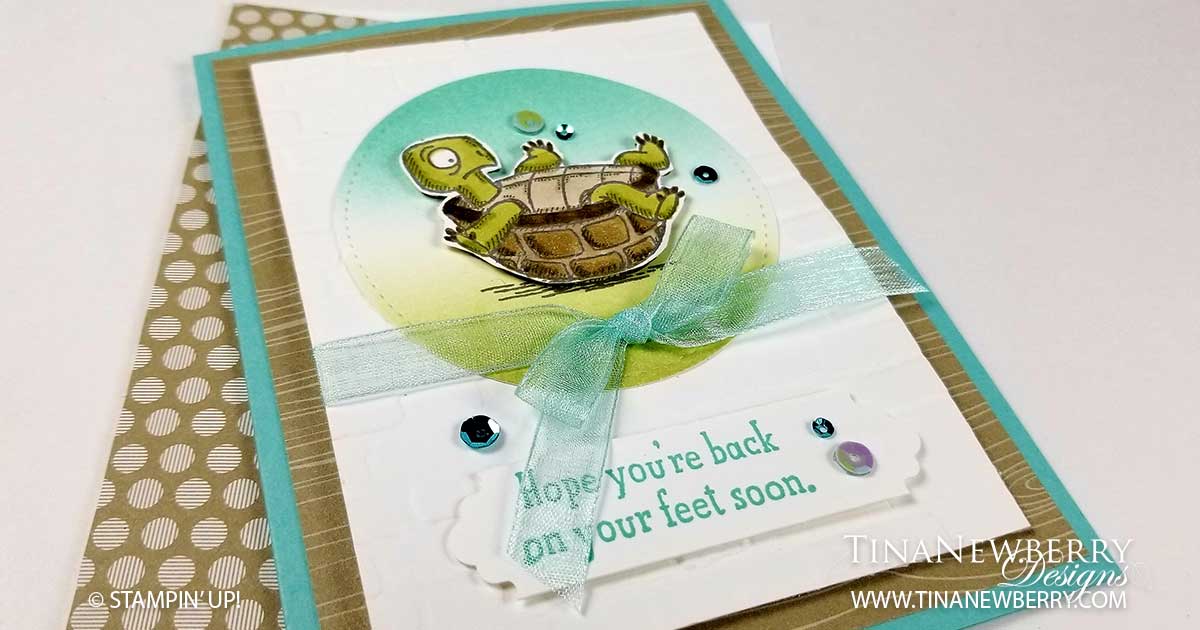
This little turtle and matching sentiment make me chuckle! Such a clever little pick-me-up card. We all need a little humor in our lives. I used Stampin’ Blend alcohol markers to color this little cutie and the new Blending Brushes to color the Stitched Circle he’s sitting on. Both bring super easy color to this simple card.
Measurements
Full list of supplies needed, listed below. A die cutting machine is needed for this card.
Card Base: Coastal Cabana Cardstock 5 1/2″ h x 8 1/2″ w folded to 5 1/2″ h x 4 1/4″ w.
Patterned Background: Neutrals DSP 5 1/4″ h x 4″ w
Embossed Background: Basic White Cardstock 4 3/4″ h x 3 1/2″ w with the Brick & Mortar Embossing Folder
Circle Layer: Basic White Cardstock trimmed with 3″ Stitched Circle Die (color first)
Sentiment Layer: Basic White Cardstock 3/4″ h trimmed with the Lovely Labels Pick a Punch (stamp first)
Inside Layer: Basic White Cardstock 5 1/4″ h x 4″ w
Let’s Create
- Affix all stamps to Acrylic Blocks.
- Fold the Card Base in half using a Bone Folder to sharpen the crease.
- Attach the Patterned Background with Stampin’ Seal.
- Run the Embossed Background through the Stampin’ Cut & Emboss Machine with the Brick & Mortar Embossing Folder.
- Using the Blending Brushes and ink pads, apply Costal Cabana and Granny Apple Green to a scrap of Basic White Cardstock and then die cut using the 3″ Stitched Circle Die. Stamp the Turtle in Soft Suede Ink. Attach Circle to Embossed Layer with Stampin’ Seal+ or Multipurpose Liquid Glue.
- Stamp the Turtle on scrap Basic White Thick Cardstock in Soft Suede Ink and color with Stampin’ Blends. Then use Paper Snips to cut out. Attach to the Stitched Circle with Stampin’ Dimensionals.
- Stamp the Sentiment in Coastal Cabana Ink on the Sentiment Layer and trim the ends with the Lovely Labels Pick a Punch. Attach with Stampin’ Dimensionals to the Embossed Layer.
- Wrap ribbon around the Embossed Layer and tie a bow. Secure with a Mini Glue Dot, if needed.
- Use Mini Glue Dots to add sequins.
- Decorate the Inside Layer and attach.
- Decorate the envelope.
- So cute!! Who needs a pick-me-up? Send them this card.
Shopping List


 Designer Series Paper")


 Sheer Ribbon")


Stamper’s Toolkit
You will also need adhesive, acrylic blocks, scissors and other basic PaperCrafting items from the Stamper’s Toolkit


")


Design inspired by Alisa Tilsner.