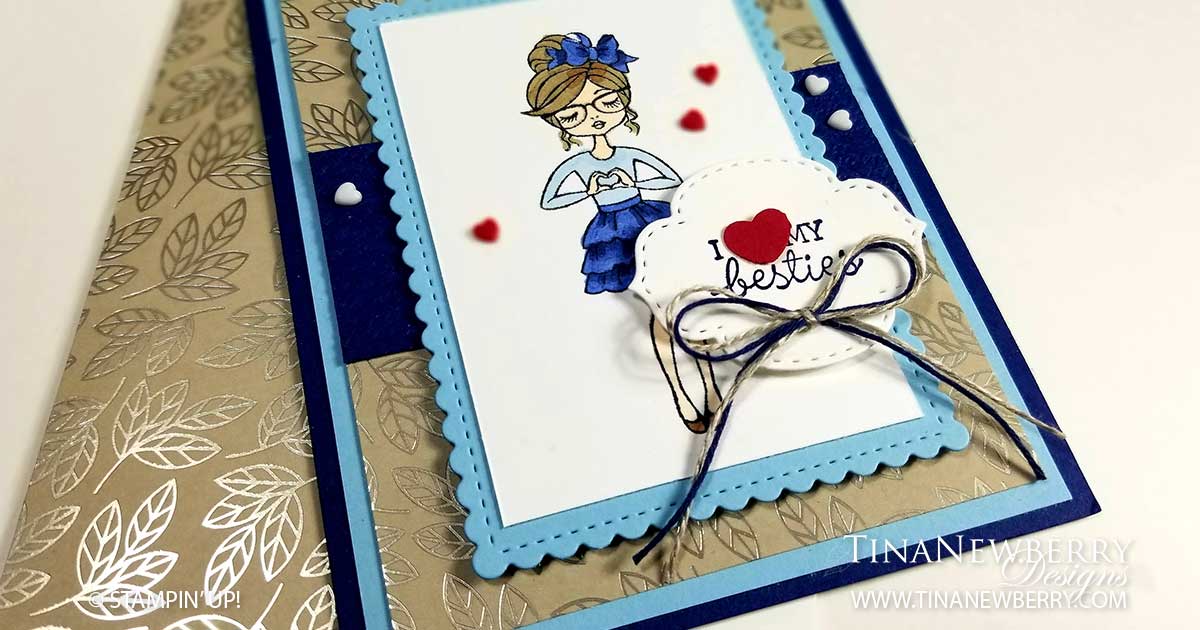
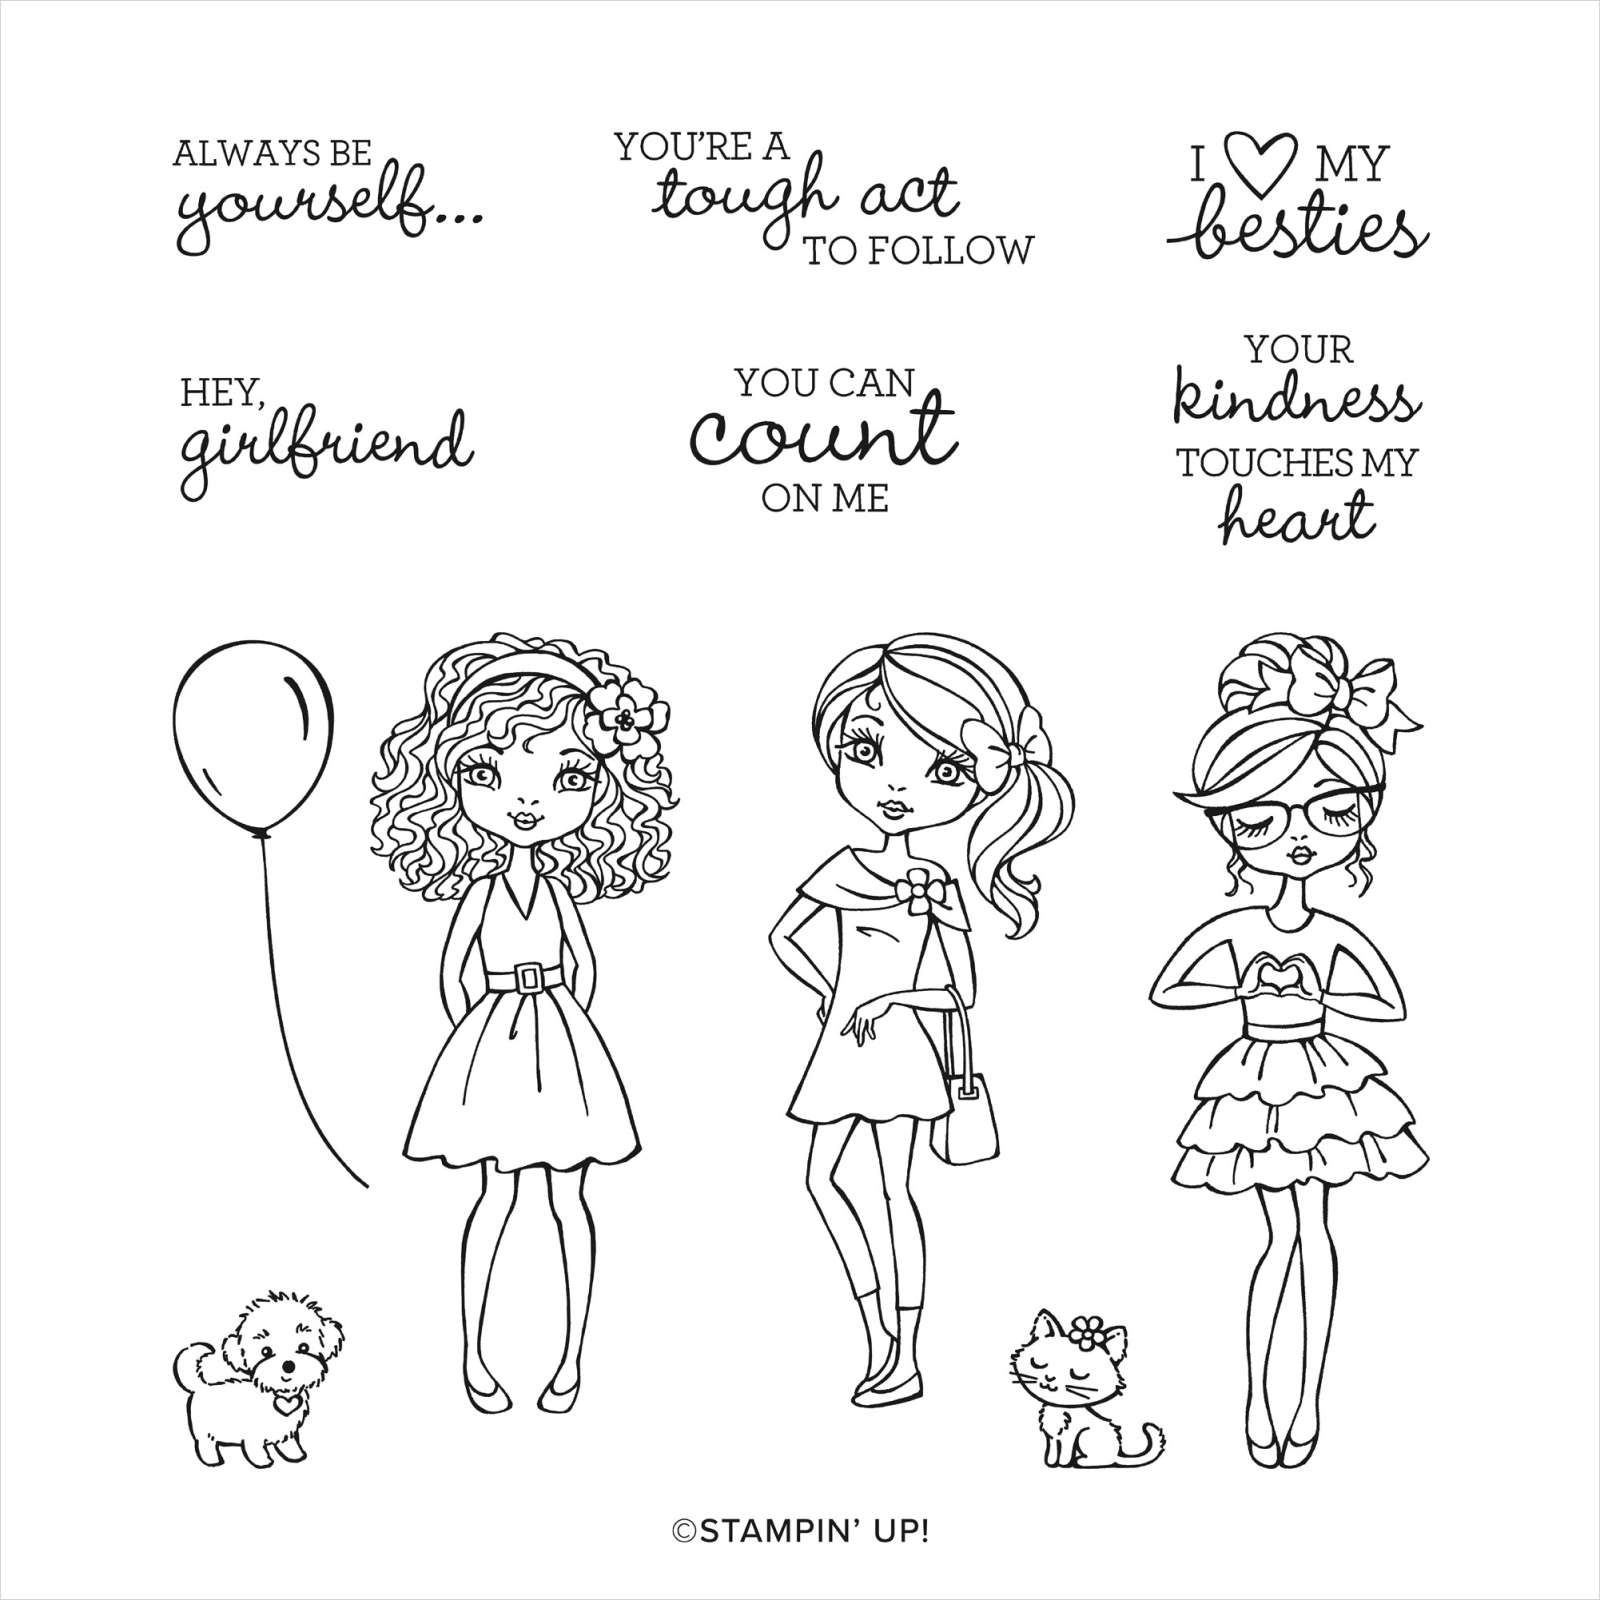
The details on this sweet girl are A-dorbs! Look at her little hand heart and long lashes, not to mention the curls and ruffled skirt! Of course she ‘hearts’ her besties. So cute! All she needed was a few accent layers to set the stage for her sweet message. I gave her some bling with a piece of the shimmery Love You Always Designer Series Paper, but otherwise this is all cardstock and cuteness!

Tip
Use Basic White Thick Cardstock anytime you are coloring with Stampin’ Blends. The colors come out much better.
Full list of supplies needed, listed below. A die cutting machine is needed for this card.
Card Base: Night of Navy Cardstock 5 1/2″ h x 8 1/2″ w folded to 5 1/2″ h x 4 1/4″ w
Background Matte: Balmy Blue Cardstock 5 1/4″h x 4″ w
Background: Love You Always Specialty Designer Series Paper 5″ h x 3 3/4″ w
Embossed Layer: Night of Navy Cardstock 1 1/2″ h x 3 3/4″ w
Image Matte: Balmy Blue Cardstock cut with the 4″ h x 3″ w Stitched so Sweetly Die
Image Layer: Basic White Thick Cardstock 3 5/8″ h x 2 1/2″ w
Sentiment Layer: Basic White Cardstock Scrap
- Affix all stamps to Acrylic Blocks.
- Fold the Card Base in half using a Bone Folder to sharpen the crease.
- Attach the Background Matte and Background.
- Run the Embossed Layer through the Stampin’ Cut & Emboss machine with the Tasteful Textures Embossing Folder and attach with Tear & Tape or Stampin’ Seal +.
- Stamp the Girl on Basic White Thick Cardstock with Tuxedo Black Memento Ink. Color with Stampin’ Blends. I used Soft Suede for her hair, Ivory and Petal Pink for her skin, Balmy Blue Light for her shirt, Night of Navy for her skirt and bow, and Bronze for her shoes.
- Attach the Girl to the Image Matte layer and attach to card with Stampin’ Dimensionals.
- Stamp the Sentiment on scrap Basic White Cardstock and die cut with the Stitched So Sweetly die.
- Punch a Heart from the Dog Punch on as scrap of Real Red Cardstock and attach to the Sentiment with a Mini Glue Dot. Attach to the Image Layer with a Stampin’ Dimensional.
- Tie a double bow with the Navy Twine and Linen Thread. Attach with a Mini Glue Dot.
- Decorate the Inside Layer and attach.
- Decorate the envelope.
- A-dorbs!! Now send it to someone special.
Shopping List


Stamper’s Toolkit
You will also need adhesive, acrylic blocks, scissors and other basic PaperCrafting items from the Stamper’s Toolkit


")


