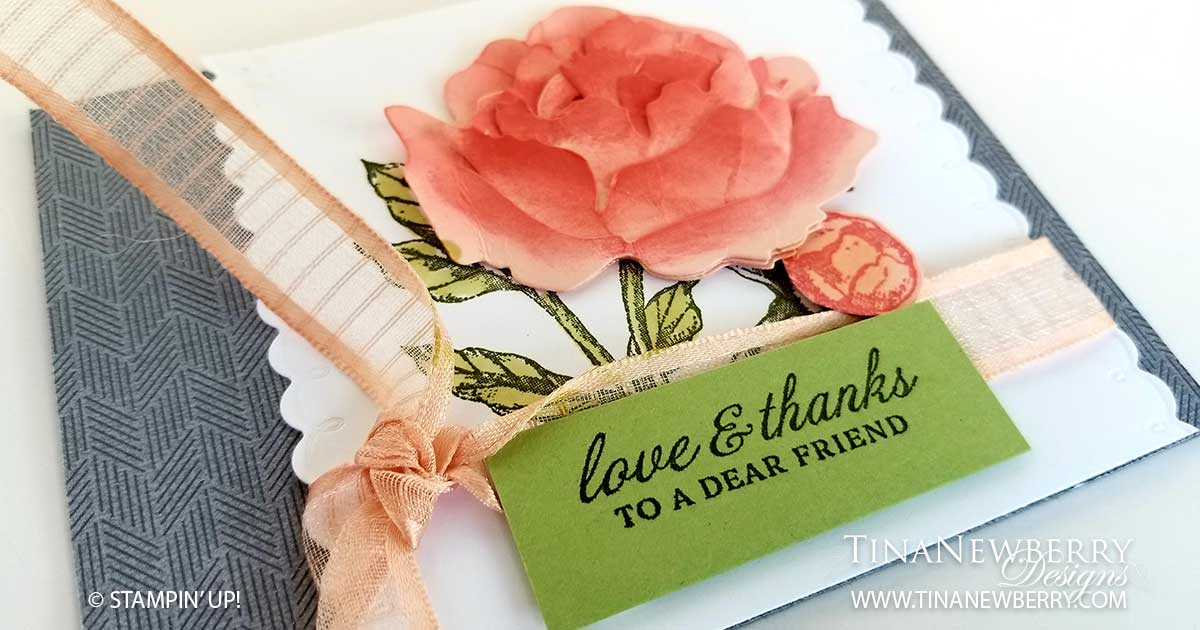
Could this color combination get any prettier? The soft pinks combined with elegant peonies and are just gorgeous add a touch of green and I never thought I’d say it, pretty gray?! Really? But yes. Here it is.
Measurements
Full list of supplies needed, listed below. A die cutting machine is needed for this card.
Card Base: Basic Gray 8 1/2 h” x 5 1/2″ w folded to 5 1/2″ w x 4 1/4″ h
Background: Peony Garden DSP 5 1/2″ w x 4 1/4″ h
Stamped Layer: Whisper White Cardstock 5 1/2″h x 4 1/2″ w die cut down to 4 1/4″ w
Sentiment Layer: Pear Pizzaz Cardstock 1″ h x 2 1/2″ w
Let’s Create
- Affix all stamps to Acrylic Blocks.
- Fold the Card Base in half using a Bone Folder to sharpen the crease.
- Stamp the Flower and Leaves in Old Olive Ink on the Stamped Layer.
- Color in the Leaves and Stem with Old Olive Stampin’ Blends
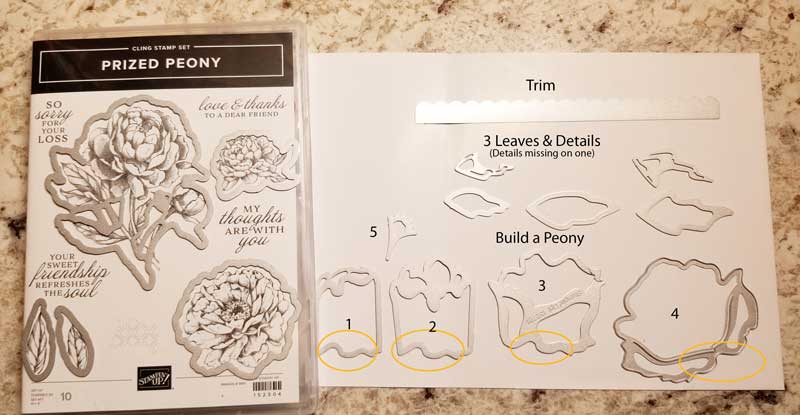
- Die cut the Peony pieces with Petal Pink Cardstock (see diagram of dies), use sponge dobbers to apply color to edges in Flirty Flamingo ink, assemble (see Build a Peony details below) and adhere using Stampin’ Dimensionals.
- Stamp the Peony Blossom in Flirty Flamingo ink on Petal Pink Cardstock. Color in with Petal Pink Stampin’ Blends. Cut out and adhere with a Stampin’ Dimensional.
- Tie a piece of Petal Pink Ribbon around Stamped Layer and attach using Stampin’ Dimensionals.
- Stamp Sentiment in Old Olive ink on Sentiment Layer and attach using Stampin’ Dimensionals.
- Done! Now send it to someone special.

Build a Peony
- Die cut shapes 1-4 for your flower.
- Die cut 5 for the flower pistil.
- Die cut the 3 leaves and details.
- Each of the flower dies has a slit in it and bumps (see yellowed circled sections) at the bottom. You insert a smaller layer into a larger layer, lining up the bumps and build from smallest to largest.
- Insert #5 into the slit in #1.
- Insert #1 into the slit in #2, line up the bumps and adhere together.
- Insert #2 into the slit in #3, line up the bumps and adhere together.
- Insert #3 into #4, line up the bumps and adhere. Please note the smallest section of #4 is the front and the larger is the back.
Shopping List
Recommended Stamper’s Toolkit ❤
Product List
Design inspired by the 2020-2021 Stampin’ Up! Annual Catalog.


