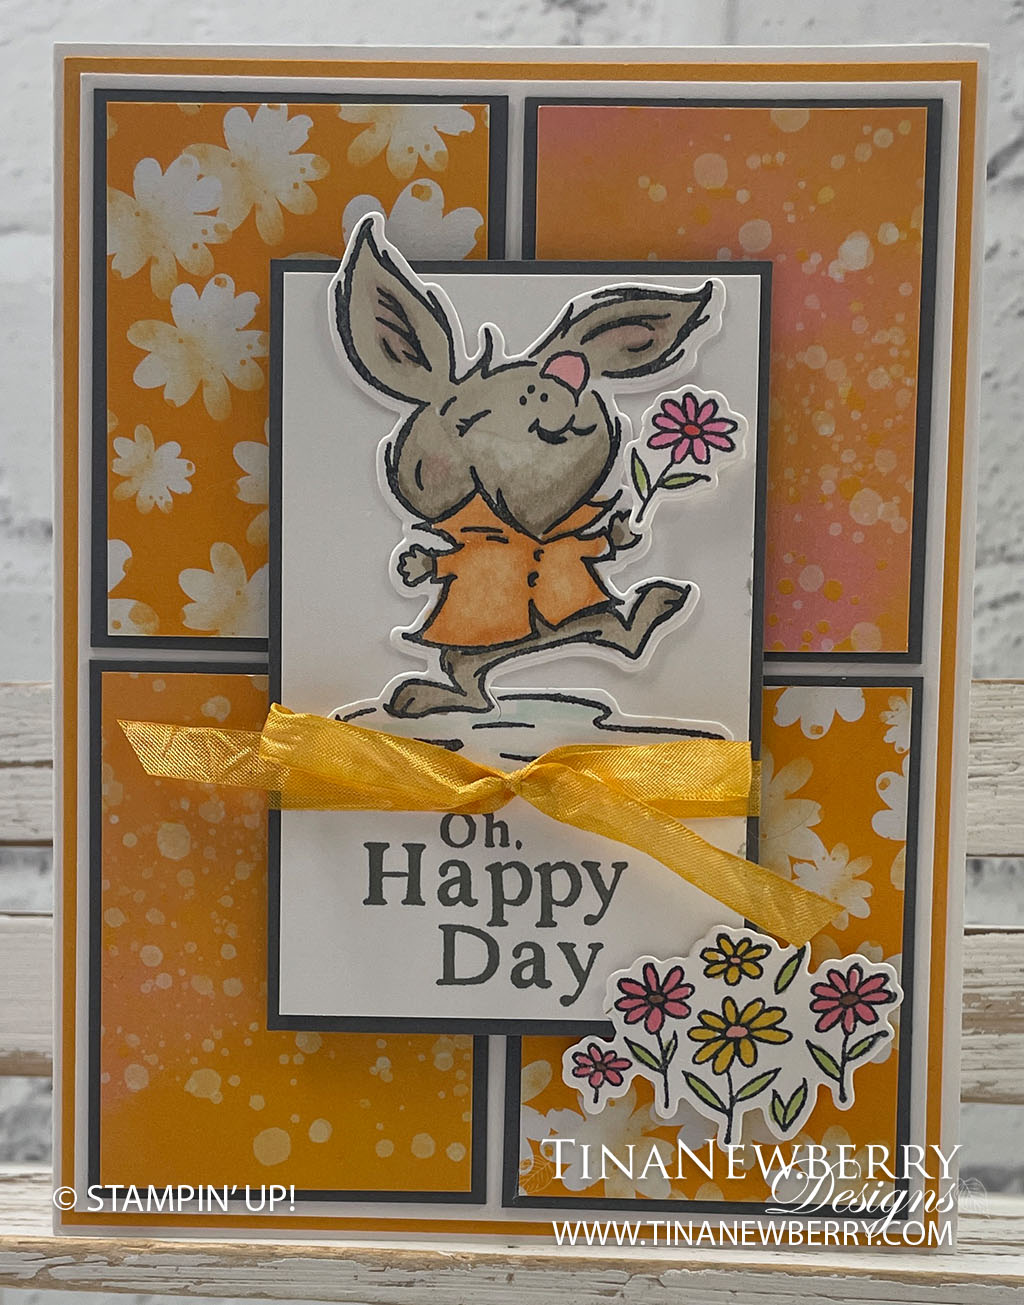
Such a cute and fun card! Perfect for sending cheer and joy to someone who needs a pick-me-up!
Measurements
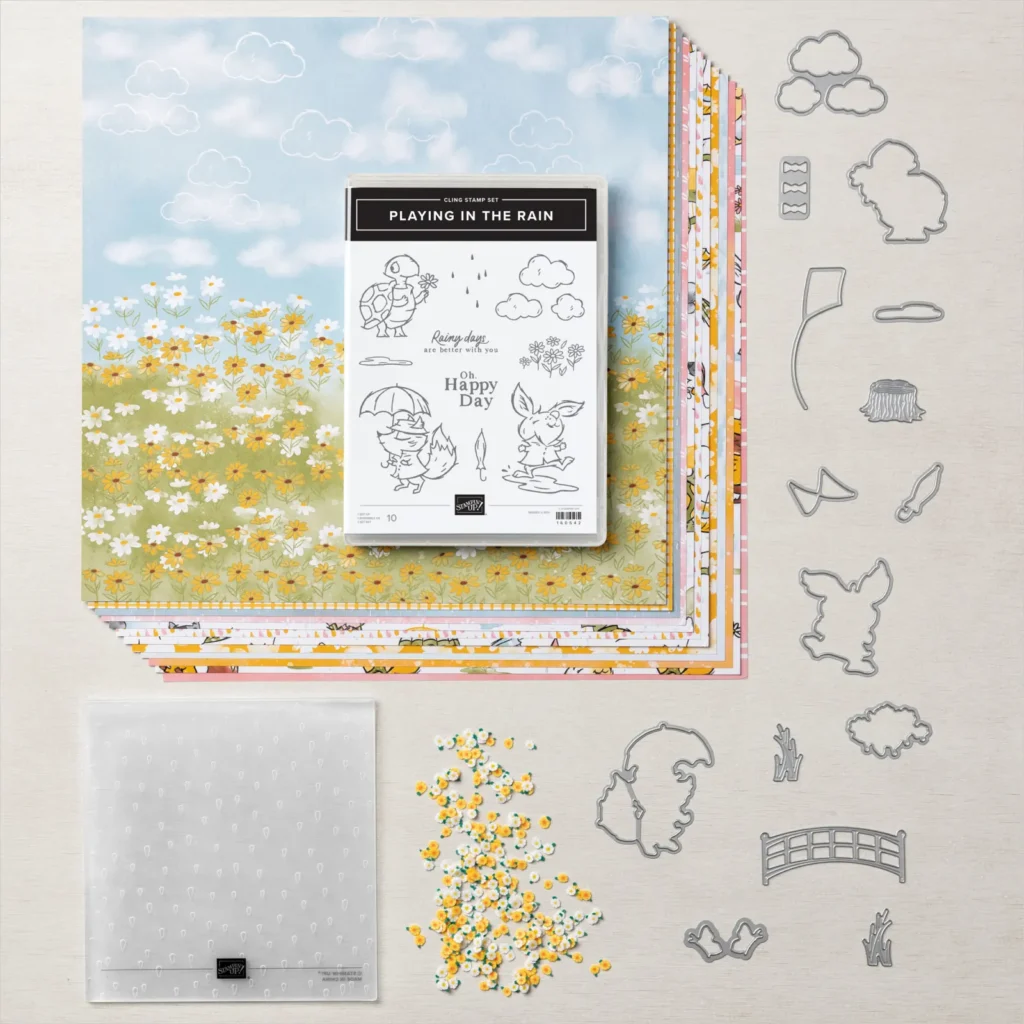
Full list of supplies needed, listed below. A die cutting machine is needed for this card.
Basic White
- 5 ½” x 8 ½” scored and folded on the long-side at 4 ¼”
- 5 ¼” x 4”
- 3 ⅜” x 2 ⅛”
- 5” x 2 ¼” (for stamping and die cutting rabbit and grouping of flowers)
Mango Melody: 5 3/8 x 4 1/8
Basic Gray
- 3 ½” x 2 ¼”
2 ½” x 1 ¾”2 35/64 x 1 29/32 OR 2 ½ h x 1 7/8 w cut 4
Rain Or Shine Designer Series Paper (DSP)
2 ⅜” x 1 ⅝”2 27/64 h x 1 51/64 OR 2 3/8 h x 1 ¾ w– cut 2 this size of Mango Melody Floral Print and 2 of this size Mango Melody Bubbly print.
Let’s Create
- Affix all stamps to Acrylic Blocks.
- Fold the Card Base in half using a Bone Folder to sharpen the crease
- Using Memento Black ink pad. Stamp 1 rabbit and 2 sets of the grouping of flowers. Color these images using Stampin’ Blends and die cut using coordinating dies.
- Using Basic Gray ink, Stamp the sentiment at the bottom of the 3 ⅜” x 2 ⅛” Basic White Cardstock. (Be sure not to stamp it too high. Stamp the rabbit above the sentiment, leaving just a small space. The rabbit will go off the top edge of your cardstock… it’s okay, you’re stamping here for the puddle. Give the puddle a little color by shading a bit with a light pool party Stampin’ Blend.
- Adhere the colored and die cut rabbit onto this piece of cardstock covering the uncolored stamped image.
- Adhere this Basic White Panel to the coordinating Basic Gray layer.
- Cut a 12” length of White Crinkle Seam Binding Ribbon. Using the brush end of a Daffodil Delight Dark Stampin’ Blend, color the length of ribbon. Color again using a Pumpkin Pie light Stampin’ Blend. (this will give it more of a Mango color). Tie this ribbon around the stamped panel just able the sentiment.
- Fussy cut one of the larger flowers from one of the sets of die cut flowers and adhere with a mini dimensional to the rabbit’s hand.
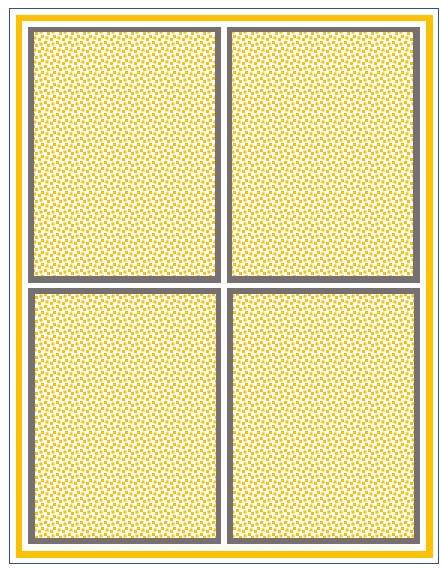
- Adhere the small pieces of Designer Series Paper to their coordinating Basic Gray mats.
- Adhere the 5 ¼” x 4” Basic White layer to the 5 ⅜” x 4 ⅛” Mango Melody layer.
- Adhere the 4 small pieces of layered Designer Series Paper pieces to the Basic White Panel. Positioning these pieces with a slight gap in between, alternating the prints.
- Adhere these layers to the folded card base.
- Using Stampin’ Dimensionals adhere the stamped layers to the center of the card. Adhere the grouping of flowers to the lower right of the card.
- Stamp and decorate the inside of your card and the envelope. And it’s ready to send off to a special friend.
Shopping List
")


 Designer Series Paper")
 Crinkled Seam Binding Ribbon")


Recommended Stamper’s Toolkit ❤
Product List
$12.00

$7.00

$4.25

$5.75

$5.50

$11.00

$26.00

$7.00

$6.50

$11.00

$20.00

$11.00

$80.75

$128.00

$16.00

$13.00


