Thank You Card (4-1/4″ x 5-1/2″) (10.8 x 14 cm)
CASUAL
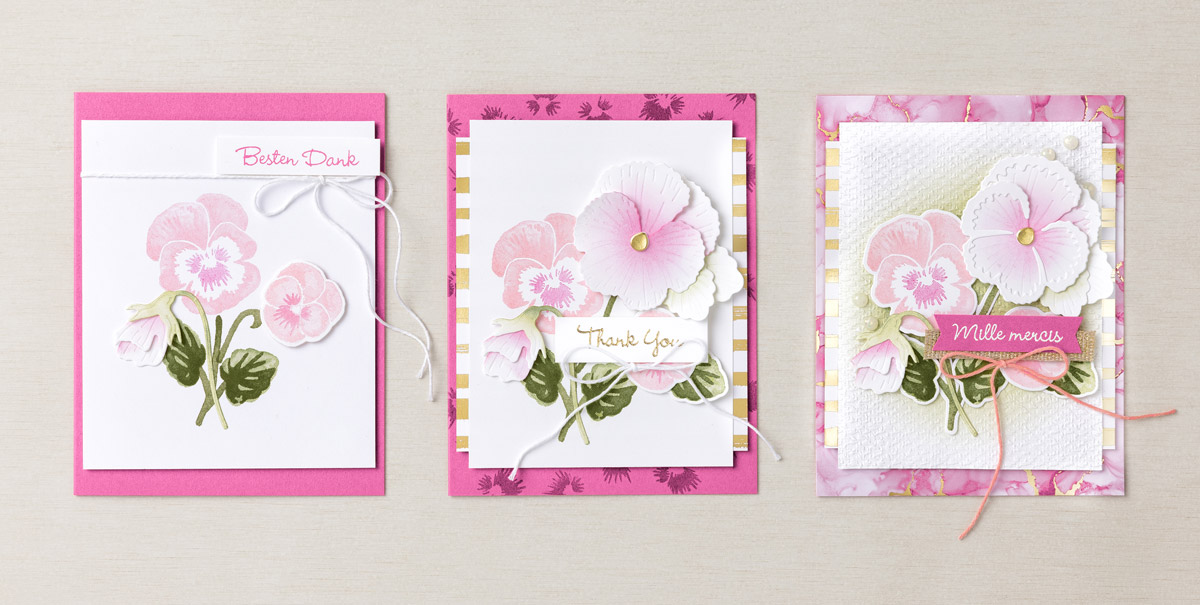
As one of the sentiments in the Pansy Patch Stamp Set says, “The little things you do make a big difference.” That can be true in life—and when sitting down to create a fabulous card for someone special. All the little details and love put into making your card can add up to one big hug that will make someone’s day!
To begin creating our lovely Besten Dank Pansy Patch step-ups, start simple. Fold Polished Pink Cardstock in half; add a layer of stamped Basic White Cardstock to the card front, then layer with just a few die-cut images. Notice that our artist used a Blending Brush to add subtle shading to the die-cut pansy bud. Easy to do. Fast. Fun!
AVID
We stepped up our Thank You card with tone-on-tone stamping and pops of gold for extra pizzazz. We also used a Bone Folder to curl the flower petals and give them extra dimension.
ARTFULLY AVID
To create our Mille mercis card, apply Granny Apple Green ink to the Basic White Cardstock layer using a Blending Brush, then run it through the Stampin’ Cut & Emboss Machine with the Tasteful Textile 3D Embossing Folder. Also, did you notice the pretty Baker’s Twine? We colored it with Flirty Flamingo Stampin’ Blends to make it really stand out!