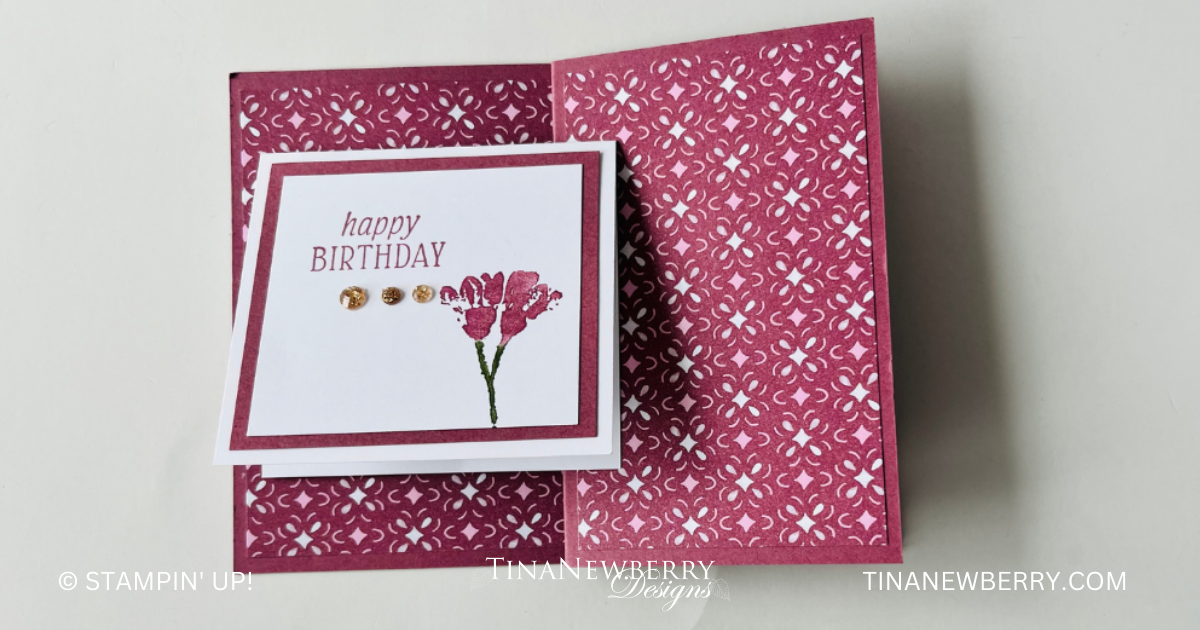
Create a fun-fold with an additional fold for the inside sentiment and let your Designer Series Paper shine with this quick & easy card!
Measurements
Full list of supplies needed, listed below. A die cutting machine is needed for this card.
Moody Mauve Cardstock
- 4 ¼” x 11” scored at 5 ½” and 8 ¼”
- 2 ½” x 2 ¾”
Basic White Cardstock
- 3” x 5 ½” scored at 2 ¾”
- 2 ¼” x 2 ½”
Poetic Expressions Designer Series Paper (DSP) – Moody Mauve diamond pattern
- 4” x 5 ¼”
- 4” x 2 ½” – 2 pieces
Let’s Create
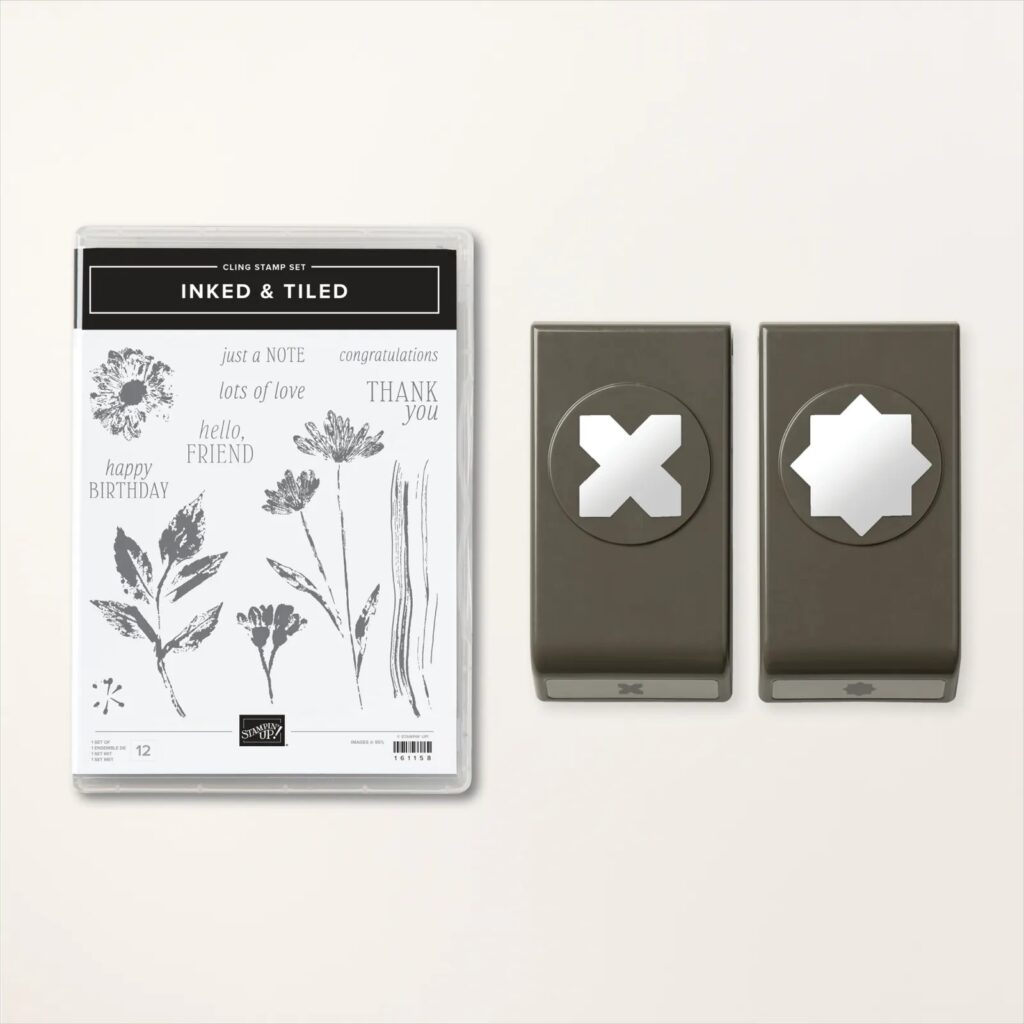
- Affix all stamps to acrylic blocks.
- Fold and burnish card base at the 5 ½” score line using bone folder. Have the Card fold on the right and fold the front back on the second score line making a Z fold card.
- Open the card base so it is flat and the score lines are on the right. Glue the large dsp panel to the left side of the flat card. Glue the 2 smaller dsp panels to the 2 sections of the flat card that are on the right.
- Take the scored piece of white and fold and burnish on the score line.
- With the fold of the white piece at the top, add the small panel of Moody Mauve.
- Use Moody Mauve and Mossy Meadow markers to color the small flower stem before stamping it on the right hand side of the 2 ¼” x 2 ½” piece of White. Note – the 2 ½” side is the top.
- Stamp the Happy Birthday using Moody Mauve in the upper left hand corner of the panel from Step 6.
- Glue the panel from Step 7 to the front of the small White folded piece of card stock.
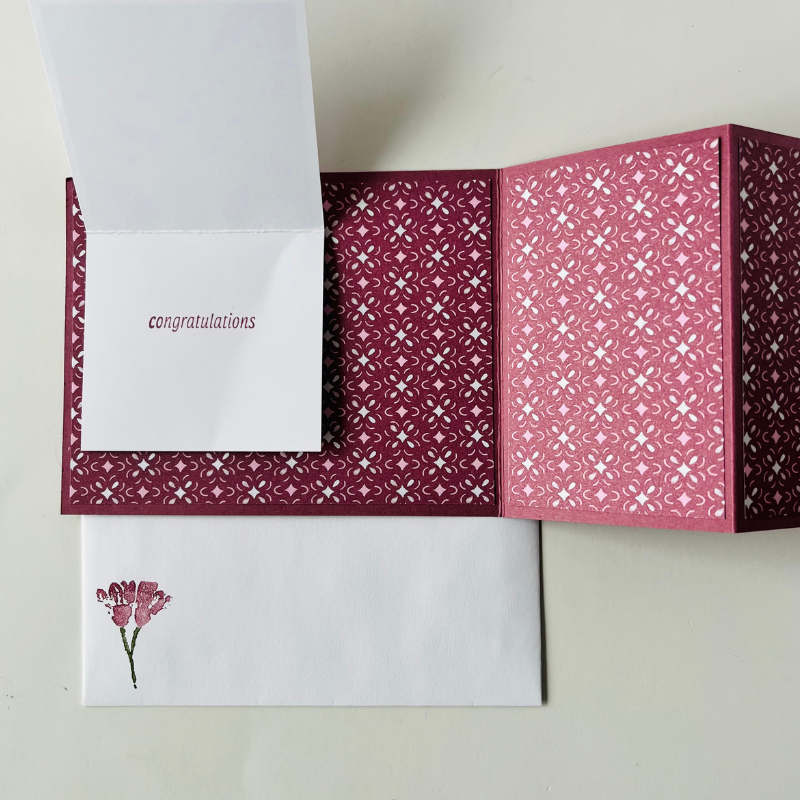
- Stamp the sentiment to the inside of the folded White card stock
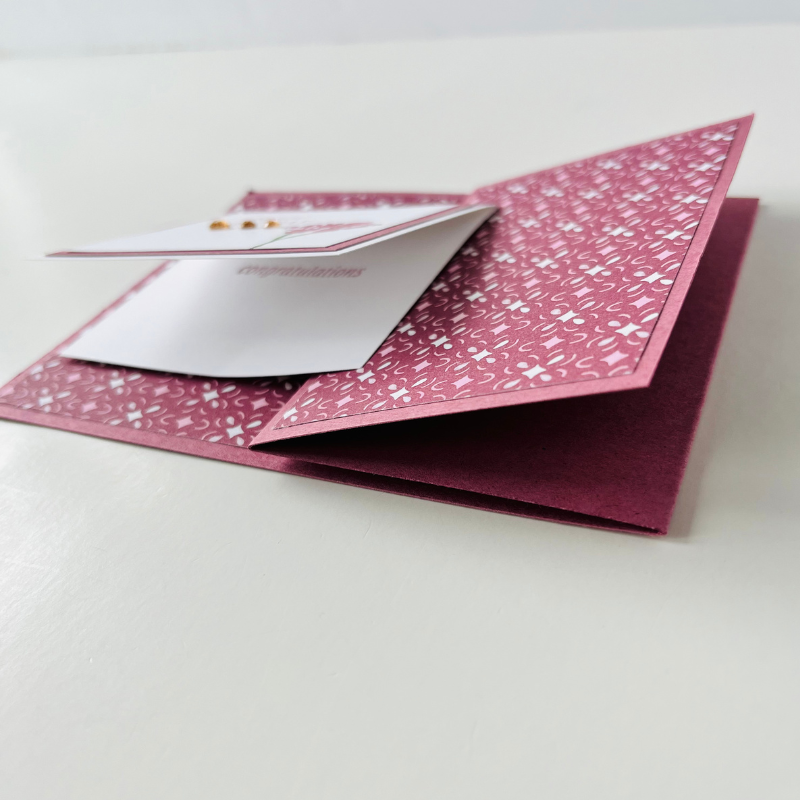
- Add dimensionals to the left back of the folded White card stock. You want to make sure that the card front fold will tuck under the White folded card stock to hold it closed but still be able to open the side panel. I added dimesionals to the left side and middle of the folded White card stock.
- To ensure proper placement, close the card front completely and then add the folded White card stock. I had the folded White card stock overlap the folded front about ½”. See photo for placement.
- Add some Adhesive Backed Sparkle gems underneath the “Happy Birthday” on the folded White card stock.
- Use the same small flower stem to decorate the envelope.
Note – if you want more space to write a message, add a 4” x 5 ¼” piece of White to the back of the card.
Shopping List
")


 Designer Series Paper")

Recommended Stamper’s Toolkit ❤
Product List
$12.00

$7.00

$4.25

$5.75

$5.50

$11.00

$26.00

$7.00

$6.50

$11.00

$20.00

$11.00

$80.75

$128.00


$16.00

$13.00


